If you’re ready to grow photoperiod weed and want full control over your plant’s veg time, flowering stage, yield potential, and terpene development, you’re stepping into the classic and most rewarding way to cultivate cannabis. Unlike autoflowers that bloom on their own schedule, photoperiod cannabis strains rely on light cycles to tell them when to grow leaves and when to stack buds — giving you the power to shape the plant exactly how you want.
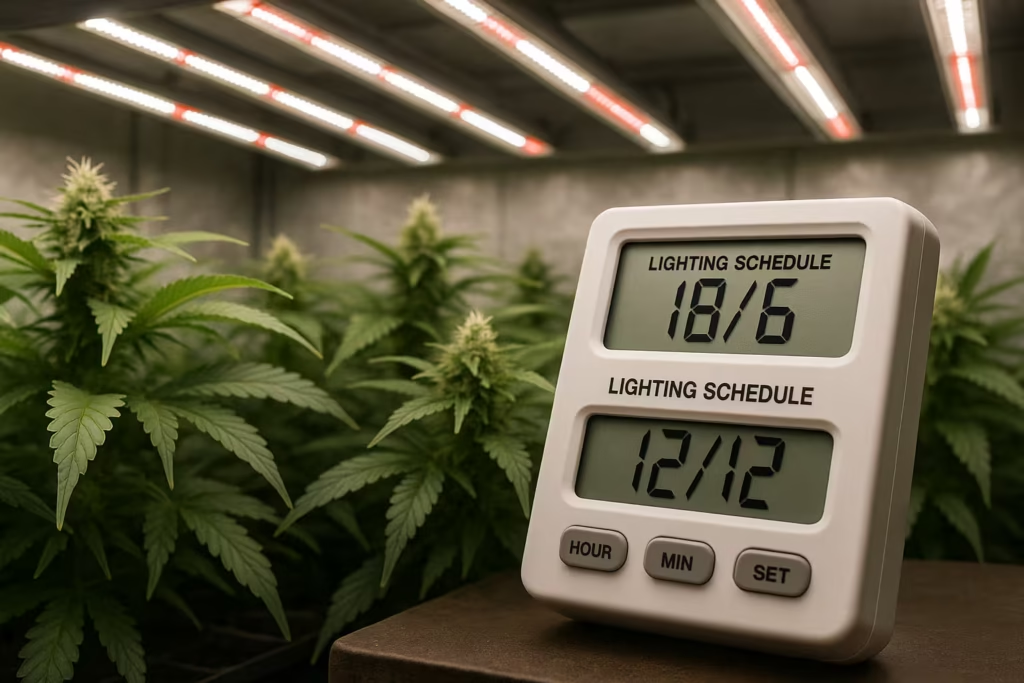
Photoperiod plants thrive under stable 18/6 vegetative lighting, then explode with bud sites when switched to 12/12 flowering mode, making them ideal for growers who want big canopies, larger yields, and premium potency. Whether you’re setting up a small indoor tent, growing under LEDs, or planning an outdoor garden that follows the natural daylight changes, photoperiod strains give you the freedom to train, top, SCROG, and stretch your plants for maximum harvests.
In this guide, we’ll break down everything you need to know — from light cycles and nutrient schedules to plant training, grow timelines, stress prevention, and hermie risks — so you can grow photoperiod cannabis confidently, even as a beginner.
Let’s dive into the world of light-dependent cannabis growing, where a little patience and the right setup can reward you with fat colas, sticky resin, and true high-quality flower.
🌿 Photoperiod Weed vs Autoflowers (Quick Comparison)
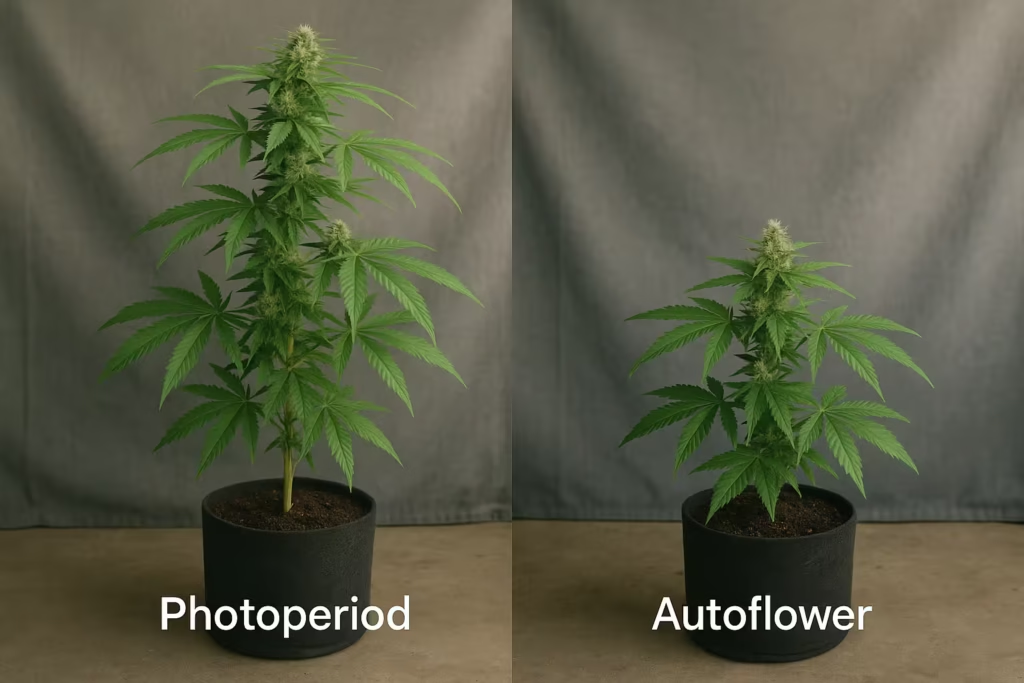
When you’re choosing what type of cannabis to grow, the biggest decision is usually photoperiod vs autoflower. Both produce great buds, but they behave completely differently in the grow room — especially when it comes to light cycles, plant size, and harvest timing.
Photoperiod cannabis plants depend on you to change their lighting schedule. As long as they stay under an 18/6 veg cycle, they’ll keep growing bigger, bushier, and stronger. Only when you switch to 12/12 do they start flowering. This gives you full control over how large you want your plants before they start making buds.
Autoflowers, on the other hand, don’t wait for anything. They flower automatically regardless of the light schedule — usually within 3–5 weeks from seed. That makes them super easy and fast, but you also get less control, less training flexibility, and generally smaller yields compared to photoperiod strains.
Here’s the quick grower-friendly comparison:
- 🌱 Photoperiod = Control
You decide when they flower. More veg time = bigger plants and bigger yields. - ⚡ Autoflower = Speed
Great for quick harvests but limited in training and size. - 🔆 Photoperiod loves 18/6 → 12/12
Light cycle matters. Perfect for growers who enjoy managing their environment. - 🕒 Autoflowers finish faster but less flexible
Ideal for beginners or for quick cycles.
At the end of the day, if you want maximum yields, powerful genetics, better terpene expression, and the ability to train and sculpt your plant, photoperiod weed wins every time. Autos are great for beginners and quick runs, but photos are the craft grower’s choice.
🔆 Why Photoperiod Plants Need Light Cycles to Flower
Photoperiod cannabis plants don’t just grow based on nutrients or genetics — their entire life cycle is controlled by light cycles and darkness duration. These strains evolved to respond to the natural changing seasons, which means they only start flowering when the days get shorter and the nights get longer. Indoors, you replicate that seasonal shift with your grow lights.
When a photoperiod plant receives 18 hours of light and 6 hours of darkness, it stays in the vegetative stage, producing new leaves, branches, and roots. It’s basically in “grow mode,” focused on becoming strong enough to support heavy buds later.
But once you flip to a 12/12 light cycle, something magical happens. The plant senses the longer darkness period and triggers a hormonal change — specifically involving phytochromes, the light-sensitive proteins that tell the plant, “It’s time to flower.” This is the natural signal that winter is approaching in the wild, so the plant shifts its energy from growing taller to developing thick buds, resin glands, and dense colas.
This is why light leaks during the dark cycle can confuse photoperiod cannabis plants. Even a small glow from a zipper or LED indicator can disrupt the plant’s internal clock, leading to:
- Delayed flowering
- Reveg (returning to veg mode)
- Stress
- Hermaphroditism (“hermies”)
As a grower, mastering light cycles is the key to controlling a photoperiod plant’s size, shape, and yield. You are basically Mother Nature with a timer — and when you use light properly, your plants reward you with massive, sticky, high-quality buds.
🌱 Benefits of Growing Photoperiod Strains (Potency, Yield, Control)
If you ask experienced growers why they still choose photoperiod strains in the age of fast-finishing autoflowers, the answer is simple: quality, control, and massive yields. Photoperiod plants might take a little more patience, but they reward you with results that autos can’t match.
🔥 1. Bigger Yields and Heavier Buds
Photoperiod weed lets you decide how long the plant stays in veg.
More veg = bigger structure = bigger harvests.
Autos are locked into a short life cycle, but photoperiods can veg for 4, 6, 8, even 12+ weeks if you want monsters filling a whole grow tent.
If you’re chasing top-tier yields, photoperiod genetics always win.
🌿 2. Higher Potency & Better Terpene Profiles
Because they grow slower and develop more naturally, photoperiod cannabis often produces:
- Stronger cannabinoid levels
- Richer terpene flavor profiles
- More resin and trichome density
If you want premium craft-quality bud, this is where photoperiod strains shine the brightest.
✂️ 3. Full Training Flexibility (LST, Topping, SCROG, Mainlining)
Autos don’t like stress — but photoperiod plants love training.
You can top, FIM, bend, tuck, defoliate, supercrop, and SCROG without worrying about stunting the plant. Since the flowering stage doesn’t start until you flip the light cycle, you’re in complete control of shaping the canopy.
This makes them perfect for:
- Maximizing light penetration
- Creating even canopies
- Filling every corner of your grow tent
- Boosting bud production
🎛️ 4. Total Control Over Plant Size and Growth Stages
Want a small bush? Veg for 3 weeks.
Want a tent-filling beast? Veg for 8 weeks.
Photoperiod plants adapt to your style — not the other way around.
You control:
- Veg duration
- Flowering start date
- Canopy height
- Overall plant structure
It’s like playing with the genetics dial — you decide the final outcome.
💧 5. More Stable and Predictable Genetics
Photoperiod strains have been bred for decades.
Their genetics are stable, reliable, and consistent — making them perfect for growers who want repeatable results, strong phenotypes, and predictable performance.
🔆 Light Cycles for Growing Photoperiod Weed
When it comes to growing photoperiod weed, light cycles are everything. Your plants don’t start flowering because of nutrients or size… they flower because you change their day and night schedule. Mastering this one thing will make you a better grower overnight.
Photoperiod cannabis reacts to hours of darkness, not just hours of light. This means the dark cycle must be pure, consistent, and uninterrupted. No light leaks, no glowing LEDs, no opening the tent when the lights are off — or your plant can get stressed, confused, or even turn hermaphrodite.
Let’s break down the best light schedules that growers use around the world.
🌱 The Ideal Vegetative Light Cycle (18/6, 20/4, 24/0)
In the vegetative stage, your photoperiod plant is all about growth, root development, and canopy building. The more light it gets, the more energy it can store — but there’s a sweet spot.
✔ 18/6 Light Cycle (Most Popular & Balanced)
This is the gold standard for indoor growers.
- 18 hours of light
- 6 hours of darkness
It gives your plant plenty of energy while still allowing a natural rest period. Most growers stick to this because it creates a healthy balance of growth, energy efficiency, and plant vigor.
✔ 20/4 Light Cycle (Faster Vegetative Growth)
Some growers push veg harder by giving 20 hours of light.
This results in:
- Faster growth
- More node development
- Slightly bigger plants
Great for SCROG or mainlining growers who want a thick canopy.
✔ 24/0 Light Cycle (Continuous Light)
Some growers run their veg under 24 hours of light, especially with LEDs.
However:
- It can stress certain strains
- Consumes more electricity
- Offers little extra benefit compared to 18/6
For most growers, 18/6 is perfect.
🌺 The Ideal Flowering Light Cycle (12/12 Explained)
The moment you switch to 12 hours of light and 12 hours of darkness, your plant detects the longer night and goes into flowering mode. This flip signals the plant to stop stretching leaves and start producing pre-flowers, pistils, and eventually dense buds.
🌙 Why 12 Hours of Darkness Is Critical
Darkness triggers a hormonal shift involving phytochrome proteins, which tell the plant:
“Days are getting shorter. It’s time to reproduce.”
If your dark cycle gets interrupted by a light leak or a sudden burst of light, the plant may:
- Delay flowering
- Reveg
- Create airy buds
- Develop seeds
- Turn hermaphrodite
Consistency is king during flower.
⏳ How and When to Switch Your Weed to 12/12
Most growers flip their photoperiod plants to 12/12 when:
- They reach half of your final desired height (because they will stretch)
- The canopy is full
- The roots are well established
- Training is complete
A good rule of thumb:
👉 Switch to 12/12 when the plant is 50% of the height you want at harvest.
Example: If your tent can handle 4-foot plants, flip at 2 feet.
💡 Light Leak Problems & How They Cause Hermies
During flower, even tiny interruptions can cause major problems. Light leaks confuse your plant’s internal clock, leading to stress and potentially hermaphroditism, where the plant develops both male and female parts.
🚨 Avoid these common light leak sources:
- Tent zippers not fully sealed
- LED indicators on humidifiers or fans
- Opening the tent during dark hours
- Broken tent seams
- Small pinholes in fabric tents
If your dark cycle isn’t 100% dark, your yield and bud quality can suffer.
⏳ How Long Do Photoperiod Plants Take to Grow?
Growing photoperiod weed isn’t a race — it’s a craft. Unlike autoflowers that follow a fixed internal schedule, photoperiod cannabis plants grow on your timeline. How long they take depends on how long you keep them in veg, what strain you’re growing, and when you flip to 12/12.
A complete photoperiod grow can take anywhere from 12 to 20+ weeks, depending on your style and setup. That’s why growers love photoperiod strains — you build your plant exactly how you want before flowering begins.
Let’s break down the full timeline so you know what to expect.
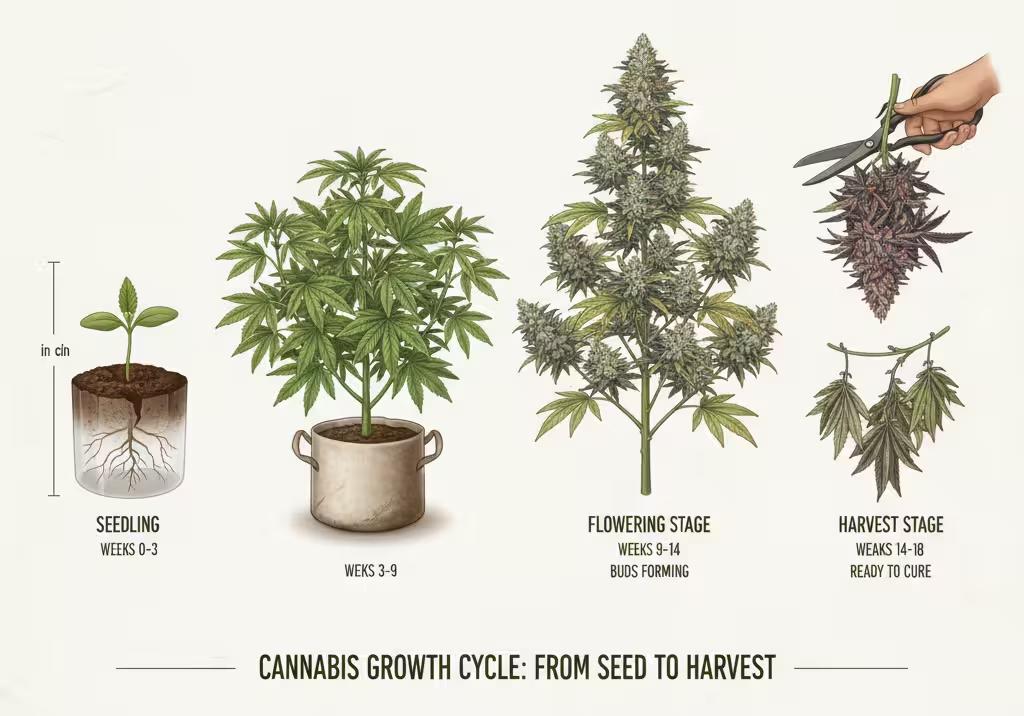
🌱 Full Photoperiod Timeline (Seed → Veg → Flower → Harvest)
1. Germination (1–5 days)
Using paper towel, peat pellets, or straight into the medium, your seed pops and develops its first taproot.
2. Seedling Stage (1–2 weeks)
Under gentle light, small pots, and stable humidity, the plant develops its first true leaves and begins establishing roots.
3. Vegetative Stage (3–12+ weeks)
This is the most flexible stage.
Your plant stays in veg as long as you keep the 18/6 light cycle.
Veg length depends on your goals:
- 3–4 weeks → small, compact plants
- 6–8 weeks → medium plants with strong branching
- 10–12+ weeks → huge SCROG canopies or mainlined monsters
Growers who want maximum yields usually veg longer to build a bigger frame.
4. Flowering Stage (8–12 weeks depending on strain)
Once you flip to 12/12, flowering begins:
- Weeks 1–3 → stretch phase (plants can double in size)
- Weeks 4–6 → bud stacking, resin formation
- Weeks 7–10+ → fattening colas, trichome ripening
Indicas usually finish faster (8–9 weeks).
Sativas can take longer (10–12+ weeks).
5. Harvest, Drying & Curing (3–6 weeks)
After flowering, you’ll spend time:
- Flushing
- Cutting
- Drying your buds slowly
- Curing them in jars for flavor & potency
A properly cured photoperiod harvest always tastes better and hits harder.
🌿 How Long You Should Keep a Photoperiod in Veg
This is one of the biggest advantages of photos — you decide when to flip.
Growers usually base veg time on:
- Tent height
- Strain genetics
- Training method
- Desired yield
- Available space
Here’s a quick guide:
- Small grow tent (2×2 or 2×3) → veg for 3–5 weeks
- Medium tent (3×3 or 4×4) → veg for 6–8 weeks
- Large tents (5×5+) or SCROG → veg 8–12 weeks for huge yields
More time in veg = more branches, more bud sites, more weight.
🌱 How Stretch Works After Switching to 12/12
Once you flip to 12/12, photoperiod cannabis goes through a rapid stretch phase.
Be prepared for your plant to grow:
- 1.5x–2x its veg height for hybrids
- 2x–3x for sativas
- 1x–1.5x for compact indicas
This is why growers flip when the plant reaches half the height they want at harvest.
Stretch is the plant’s natural response to the darker cycle — it’s trying to grow tall fast before forming buds.
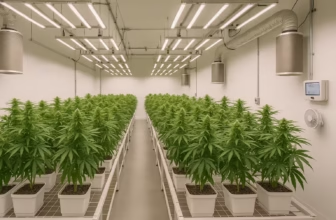
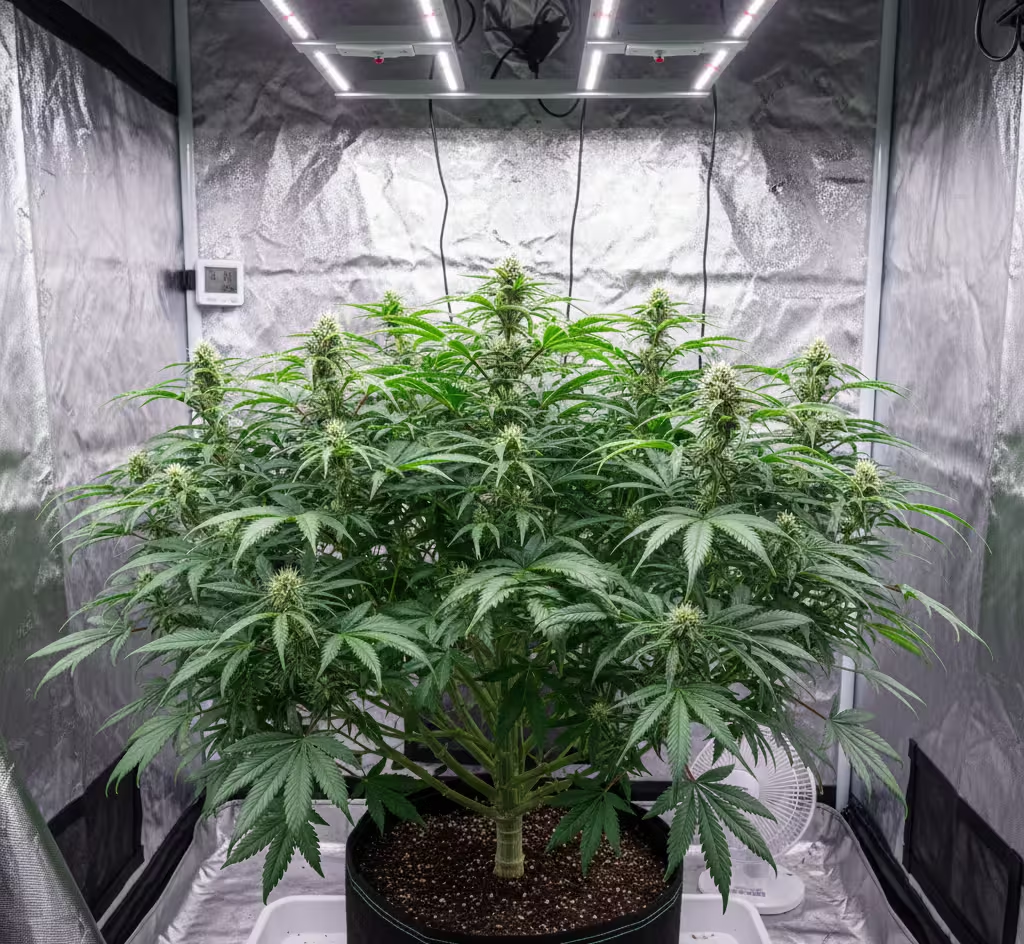
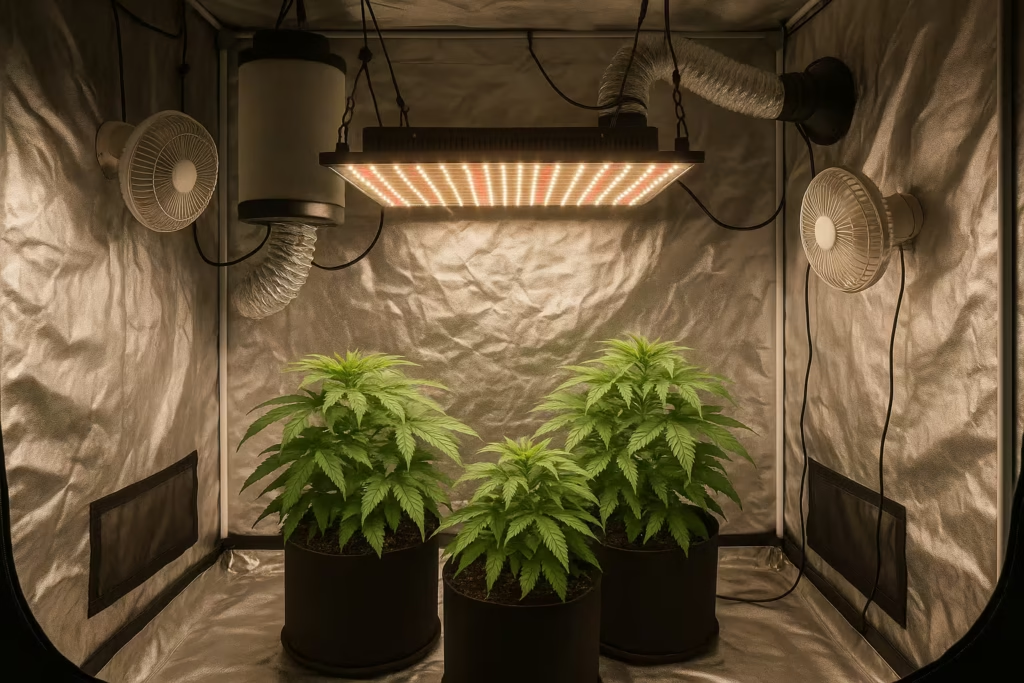
🌿 Indoor Setup for Photoperiod Cannabis
Setting up the right indoor environment is the secret to growing healthy, high-yield photoperiod cannabis plants. Because photoperiod strains rely heavily on light cycles, airflow, temperature, and canopy control, your indoor grow setup must provide a stable, dialed-in environment. When your grow tent is balanced and efficient, your plants reward you with explosive veg growth and dense, resin-rich buds in flower.
Let’s walk through every component you need for a successful photoperiod grow indoors.
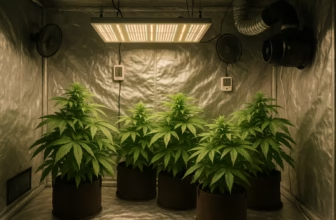
🏕️ Grow Tent Size & Layout for Photoperiod Plants
Your tent size determines how big your plants can get, how long you can veg, and which training methods you can use.
Here are the most common tent sizes:
- 2×2 or 2×3 → great for 1 plant; short veg, basic LST
- 3×3 → perfect for 1–2 plants; topping, SCROG, training
- 4×4 → ideal for 2–4 plants; bigger yields, more canopy control
- 5×5 → professional-level space for large photoperiod plants
- 2×4 → excellent for side-by-side phenos or comparing strains
Photoperiod weed stretches 1.5–2× after the 12/12 flip, so always pick a tent with enough height. Most growers prefer 6–7 ft tall tents.
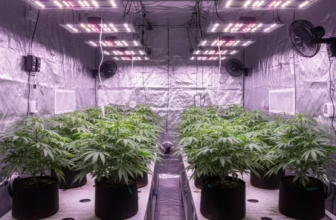
🔆 Best Lights for Photoperiod Plants (LED, HID, CMH)
Lighting is the backbone of your entire grow. Photoperiod plants thrive under strong, consistent lighting, especially during veg and early flower.
✔ LED Grow Lights (Best Overall Choice)
Modern LEDs are efficient, cool, and perfect for producing dense buds.
Benefits:
- Lower heat output
- Higher PAR and PPFD efficiency
- Better terpene preservation
- Full-spectrum light for veg + flower
Recommended PPFD levels:
- Veg: 400–600 µmol/m²/s
- Flower: 700–1,000+ µmol/m²/s
✔ HID Lights (HPS/MH)
Old school but still powerful.
- MH for veg
- HPS for flower (great for heavy bud stacking)
Downside:
- Runs very hot
- Higher energy cost
✔ CMH / LEC Lights (315W / 630W)
Balanced lighting with great penetration.
Excellent for terpene production but can run hot in small tents.
🌬️ Ventilation, Carbon Filter, Airflow & Humidity Control
Photoperiod cannabis loves fresh air, constant airflow, and stable humidity. A proper ventilation setup prevents mold, keeps plants cool, and removes excess moisture from dense canopies during late flower.
Essential components:
- Inline exhaust fan
- Carbon filter (controls smell)
- Oscillating fans
- Ducting + clamps
Ideal environment ranges:
Veg Stage:
- Temp: 22–28°C (72–82°F)
- RH: 50–70%
Flowering Stage:
- Temp: 21–26°C (70–79°F)
- RH: 40–50%
Late Flower:
- RH: 35–45% to prevent bud rot
Good airflow = stronger plants + tighter buds.
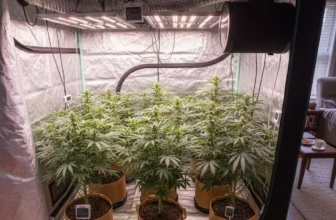
🪴 Pot Size & Soil Mix Recommendations
Photoperiod strains need a bit more root space than autos because they veg longer and stretch more.
Recommended pot sizes:
- 3–5 gallon → small plants or short veg
- 5–7 gallon → medium plants (most common)
- 10+ gallon → big SCROG or long-veg monsters
Ideal soil mix for photoperiod cannabis:
- Organic soil base (FoxFarm, BioBizz, Coast of Maine)
- Added perlite for drainage
- Worm castings
- Mycorrhizae for healthy roots
- Optional: coco blend for faster nutrient uptake
A rich, airy soil creates explosive vegetative growth.
💧 Nutrient Schedule for Veg & Flower (Feeding Chart)
Photoperiod plants have different nutrient needs at different stages:
🌱 Veg (High Nitrogen – N)
- Promotes leaf growth
- Strengthens stems
- Builds the canopy for heavy flowering
🌺 Flower (Higher P & K)
- Dense buds
- Resin production
- Terpene development
Most nutrient lines use a simple system:
- Grow formula during veg
- Bloom formula during flower
- Cal-Mag throughout the entire grow
- Silica for strong stems
- Molasses or carbs for terpene production (optional)
Always start feeding at half strength and increase slowly to avoid nutrient burn.
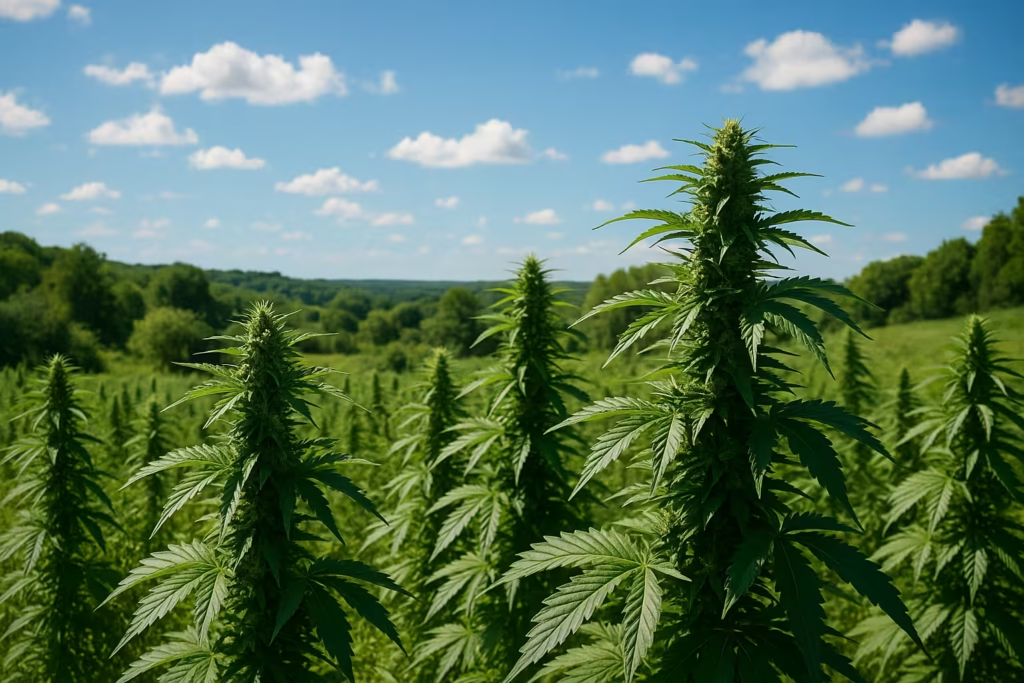
🌞 Outdoor Growing Guidelines for Photoperiod Weed
Growing photoperiod cannabis outdoors is the most natural and rewarding way to cultivate big, healthy plants with explosive yields. Outdoors, your plants follow Mother Nature’s light cycle, transitioning from long summer days to shorter fall nights — exactly how photoperiod strains evolved. If you want massive plants, thick trunks, and huge colas, outdoor photoperiod growing is the way to go.
Here’s everything you need to know to succeed with photoperiod weed outdoors.
🌱 When to Plant Photoperiod Seeds Outdoors
Timing is everything. Photoperiod cannabis needs long days and warm temperatures to thrive in veg before flowering season begins.
Ideal outdoor planting time:
- Northern Hemisphere: Late April to early June
- Southern Hemisphere: Late October to early December
The key is to plant after the last frost and when daylight hours exceed 14 hours per day. This ensures strong vegetative growth before your plant begins flowering in late summer.
Pro tip:
Start your seeds indoors 2–3 weeks early, then transplant outdoors for a huge head start.
🌅 How Natural Daylight Triggers Flowering
Outdoors, photoperiod cannabis flowers naturally when days get shorter and nights get longer.
This usually happens:
- Late July–August (Northern Hemisphere)
- Late January–February (Southern Hemisphere)
Once daylight dips below 14 hours, your plant shifts into flowering mode without you having to do anything.
The outdoor flowering timeline:
- Pre-flower stretch: 2–3 weeks
- Mid-flower bud stacking: 3–4 weeks
- Ripening & trichome development: 2–4+ weeks
Your job is simply to give the plant consistent water, nutrients, and protection from pests.
🌳 Protecting Plants from Early Flower or Reveg
Outdoor photoperiod cannabis can get confused by unexpected daylight changes. Too much shade or too few daylight hours can push plants into early flowering. On the flip side, sudden increases in daylight can cause reveg, leading to twisted leaves and stalled growth.
Avoid these issues by:
- Planting where the plant receives full sun
- Preventing street lights or porch lights from shining on your garden at night
- Not planting too early when daylight is less than 14 hours
- Avoiding shaded backyards where light changes daily
Light pollution at night can seriously disrupt flowering outdoors, just like indoors.
🌿 Best Outdoor Strains for Beginners
Some photoperiod strains handle outdoor conditions better than others — especially heat, humidity, and pest pressure. Choose hardy, mold-resistant genetics for your first outdoor grow.
Great outdoor-friendly photoperiod strains:
- Blue Dream – vigorous, high-yield hybrid
- OG Kush – handles heat well
- Super Skunk – tough and resilient
- Northern Lights – compact with fast flowering
- Durban Poison – strong sativa for long seasons
- Gorilla Glue #4 – thick buds and heavy harvests
Pick strains that match your climate — humid regions need mold-resistant genetics, while hot climates do well with sativa-dominant plants.
🌿 Training Photoperiod Weed for Bigger Yields
One of the biggest advantages of growing photoperiod weed is the freedom to train your plants exactly how you want. Unlike autoflowers, photoperiod strains don’t mind being topped, bent, shaped, or spread out — because they only enter flowering when YOU flip to 12/12. This gives you the perfect window to build a strong structure for massive buds and maximum light penetration.
Training is where photoperiod cannabis truly shines. Done right, it can double your yield, boost resin production, and help create an even, efficient canopy.
Let’s break down the best training methods for photoperiod plants.
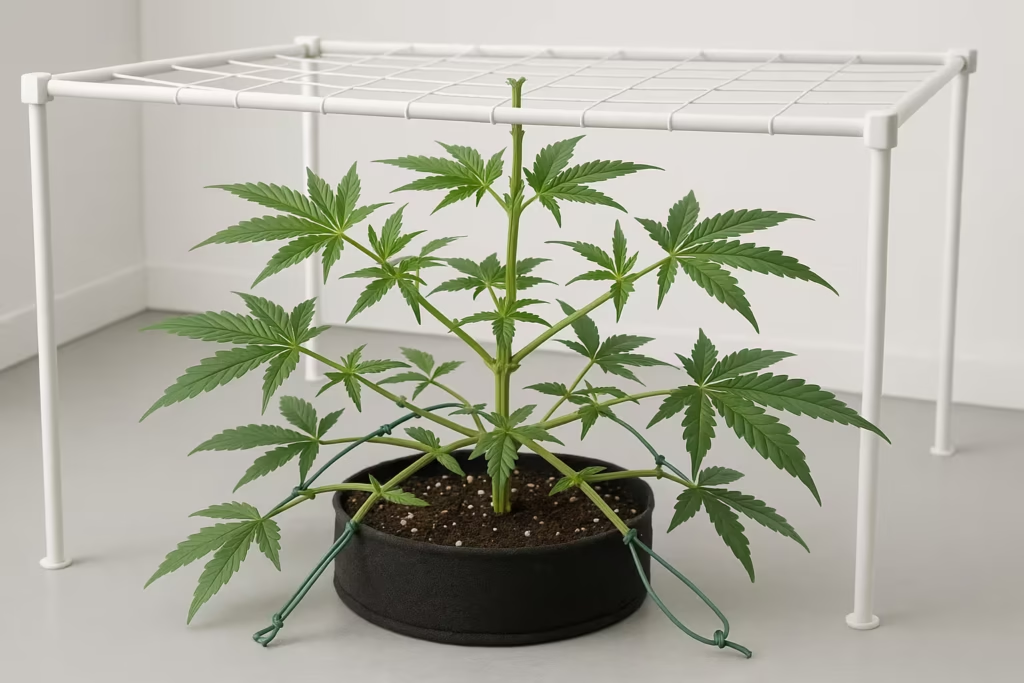
🍃 Low-Stress Training (LST)
LST is one of the easiest and most effective ways to boost yields. It involves gently bending and tying down branches to create a more even canopy.
Benefits of LST:
- Better light penetration
- More bud sites
- Reduced height (great for small tents)
- Stronger branches
- Zero stress on the plant
Photoperiod strains respond beautifully to LST, especially during early and mid-veg.
When to start LST:
- Once the plant has 4–5 nodes
- Continue throughout veg
- Stop a week into flowering
LST + photoperiod strains = a match made for big harvests.
✂️ Topping & FIM Techniques
Topping is a high-impact training method where you cut off the main top to create two new main colas.
FIMing leaves 3–4 new tops, giving you even more growth points.
Why growers top photoperiod plants:
- Creates bushier structure
- Controls height
- Boosts canopy width
- Multiplies bud sites
- Perfect for SCROG setups
Because photoperiod plants have a flexible veg period, they recover quickly and respond with explosive lateral growth.
Best time to top:
- At 4–6 nodes
- Early to mid-veg
- Avoid topping after flowering has begun
Top early, shape during veg, then flip — and enjoy a forest of colas.
🕸️ SCROG (Screen of Green) for Maximum Yield
If you want the highest yields possible from photoperiod weed, SCROG is king. This method uses a net or screen to spread the branches horizontally, creating a perfectly even canopy.
SCROG advantages:
- Every branch gets equal light
- Buds grow uniform and dense
- Eliminates empty space in the tent
- Huge increase in yield per plant
- Perfect for 1–2 plant grows
SCROG works exceptionally well with photoperiod strains because you can veg them long enough to fill the entire net before flipping.
When to start SCROG:
- After your first topping
- Spread branches under the net
- Keep tucking shoots until the first week of flower
Once the screen fills, flip to 12/12 and watch the canopy explode.
🍃 Defoliation Best Practices
Defoliation removes excess fan leaves to improve airflow and light penetration — two key factors for fat buds.
When to defoliate:
- Light defoliation during veg
- Major cleanup around day 21 of flower (post-stretch)
- Second cleanup around day 45 for airflow
Benefits:
- Reduces humidity
- Prevents mold
- Helps light reach lower bud sites
- Improves overall bud density
Just don’t overdo it. Photoperiods handle defoliation well, but they still need enough leaf material to photosynthesize.
💧 Watering & Nutrient Requirements for Photoperiod Weed
Photoperiod cannabis plants grow bigger, veg longer, and stretch harder than autoflowers — which means they need consistent watering, proper nutrient balance, and stable pH levels to reach their full potential. Getting your feeding and watering routine right is one of the most important parts of growing healthy, vigorous photoperiod plants with fat, resin-rich buds.
Let’s break down everything you need to keep your plants thriving.
🌱 Nutrient Needs During Veg vs Flower
Photoperiod cannabis requires different nutrient ratios depending on the stage of growth.
This is where your N-P-K levels really matter.
✔ Vegetative Stage (Higher Nitrogen – N)
During veg, plants use nitrogen to build:
- Strong stems
- Big fan leaves
- Thick branches
- Dense canopy for training
Veg nutrients usually look like:
NPK 3-1-2, 4-2-3, or 5-2-3.
Cannabis in veg loves nitrogen the way bodybuilders love protein — it’s the essential fuel for explosive growth.
🌺 Flowering Stage (Higher Phosphorus & Potassium – P & K)
Once you flip to 12/12, the plant shifts from leaf production to bud development.
Flower nutrients typically look like:
NPK 1-4-5, 2-8-4, or 0-10-10.
More P = strong bud formation
More K = bigger, denser colas
Nitrogen is reduced to avoid leafy, airy buds.
🧪 How to Prevent Nutrient Burn & Deficiencies
Photoperiod strains grow aggressively, so it’s easy to overfeed — especially if you’re running synthetic nutrients.
🚫 Signs of nutrient burn:
- Leaf tips turning yellow or crispy
- Dark, clawing leaves
- Slowed growth
✔ How to avoid overfeeding:
- Start nutrients at 50% strength
- Increase gradually each week
- Monitor leaf color and tip health
- Flush if salt buildup occurs
🌿 Common deficiencies:
- Nitrogen deficiency: Yellowing leaves in veg
- Cal-Mag deficiency: Rust spots & weak stems
- Phosphorus deficiency: Purple stems, slow bud growth
- Potassium deficiency: Burnt leaf edges during flower
Photoperiod plants are forgiving — just correct the feeding and they bounce back quickly.
💦 Watering Photoperiod Cannabis Properly
Overwatering is the #1 mistake new growers make. Photoperiod plants need a wet-to-dry cycle so roots can breathe.
✔ Water when:
- Top 1–2 inches of soil are dry
- Pot feels light when lifted
- Leaves slightly droop before watering
✔ Avoid:
- Daily watering
- Standing water in trays
- Compacted soil with poor drainage
Ideal watering pH:
- Soil: pH 6.2–6.8
- Coco/Hydro: pH 5.8–6.2
Proper pH ensures your plant can actually absorb the nutrients you feed it.
🧂 Additives That Help Photoperiod Plants Thrive
You don’t need everything — but some additives truly help photoperiod strains perform better.
Recommended supplements:
- Cal-Mag: Essential for LED grows
- Silica: Strong stems for heavy buds
- Molasses: Boosts microbial life in organic soil
- Mycorrhizae: Better root growth & nutrient uptake
- Beneficial microbes: Healthier root zone, stronger plants
Photoperiods respond beautifully to good soil biology.
⚠️ Common Problems When Growing Photoperiod Weed
Photoperiod cannabis gives you full control and massive potential — but because these plants rely so heavily on light schedules, stability, and environmental balance, they can show problems quickly if something goes wrong. The good news? Once you understand the causes, these issues are easy to prevent and even easier to fix.
Here are the most common challenges growers face when cultivating photoperiod strains, and how to stay ahead of them.
🌚 Stress Factors That Cause Hermies
Hermaphroditism (plants producing both male + female parts) is one of the biggest risks with photoperiod cannabis. This happens when the plant feels threatened or unstable.
Top causes of hermies:
- Light leaks during the dark cycle
- Interruptions in the 12/12 schedule
- Extreme temperature swings
- Heavy physical stress late in flower
- Root shock from transplanting too late
- Genetically unstable strains
If your tent has glowing LEDs, zipper gaps, or leaks during “lights off,” your plant may react by throwing bananas (nanners) or male sacs. A perfect, uninterrupted dark cycle is crucial.
🌡️ Temperature & Humidity Issues
Photoperiod cannabis thrives when the environment is stable. Extreme highs or lows can slow growth or even stunt your plant.
Ideal ranges:
Veg:
- Temp: 22–28°C (72–82°F)
- RH: 50–70%
Flower:
- Temp: 21–26°C (70–79°F)
- RH: 40–50%
Late flower:
- RH: 35–45% to prevent mold
Common environment-related problems:
- Heat stress: Leaves taco upward
- Cold shock: Purple stems, slowed growth
- High humidity: Mold, bud rot
- Low humidity: Crispy leaf edges, slow veg
Stable airflow, good ventilation, and a reliable hygrometer can save your entire crop.
🦟 Pest Prevention (Spider Mites, Aphids, Fungus Gnats)
Outdoor grows attract pests — but even indoor tents get unwelcome visitors. Photoperiod plants veg longer, meaning pests have more time to spread if not controlled early.
Most common cannabis pests:
- Spider mites (webbing under leaves)
- Aphids (sticky residue, tiny bugs)
- Fungus gnats (small flies in soil)
- Thrips (silver scratch marks)
Prevention tips:
- Keep your grow area clean
- Use sticky traps for early detection
- Treat soil with neem cake, BTi, or diatomaceous earth
- Quarantine new clones
- Never enter your tent after being outdoors without washing hands/clothes
Healthy plants are naturally more pest-resistant, especially photoperiod strains with long veg cycles.
🌾 Harvesting & Curing Photoperiod Cannabis
Harvesting photoperiod weed is the moment every grower waits for — the payoff after weeks of dialing in your light cycles, feeding schedule, canopy training, and environmental control. But the truth is this: harvesting, drying, and curing matter just as much as growing. Even the highest-quality buds can taste harsh or lose potency if you rush the final stages.
Here’s how to harvest photoperiod cannabis the right way so your buds come out smooth, flavorful, and potent.
🔍 When Photoperiod Weed Is Ready to Harvest
The most accurate way to know when your plant is ready is by checking the trichomes, not just the pistils.
✔ Use a jeweler’s loupe or digital microscope
Look closely at the trichome heads — those tiny mushroom-like crystals on your buds.
Trichome color guide:
- Clear trichomes → Not ready (low potency)
- Milky/cloudy trichomes → Peak THC level
- Amber trichomes → Heavier body high, more CBN
Ideal harvest mix:
- 10–20% amber
- 80–90% cloudy
- 0% clear
You can harvest slightly earlier for a more energetic high or later for a more sedating effect.
💦 Flushing Plants Before Harvest
Flushing helps remove excess nutrient salts from the medium so your buds burn cleaner and taste better.
When to flush:
- 7–14 days before harvest for synthetic nutrients
- 3–7 days if you’re using organics
Signs your flush is working:
- Leaves fade from green to yellow
- Plant consumes stored nutrients
- Buds retain flavor without harshness
Flushing isn’t optional — it’s essential for smooth, clean-smoking weed.
🌬️ Drying Photoperiod Cannabis Properly (Slow and Controlled)
Drying is where many growers ruin good buds. Drying too fast causes hay smell, chlorophyll bite, and weak aroma, and drying too slow can cause mold.
Ideal drying conditions:
- Temp: 18–21°C (64–70°F)
- Humidity: 55–60%
- Darkness: Complete darkness
- Airflow: Gentle, indirect
Hang whole branches or full plants for 7–14 days until small stems snap rather than bend.
Slow, controlled drying locks in terpenes, flavor, and smoothness.
🫙 Curing for Smooth, Potent Buds
Curing transforms your buds from “homegrown” to “top-shelf.”
After drying, place buds in glass mason jars filled to 60–70% capacity.
Cure process:
- Burp jars daily for the first 7–10 days
- Then burp every other day for 2–3 weeks
- Continue curing for 4–8 weeks (longer = better)
Perfect curing environment:
- RH inside jars: 58–62%
- Using Boveda or Boost packs helps maintain consistency
Well-cured photoperiod buds will:
- Smell stronger
- Smoke smoother
- Taste richer
- Feel more potent
Curing is where your hard work truly shines.
🌱 Best Photoperiod Strains for Beginners
Choosing the right strain can make or break your first photoperiod grow. Beginners need easy-to-grow cannabis strains that are hardy, mold-resistant, forgiving with nutrients, and capable of producing solid yields even with small mistakes. Luckily, many photoperiod classics are perfect for new growers — they’re stable, vigorous, and produce top-shelf flower without demanding complicated techniques.
Here are the best beginner-friendly photoperiod strains that almost guarantee a successful harvest.
🌿 1. Northern Lights (Indica) — The Easiest Photoperiod Strain Ever
Northern Lights is the legendary beginner strain — almost impossible to mess up.
- Naturally pest-resistant
- Handles cold and heat
- Fast flowering (7–9 weeks)
- Dense, resinous buds
- Minimal smell compared to other strains
It stays compact, making it ideal for small grow tents or stealth grows.
Perfect for: total beginners, low-maintenance grows, stress-free harvests.
🌸 2. Blue Dream (Hybrid) — Big Yields and Vigorous Growth
Blue Dream is famous for its explosive growth and high yields, making it one of the most forgiving hybrids for new growers.
Benefits:
- Strong resistance to pests and mildew
- Loves training (LST, topping, SCROG)
- Produces huge colas
- Uplifting, fruity aroma
This plant grows quickly and thrives indoors or outdoors.
Perfect for: growers who want big yields on their first run.
🔥 3. Gorilla Glue #4 (Hybrid) — Sticky Resin & Heavy Buds
GG4 is a sturdy hybrid that tolerates mistakes and still pumps out insanely sticky buds with high THC.
Why beginners love it:
- Very strong vigor
- Easy to train
- Handles overfeeding better than most strains
- Produces dense, chunky flowers
If you want potency + resilience, GG4 is a beast.
Perfect for: strong THC lovers, resin-heavy harvests.
🌳 4. Super Skunk (Indica Hybrid) — Tough, Resilient & Reliable
Super Skunk is one of the most stable photoperiod strains on the planet.
It grows fast, branches well, and produces thick buds even in imperfect environments.
Traits:
- Mold-resistant
- Beginner-proof nutrient requirements
- Short, bushy structure
- Classic old-school aroma
This is a hardy workhorse strain that performs in any climate.
Perfect for: outdoor growers and anyone who wants a reliable harvest.
🌾 5. Critical Mass (Indica) — Monster Yields with Minimal Effort
Critical Mass is a heavy producer — famous for its massive colas and quick finishing time.
Strengths:
- Incredible yield potential
- Fast vegetative growth
- Flowers in 7–8 weeks
- Easy to clone and train
Just watch humidity during late flower because the buds get huge.
Perfect for: growers who want commercial-level output on their first grow.
🌬️ 6. Durban Poison (Sativa) — Easy Outdoor Photoperiod Strain
One of the best outdoor sativas for beginners.
Durban Poison thrives in sunlight and has legendary mold resistance.
Why it’s beginner-friendly:
- Handles heat and humidity
- Doesn’t require heavy feeding
- Uplifting, energetic high
- Big outdoor yields
Perfect for: outdoor growers in hot or tropical climates.
FAQs
As long as YOU keep the light cycle at 18/6, 20/4, or 24/0, a photoperiod plant will stay in veg indefinitely.
You could veg for:
3–4 weeks for small plants
6–8 weeks for medium grows
10–12+ weeks for SCROG or massive yields
Photoperiod weed only enters flower when you switch to 12/12.
A photoperiod strain needs 12 hours of complete darkness to trigger flowering.
Even small light leaks can:
Delay flower
Confuse the plant
Cause hermaphroditism
12/12 must be consistent and uninterrupted.
Yes — this is called re-vegging.
If you put the plant back under 18/6, it will eventually return to vegetative growth.
However:
It takes 2–6 weeks to normalize
Leaves grow twisted at first
Stress may reduce final yields
Re-vegging is possible, but not ideal for beginners.
Yes — almost always.
Because you control veg length, photoperiod plants can become much larger and produce bigger harvests.
Typical yields:
Photoperiods: 4–16+ oz per plant (depending on veg time)
Autos: 1–6 oz per plant
Training, grow space, and genetics all matter — but photos win for weight.
Not really. They just require:
Stable light cycles
A good veg period
Basic training
Patience (longer timeline than autos)
Once you understand light management, photoperiod strains are easy and predictable.
If you want control, higher yields, and training flexibility, choose photoperiods.
If you want speed and simplicity, choose autoflowers.
Most growers eventually prefer photoperiods because the quality and yields are unmatched.
Yes — photoperiods are much more forgiving.
They can recover from:
Topping
Transplant shock
LST
Supercropping
Light pruning
Autos often stunt from the same stress because they don’t have time to recover.
🌟 Conclusion
Growing photoperiod weed is one of the most rewarding experiences for any cannabis gardener. These plants give you full control over veg time, canopy structure, training, stretching, and yield potential — something autoflowers can’t match. Once you understand light cycles, feeding schedules, and environmental balance, photoperiod strains become incredibly predictable and responsive.
By managing the 18/6 vegetative cycle and the 12/12 flowering cycle, you’re essentially steering the entire life of the plant. You decide how big your canopy becomes, how many bud sites form, and how dense your final harvest will be. Photoperiod strains give you room to experiment — topping, LST, SCROG, defoliation — all while bouncing back stronger.
Whether you’re growing indoors in a dialed-in tent or letting the sun work its magic outdoors, photoperiod cannabis rewards patience with bigger yields, richer terpene profiles, and premium-quality buds that stand out in flavor and potency. With the right genetics, stable light cycles, and a bit of grower love, anyone can cultivate photoperiod strains like a pro.
Photoperiod growing isn’t just growing weed —
it’s crafting your harvest, your way.
Further Reading: You may also like
- Best grow setup for indoors
- Growing feminized seeds indoors
- Growing cannabis in 1-gallon pots
- Growing weed in an apartment
- Drying weed outdoors
- How to grow hydro weed plants indoors
References and Sources:
- Peterswald, T. J., Mieog, J. C., Azman Halimi, R., Magner, N. J., Trebilco, A., Kretzschmar, T., & Purdy, S. J. (2023). Moving Away from 12:12; the Effect of Different Photoperiods on Biomass Yield and Cannabinoids in Medicinal Cannabis. Plants, 12(5), 1061. MDPI, pmc.ncbi.nlm.nih.gov.
- Ahrens, A., Llewellyn, D., & Zheng, Y. (2023). Is Twelve Hours Really the Optimum Photoperiod for Promoting Flowering in Indoor-Grown Cultivars of Cannabis sativa? Plants, 12(14), 2605. pubmed.ncbi.nlm.nih.gov, MDPI.
- Dang, M., et al. (2022). Optimizing Photoperiod Switch to Maximize Floral Biomass and Cannabinoid Content in Cannabis sativa. Frontiers in Plant Science, 12, 797425. Frontiers.
- Cui, H., et al. (2025). Effects of Photoperiod and Light Quality on Cannabinoid Yield in Medical Cannabis ‘Hanma 11’. Industrial Crops and Products. Sciencedirect.
- Konvalina, P., et al. (2024). Effect of Light Intensity and Two Different Nutrient Solutions on the Quantity and Quality of Medical Cannabis (Cannabis sativa L.). Agronomy, 14(12), 2960. MDPI.
- JumpLights (2024). Photoperiodism: Principles and Applications in Cannabis Cultivation. Jumplights.
- When you mention “standard 12/12 flowering for photoperiod cannabis”, you can cite Peterswald 2023 and Ahrens 2023. MDPI, Pubmed.
- When you talk about light cycles affecting yield and cannabinoid content, you can reference Peterswald 2023, Cui 2025 and Konvalina 2024. MDPI, MDPI, Sciencedirect.
- When you explain switching from veg to flower timing, reference Dang 2022.