When it comes to growing weed, an indoor grow setup gives you something outdoor growers can only dream of — total control over your cannabis environment. Indoors, you decide how much light your plants get, how warm or humid the air feels, and how steady the airflow remains. That control means one thing for every passionate grower — healthier plants, bigger yields, and better quality buds every single time.
Indoor growing isn’t just about putting a plant in a tent under a light — it’s about creating a complete microclimate that mimics the best of nature while cutting out its worst parts. With the right lighting system, proper ventilation and air circulation, a well-balanced humidity level, and a smart nutrient feeding plan, even small grow spaces can produce dense, resinous flowers like a pro setup.
Many new growers start indoors because it’s stealthier, easier to automate, and can be run year-round, no matter what’s happening outside. Whether you’re running a 2×4 grow tent, a closet grow, or a full-on hydroponic setup, the foundation is always the same — light, air, temperature, and water in perfect balance. Once you dial these in, you can unlock consistent growth cycles, top-tier potency, and that unmistakable home-grown aroma.
The best indoor grow setup combines efficient LED lighting, proper ventilation and humidity control, and a stable temperature between 70–80°F with humidity levels adjusted for each growth stage. Using a 2×4 grow tent, carbon filter, smart timer, and organic soil or hydro system creates an ideal, controlled environment for high-yield cannabis cultivation indoors.
So before you start germinating your seeds, let’s break down how to build the best indoor grow setup — from lighting and soil to automation tools and budget options — so your plants thrive in every stage of life.
🌿 Choosing the Right Grow Space
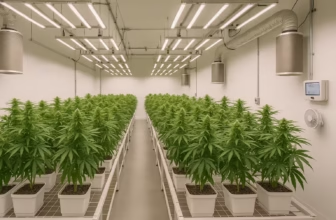
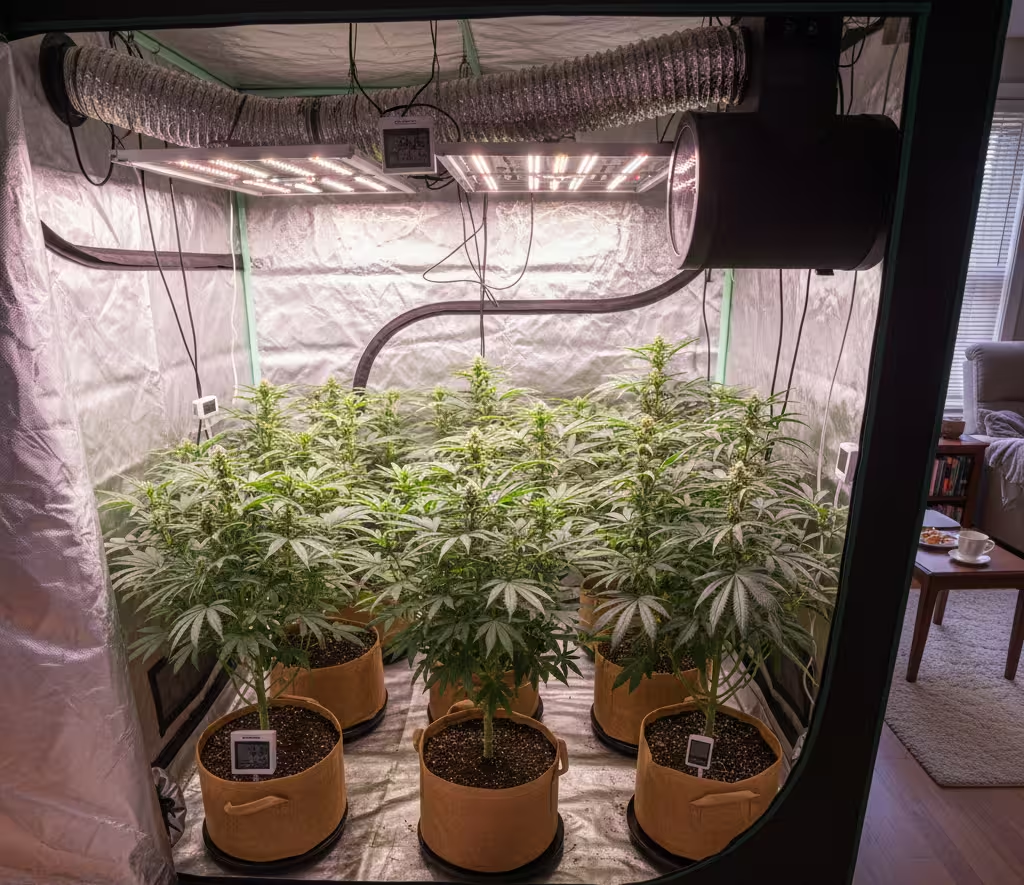
Before buying lights or soil, the first thing every grower needs to figure out is where your cannabis plants will live. The grow space is the foundation of your entire setup — it determines your lighting needs, airflow setup, temperature control, and even how stealthy your grow will be. Whether you’re growing in a small grow tent, a converted closet, or an entire spare room, choosing the right space sets the tone for your plants’ health and yield.
🌱 Grow Tent vs Grow Room vs Closet Setup
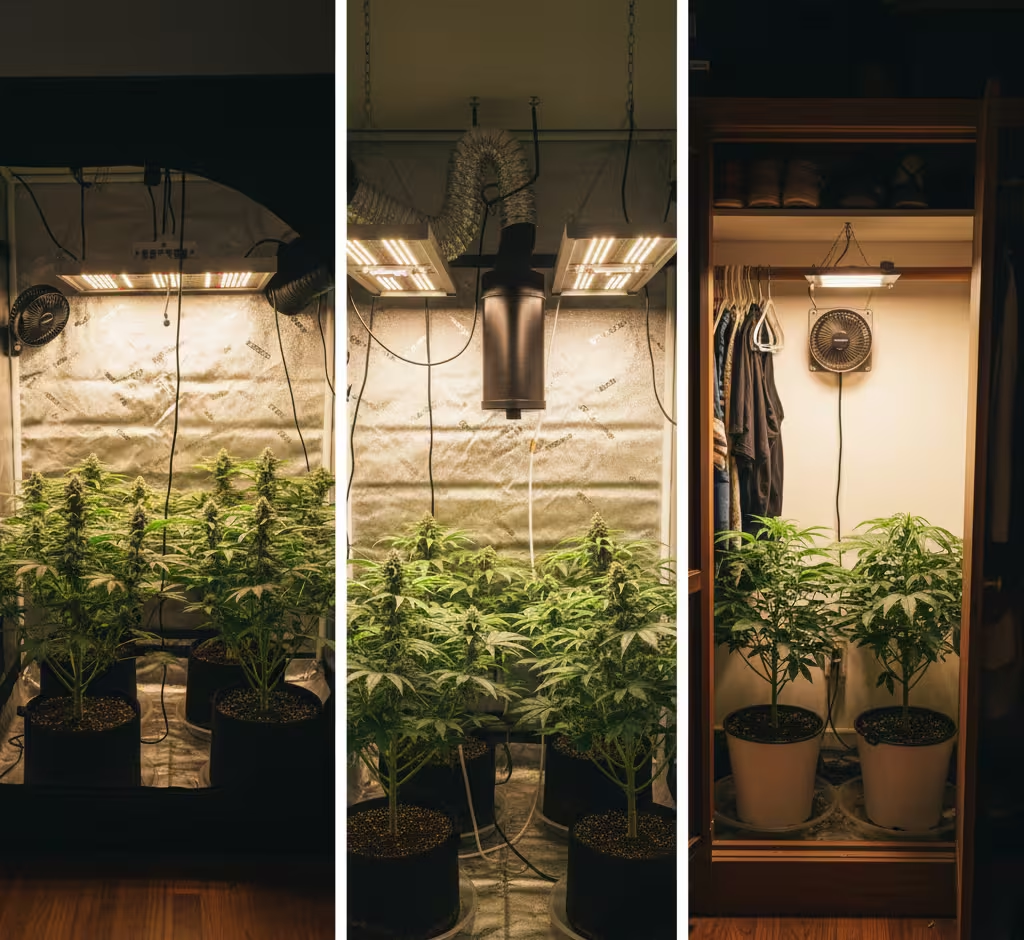
Grow Tents:
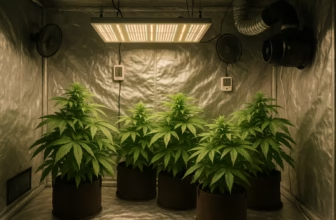
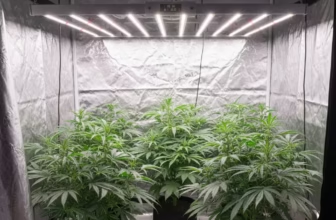
If you’re a beginner, a grow tent is hands-down the easiest way to start. It’s already designed with lightproof fabric, built-in ports for ventilation, and reflective inner walls that maximize your light efficiency. Sizes like 2×2, 2×4, or 4×4 feet are perfect for 1–6 plants depending on strain and container size. Tents are affordable, modular, and easy to manage humidity and temperature, which makes them ideal for small-scale home growers.
Grow Rooms:
Got more space or planning to scale up? A grow room gives you full control over your environment. You can install stronger LED grow lights, more powerful fans, and a custom hydroponic or soil system. Grow rooms are great for commercial-style setups or when you want to experiment with different strains and training methods. The trade-off? More maintenance, electricity use, and setup cost — but the yields can be massive.
Closet Grows:
If stealth is your top priority, a closet grow setup might be your best bet. You can convert an old wardrobe or cabinet into a small, self-contained grow box with an LED panel, inline fan, and carbon filter. It’s perfect for urban growers or renters who need to keep things discreet. Just remember — airflow can be tricky in small spaces, so use oscillating fans and vent ducts to avoid stagnant air and mold.
💡 Grower’s Tip
No matter what you choose, focus on light control, ventilation, and insulation. A good grow space keeps light leaks, heat buildup, and odor in check while allowing your plants to breathe. It’s better to have a small, optimized grow tent than a big, poorly ventilated room.
💡 Lighting: The Heart of Your Indoor Grow
Ask any experienced grower — your lighting setup is the heartbeat of your indoor garden. Without the right light, your cannabis plants can’t photosynthesize properly, which means slow growth, weak stems, and airy buds. When you get the light right, though, your plants reward you with dense, resin-coated flowers that smell and smoke like heaven.
Indoor growing means you’re replacing the sun with artificial grow lights, so quality, spectrum, and placement all matter. There are three main options for indoor growers: LED, HPS (High-Pressure Sodium), and Fluorescent lights. Each has its pros and cons depending on your grow space, budget, and heat tolerance.
🌈 Choosing Between LED, HPS, and Fluorescent Lights
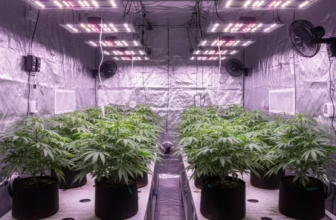
LED Grow Lights are the go-to choice for modern growers. They’re energy-efficient, low-heat, and provide a full spectrum that mimics natural sunlight — perfect for both the vegetative and flowering stages. High-quality LEDs offer strong PAR (Photosynthetically Active Radiation) output with low wattage, keeping your tent cooler and your electric bill lighter.
HPS (High-Pressure Sodium) Lights still have a loyal following, especially for flowering. They’re known for penetrating canopy light and high yield potential, but they produce a lot of heat — meaning you’ll need a strong ventilation system to keep temperatures stable.
Fluorescent Grow Lights (CFLs and T5s) are great for seedlings, clones, or small stealth grows. They’re affordable and gentle on young plants but don’t pack enough intensity for full flowering cycles.
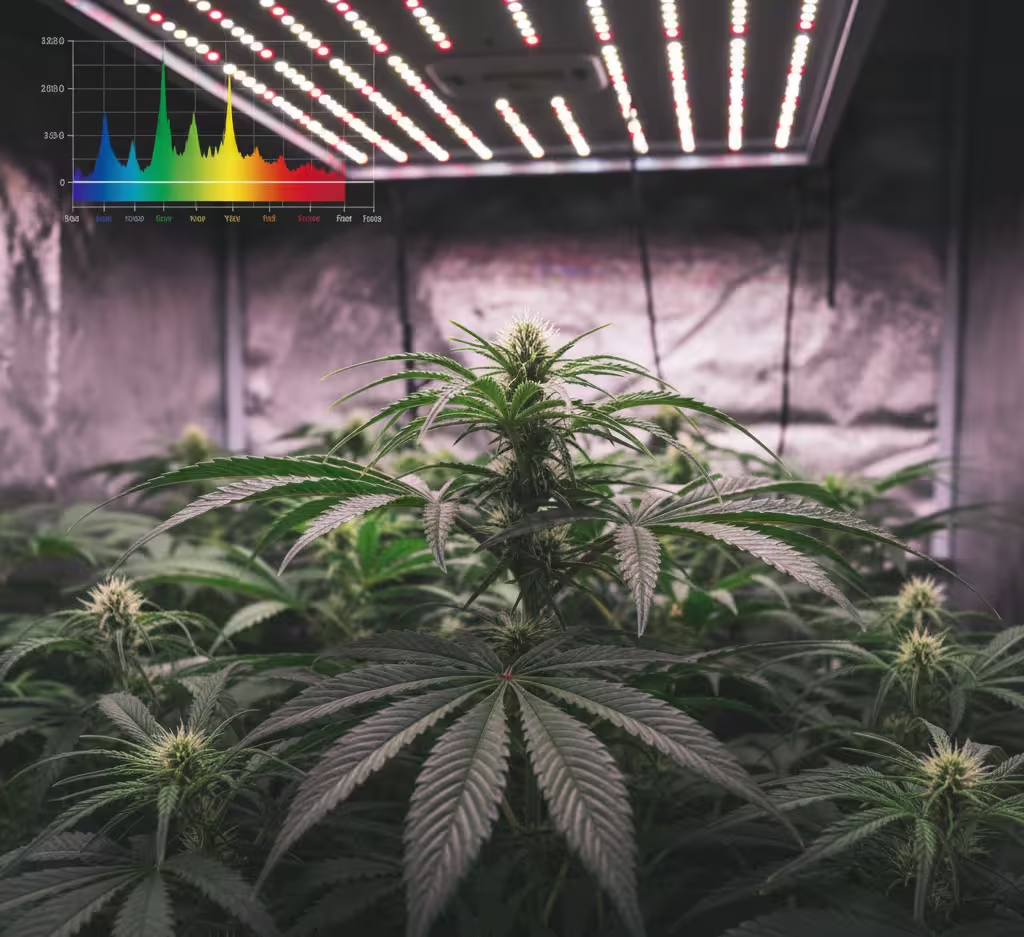
⚙️ Light Spectrum and Wattage Guide
The secret to big, sticky buds lies in understanding light spectrum and intensity.
- Vegetative stage: Use blue spectrum (400–500 nm) to promote leafy growth.
- Flowering stage: Shift to red spectrum (620–700 nm) to trigger bud formation.
- Full-spectrum LEDs combine both, automatically supporting each growth phase.
When it comes to wattage, aim for roughly 35–50 watts per square foot of canopy. For example:
- 2×2 tent: 150–250 watts
- 2×4 tent: 300–400 watts
- 4×4 tent: 450–600 watts
Make sure your lights are adjustable — too close and you risk light burn, too far and your plants stretch and weaken.
💡 Pro Grower Tip
Start with LEDs that have dimmable settings and built-in timers. This lets you fine-tune the light intensity as your plants mature — saving power while keeping your grow efficient.
🌬️ Ventilation and Air Circulation Setup
If lighting is the heart of your grow room, then ventilation is the lungs. Your cannabis plants breathe just like you do — they take in carbon dioxide (CO₂) and release oxygen. Without proper airflow, your grow tent becomes a hot, humid bubble where mold, mildew, and weak growth can take over fast. A well-designed ventilation system keeps your plants strong, your room cool, and your grow stealthy.
💨 The Importance of Fresh Air Exchange
Cannabis thrives when it has a steady supply of fresh, CO₂-rich air. When air gets stale, humidity spikes and CO₂ levels drop — stalling growth and reducing yields. The goal is simple: keep fresh air moving in and stale air moving out continuously.
Every indoor setup needs two key airflow systems:
- Exhaust system: pulls out hot, humid, and odor-heavy air.
- Intake system: draws in cool, fresh air from outside the tent or room.
This constant exchange stabilizes your temperature, humidity, and CO₂ levels, creating the perfect microclimate for healthy cannabis plants.
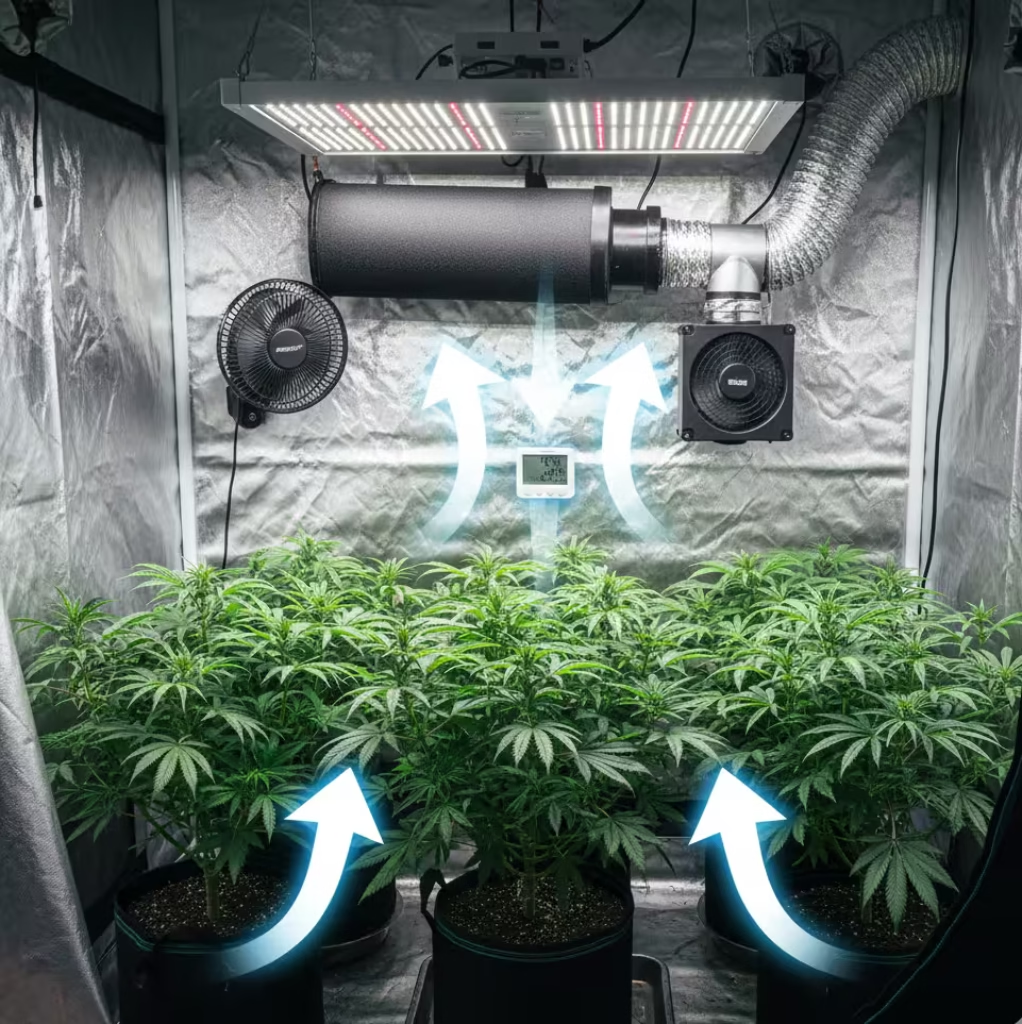
⚙️ Setting Up Exhaust, Intake, and Oscillating Fans
Start by installing an inline fan and carbon filter at the top of your grow tent, where hot air collects. The carbon filter traps odor molecules, so you can grow discreetly without alerting the neighbors. Connect ducting to guide exhaust air out of the grow room — ideally near a window or vent.
At the bottom of the tent, create a passive or active intake. Passive intakes are simply mesh vents that let fresh air in naturally, while active intakes use a small fan to pull in air more efficiently.
Inside your grow space, place oscillating fans to keep air moving around your plants. Gentle airflow strengthens stems, prevents hotspots, and keeps humidity uniform. Always aim for a slight leaf movement — that’s your visual cue that airflow is just right.
🔧 Grower’s Tip
- Keep your exhaust fan running 24/7 during flowering, when odor is strongest.
- Use a speed controller to adjust fan intensity and noise.
- Replace carbon filters every 9–12 months for maximum odor control.
🌡️ Temperature and Humidity Control
If you want your indoor garden to thrive, you need to treat temperature and humidity like two sides of the same coin. These factors work together to shape your plants’ metabolism, nutrient absorption, and resistance to stress. Get them right, and your cannabis will grow lush, strong, and aromatic. Get them wrong, and you’ll see slow growth, nutrient lockout, or even mold on your buds.
The key is maintaining a stable environment through all stages of growth. Cannabis is a tough plant, but it loves consistency — not wild temperature swings or damp, stagnant air.
🌱 Ideal Climate for Each Growth Stage
Seedling Stage (70–85°F / 65–70% RH)
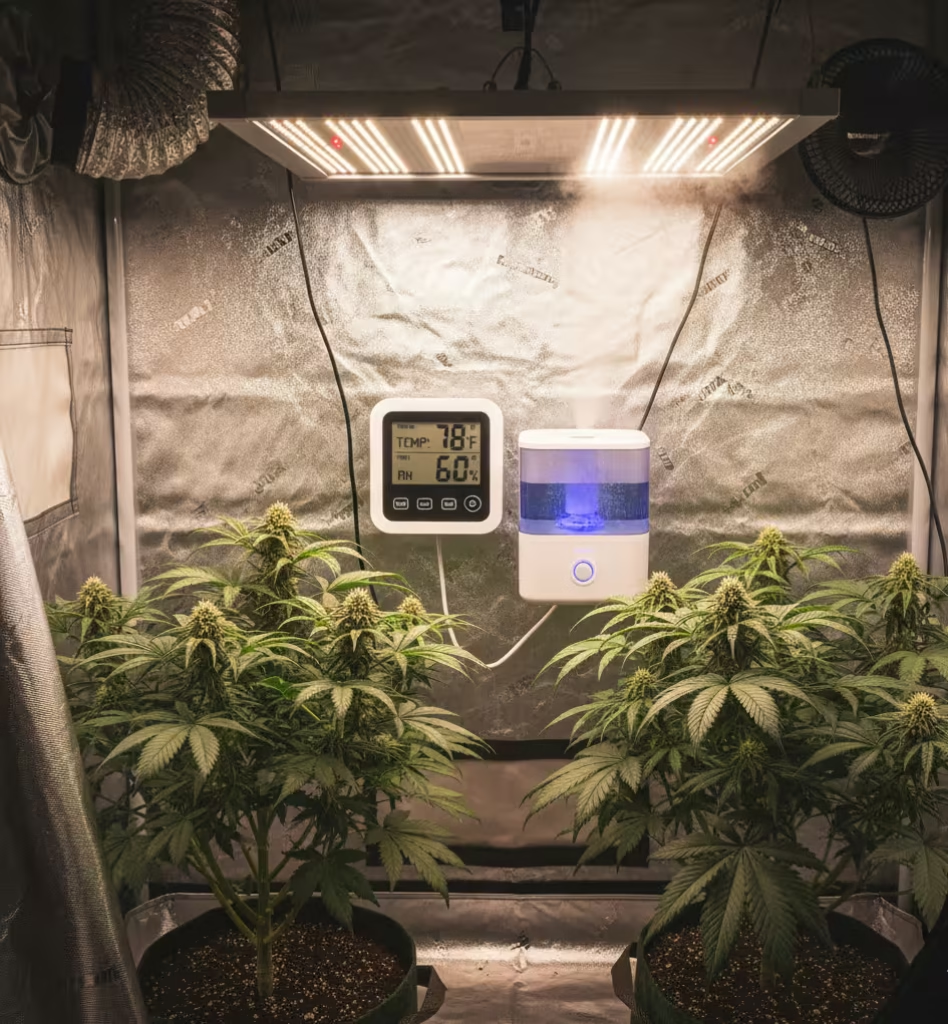
Young cannabis seedlings need warmth and moisture. High humidity helps them absorb water through their leaves while roots develop. A small humidifier and gentle airflow help create a cozy, tropical environment.
Vegetative Stage (70–80°F / 50–60% RH)
As plants grow larger, they prefer slightly cooler and drier air. This balance encourages strong root growth and thick stems while keeping mold at bay. During lights-on hours, aim for 78°F; at night, let it dip to 70°F for natural rhythm.
Flowering Stage (65–78°F / 40–50% RH)
Flowering is when humidity becomes your enemy. Lower RH levels help prevent bud rot and powdery mildew, especially in dense colas. You can use a dehumidifier to stay below 50% RH and maintain airflow across the canopy.
⚙️ Tools for Climate Control
A few key tools make managing your indoor climate easier:
- Thermo-hygrometer: Tracks temperature and humidity in real time.
- Humidifier/Dehumidifier: Adjust moisture levels depending on plant stage.
- AC Unit or Heater: Keeps room temperature stable during seasonal changes.
- Controller or Smart Sensor: Automates your fans, lights, and humidifiers for a smart grow environment.
It’s also smart to hang your thermometer at canopy level, not on the tent wall — that’s where your plants actually live and breathe.
🌿 Grower’s Tip
Monitor your Vapor Pressure Deficit (VPD) — it’s a more advanced but powerful way to measure how much water your plants can transpire efficiently. Keeping your VPD in the sweet zone (0.8–1.2 kPa) ensures your plants are growing at full throttle without stress.
🪴 Choosing the Growing Medium (Soil vs. Hydro)
Your cannabis plants can only be as healthy as what they’re rooted in. The growing medium is where your plants breathe, drink, and eat — it’s their entire world below the surface. Whether you choose organic soil, coco coir, or hydroponics, each option brings a unique rhythm to your indoor grow setup. Picking the right medium depends on your growing style, your budget, and how hands-on you want to be.
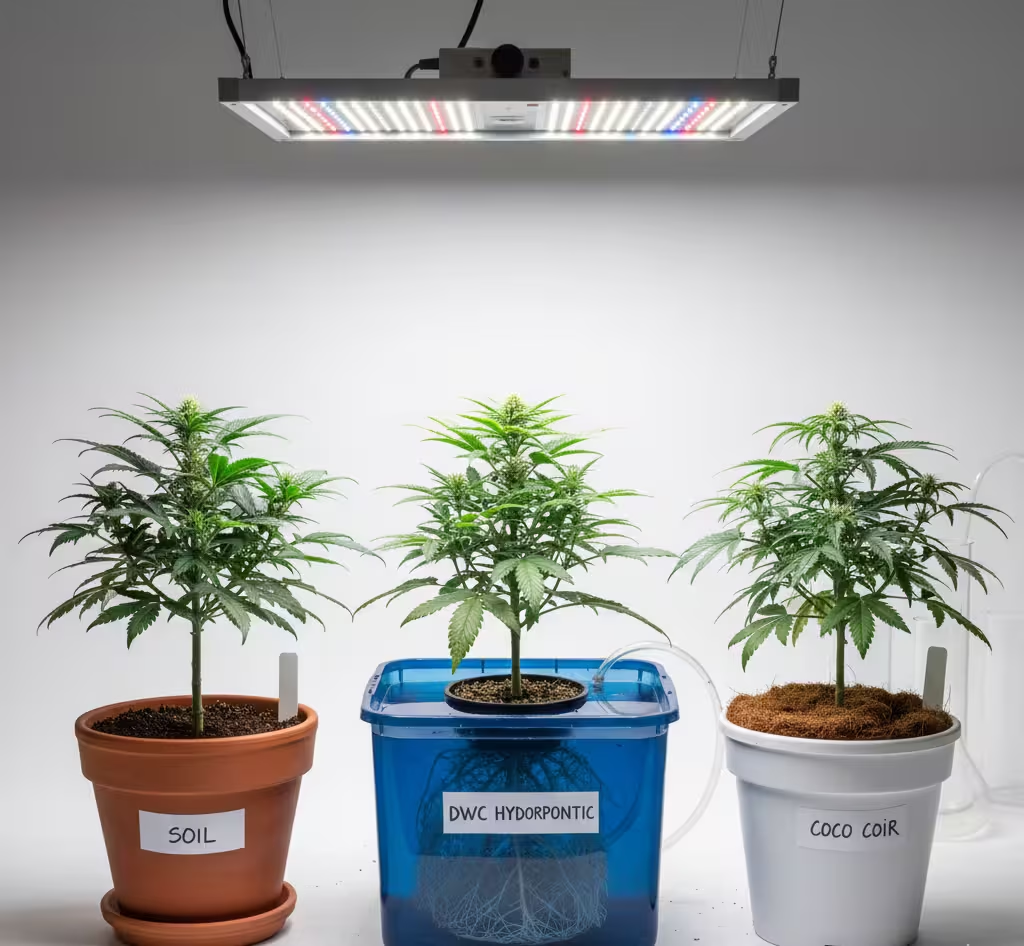
🌱 Soil — The Classic and Forgiving Option
For most home growers, soil is still king. It’s natural, affordable, and beginner-friendly. A good organic soil mix acts like a buffer — it holds nutrients and moisture while giving your roots room to breathe. Look for soil blends with perlite, coco fiber, worm castings, and compost, all of which boost oxygen flow and microbial life.
The real magic of soil lies in its living ecosystem. Beneficial bacteria and mycorrhizal fungi break down organic matter into plant-ready nutrients, which leads to richer terpene profiles and better flavor. You don’t need to feed as often, just keep the soil moist but not soaked.
🪴 Pro tip: Use fabric pots instead of plastic ones — they improve air pruning and root development, helping your plants grow strong and healthy.
💧 Hydroponics — Fast Growth, Precision Feeding
If you’re the type of grower who likes full control and faster growth cycles, hydroponic systems might be your calling. Instead of soil, plants grow in nutrient-enriched water supported by mediums like clay pebbles, rockwool, or coco coir.
Because nutrients are delivered directly to the roots, hydro plants grow faster and yield more. But it’s not set-and-forget — hydro requires constant monitoring of pH and EC levels, as well as clean water and stable oxygenation. One slip in your feeding or pH balance can cause quick nutrient burn or deficiency.
Still, many experienced indoor growers swear by hydro for its speed, cleanliness, and yield potential, especially in controlled grow tents.
⚖️ Soil vs. Hydro — Which Is Right for You?
| Factor | Soil Grow | Hydroponic Grow |
|---|---|---|
| Ease of Use | Easier, forgiving for beginners | Requires precision and monitoring |
| Growth Speed | Slower but stable | Much faster growth rate |
| Flavor & Aroma | Richer terpene profile | Slightly milder flavors |
| Maintenance | Less frequent feeding | Frequent pH and EC adjustments |
| Setup Cost | Low to medium | Higher initial cost |
| Yield Potential | Moderate | Very high (when dialed in) |
No matter which path you take, healthy roots = happy buds. If you’re new, start with soil. Once you’ve mastered plant behavior and nutrient timing, try experimenting with a small hydro setup. Both can deliver incredible results when tuned right.
💧 Nutrient and Watering Setup
No matter how perfect your light or soil is, your plants won’t thrive without the right nutrient balance and watering routine. Cannabis is a heavy feeder, and every stage of growth demands a different nutrient ratio. Overfeed, and you’ll see nutrient burn on the leaf tips; underfeed, and your plants will yellow and slow down. The goal is to deliver just enough food and moisture to keep your roots healthy and your canopy vibrant.
🧪 Understanding pH and EC Levels
In an indoor grow, pH and EC are your two most important numbers.
- pH (potential hydrogen) controls how well your roots absorb nutrients.
- For soil grows, keep pH between 6.0–7.0.
- For hydroponics and coco, aim for 5.5–6.5.
If your pH drifts outside these ranges, nutrients “lock out,” meaning your plants can’t take them in — even if they’re present.
EC (Electrical Conductivity) measures the concentration of nutrients in your water.
- Low EC means your plants are hungry.
- High EC means the mix is too strong and could cause burn.
Regularly check EC using a TDS or EC meter and adjust your feeding solution accordingly.
Think of it like cooking — measure, adjust, and taste (test) as you go.
🌿 Feeding Your Plants by Growth Stage
Seedling Stage:
Use only pH-balanced water or a mild root stimulator. Seedlings are sensitive and don’t need heavy nutrients yet.
Vegetative Stage:
Now your plants are hungry for Nitrogen (N) — it’s the fuel for lush, leafy growth. Use a balanced NPK nutrient around 3-1-2 or 4-2-3, and supplement with calcium and magnesium (Cal-Mag).
Flowering Stage:
Once the light cycle changes to 12/12, switch to nutrients high in Phosphorus (P) and Potassium (K), around 1-3-2 or 1-4-5. These help with bud formation, resin production, and density. Stop feeding two weeks before harvest and flush with pure water to remove excess salts.
💦 Perfecting Your Watering Routine
Overwatering is one of the biggest beginner mistakes. Cannabis roots need both air and moisture — not constant soaking.
- Water when the top inch of soil feels dry or pots feel light.
- Always ensure drainage holes to prevent root rot.
- Use lukewarm, pH-balanced water (65–75°F) to avoid shocking the roots.
In hydro systems, maintain consistent oxygenation with air stones or pumps so roots don’t suffocate.
🌱 Grower’s Tip: Lift your pots — they tell you everything. If it feels heavy, wait. If it’s light, water. That simple rhythm keeps your roots breathing and your buds booming.
🤖 Automation and Smart Grow Tools
If you’ve ever felt like keeping up with your plants’ needs is a full-time job, you’re not alone. That’s why today’s indoor growers are turning to automation tools and smart grow technology to take the guesswork out of growing. With the right gear, you can let your setup handle the heavy lifting — maintaining perfect lighting cycles, humidity levels, and nutrient delivery while you sit back and watch your plants thrive.
Automation doesn’t just make growing easier; it makes it more consistent. Every cannabis plant loves a predictable rhythm — same light hours, steady airflow, balanced moisture. Smart grow devices help you lock in that precision and prevent rookie mistakes like overwatering, light stress, or temperature swings.
⚙️ Timers, Smart Plugs, and Environmental Controllers
Start with the basics — timers and smart plugs. Plug your LED grow lights, fans, and pumps into programmable timers so they switch on and off automatically. This ensures your light cycles (18/6 or 12/12) stay exact, even if you forget.
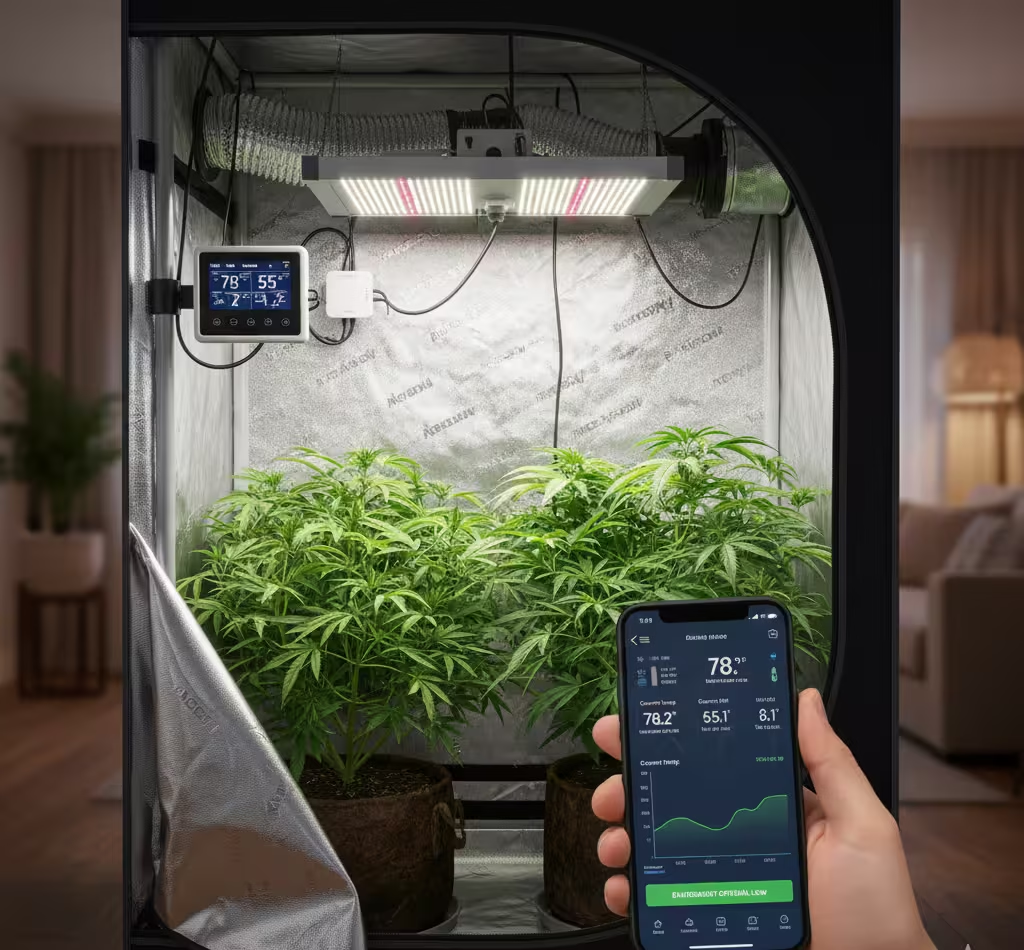
For more advanced control, look into smart environmental controllers. These gadgets connect to your humidifier, exhaust fan, heater, and even your CO₂ tank. They read the room’s temperature, humidity, and VPD and make instant adjustments to keep your grow tent in the sweet zone. Some even integrate with mobile apps, letting you monitor your plants remotely from your phone.
🌿 Grower’s Tip: Smart controllers can save electricity and stabilize your grow — keeping your tent cooler, quieter, and perfectly balanced day and night.
📱 Monitoring and Alert Systems
Modern smart sensors can alert you when humidity spikes, lights fail, or temperatures drift too high. Systems like AeroGarden, Inkbird, AC Infinity, or TrolMaster are popular among home growers for their plug-and-play simplicity. You can even track pH and EC readings in real time for hydro systems.
Setting up a simple automation hub turns your indoor grow into a self-sustaining ecosystem — one that runs efficiently and stays stealthy while you manage everything from your phone or tablet.
🌿 Grower’s Advantage
Automation gives you more time to focus on what truly matters — plant health, training, and harvest timing. When your grow runs on data instead of guessing, your results become predictable, your yields bigger, and your stress lower.
💸 Example Budget Indoor Setup (2026 Edition)
You don’t need a massive room or industrial gear to grow top-shelf buds indoors. With the right setup and a bit of DIY spirit, you can build a professional-quality grow system on almost any budget. Below are three sample setups for 2025 — from small beginners’ tents to advanced smart grow systems — all optimized for yield, stealth, and energy efficiency.

🌿 1. Small Tent Setup (~2×4 ft) — Perfect for Beginners
If you’re growing a few plants in your apartment or spare closet, this setup gives you everything you need without overcomplicating things.
Essential Components:
- Grow Tent (2×4 ft) — Keeps your environment controlled and light-tight.
- Full-Spectrum LED Light (300W–400W) — Ideal for 2–4 plants; look for brands like Spider Farmer SF-2000 or Mars Hydro TS1000.
- Inline Fan + Carbon Filter Kit (4-inch) — Controls odor and improves airflow.
- Fabric Pots (3–5 gallons) — Allow roots to breathe.
- Organic Soil Mix + Nutrient Starter Kit — For easy maintenance and natural flavor.
💰 Estimated Cost (2025): $350–$500
⚙️ Expected Yield: 6–12 ounces per harvest
🪴 Pro Tip: Start with autoflower strains — they’re low-maintenance, fast, and thrive in smaller tents.
🌾 2. Medium Setup (~4×4 ft) — For Growers Ready to Scale Up
Ready for bigger yields and more control? The 4×4 setup gives you space for 4–6 medium plants and full environmental control.
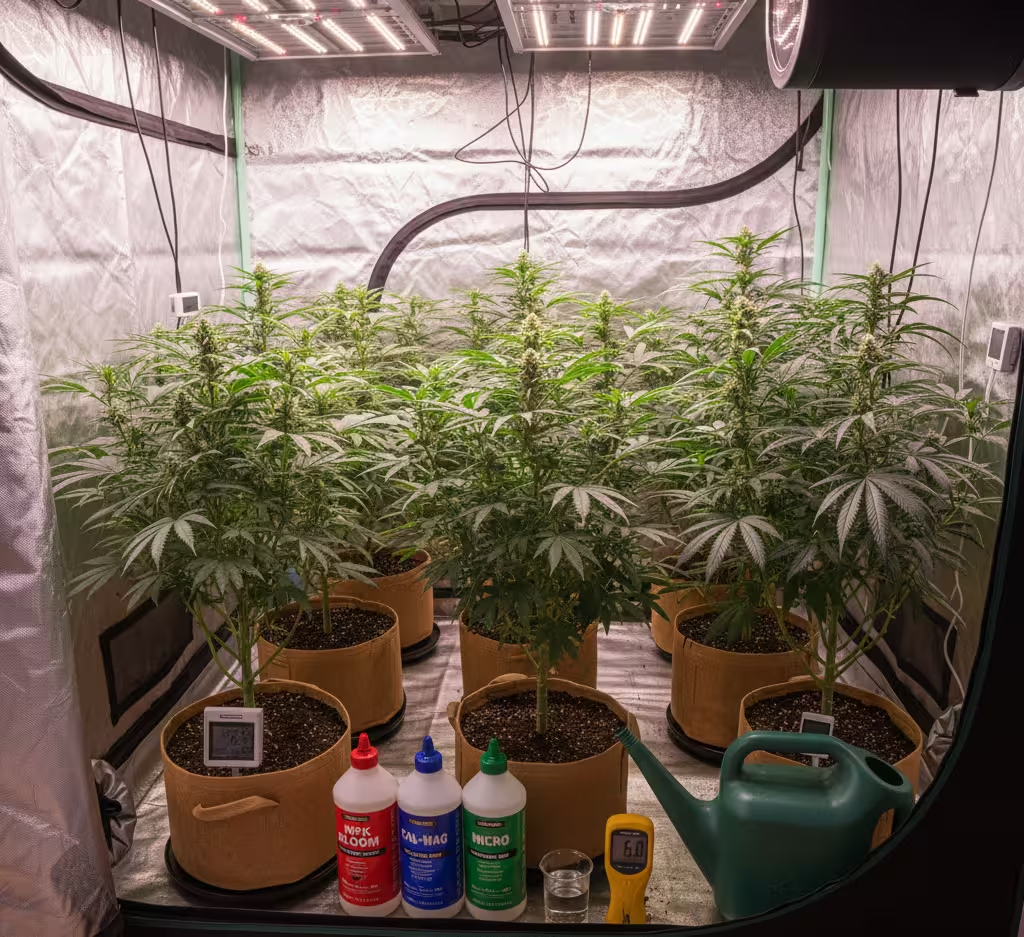
Essential Components:
- Grow Tent (4×4 ft) with reinforced frame and double-layer Mylar lining.
- Full-Spectrum LED (450W–600W) with dimmer control, such as AC Infinity IonBoard S44.
- 6-inch Inline Fan + Carbon Filter Combo for powerful odor control.
- Clip Fans and Dehumidifier to balance airflow and humidity.
- Digital Thermo-Hygrometer for real-time climate tracking.
- Soil or Coco Mix + 3-part nutrient system (Grow, Bloom, Micro).
💰 Estimated Cost (2025): $700–$1,000
⚙️ Expected Yield: 1–1.5 pounds per harvest
🌿 Grower’s Tip: Use smart plugs and timers to automate your light and fan schedules — it saves energy and keeps cycles perfect.
⚡ 3. Advanced Smart Setup (~5×5 ft) — For Pros and Tech Enthusiasts
If you’re serious about precision and want high-yield, top-shelf buds, the smart grow system is the way to go.
Essential Components:
- Grow Tent (5×5 ft) heavy-duty with noise-insulated lining.
- High-Efficiency LED Bar Light (700–800W) — e.g., HLG Scorpion Diablo or Grower’s Choice ROI-E720.
- 8-inch Inline Fan with Smart Controller (like AC Infinity Controller 69 Pro).
- CO₂ Tank or Generator with automatic release system.
- Smart Climate Controller for temperature, humidity, and CO₂ management.
- Hydroponic or Drip Irrigation System for nutrient precision.
- pH/EC Monitoring Kit with Bluetooth app integration.
💰 Estimated Cost (2025): $1,800–$2,500
⚙️ Expected Yield: 2–3 pounds per harvest
💡 Pro Tip: Smart systems pay off long-term — you’ll save energy, time, and reduce risk of grow room failures.
🧰 Maintenance, Safety, and Common Mistakes
Once your grow setup is dialed in, your job shifts from building to maintaining. Indoor growing is all about consistency — keeping your environment clean, safe, and fine-tuned. A well-maintained grow space doesn’t just produce better buds; it also prevents expensive disasters like mold outbreaks, electrical shorts, or pest infestations. Think of it as routine care for your green investment.

🌿 Regular Maintenance Routine
A clean, well-ventilated grow room is the secret weapon of every successful cultivator. Make it a habit to:
- Inspect plants daily for early signs of stress, pests, or discoloration.
- Wipe down tent walls and equipment weekly to prevent dust, mold, and algae buildup.
- Flush your medium every few weeks to avoid salt buildup in soil or hydro systems.
- Calibrate pH and EC meters monthly to ensure feeding accuracy.
- Rotate plants and adjust lights as they grow to maintain even canopy coverage.
It’s not glamorous work — but it’s what separates smooth growers from struggling ones.
💡 Grower’s Tip: Keep a simple grow journal or use an app to log your watering, feeding, and climate data. This helps you track progress and catch patterns before problems snowball.
⚡ Safety Tips for Indoor Growers
Growing indoors means working with electricity, water, and heat in close quarters — a recipe for trouble if you’re careless. Follow these must-do safety tips:
- Never overload power strips; use surge protectors with rated wattage.
- Keep electrical connections off the floor to prevent water contact.
- Secure all hanging lights and fans; a falling LED panel can destroy your canopy.
- Install a smoke detector near your grow area (not inside the tent).
- If you use CO₂ enrichment, make sure the room is ventilated and monitored safely.
Smart growers know: prevention is cheaper than repair.
🚫 Common Mistakes to Avoid
Even experienced growers slip up sometimes. Here are the top pitfalls that hurt yields:
- Overwatering: Roots drown easily. Let the soil dry slightly between waterings.
- Overfeeding: More nutrients ≠ more buds. Watch for burnt tips or crispy leaves.
- Ignoring airflow: Stagnant air causes mold and weak stems. Keep fans running 24/7.
- Light burn: LEDs can be intense. Keep lights 18–24 inches above the canopy.
- Neglecting pH: Unbalanced pH causes nutrient lockout even with perfect feeding.
- Poor hygiene: Dirty tents invite pests like spider mites and fungus gnats.
🌱 Grower’s Wisdom: Cannabis is resilient — if you make a mistake, learn from it. Most problems can be reversed with a little patience and a few smart adjustments.
🌱 Conclusion — Build the Perfect Indoor Grow Setup
Building the best indoor grow setup isn’t about fancy gear — it’s about balance. When your lights, air, temperature, humidity, and nutrients all work in harmony, your plants reward you with healthy growth and rich, resinous buds. Whether you’re growing in a 2×4 grow tent or a smart hydroponic system, the secret lies in understanding your plants’ environment and adjusting with care.
Growing cannabis indoors is a journey of learning, not perfection. Each grow teaches you something new about your strains, your space, and yourself. Over time, you’ll fine-tune your lighting schedules, optimize your ventilation and humidity, and create an environment where your plants practically grow themselves.
So, start small, stay consistent, and track every change. With patience and the right setup, you’ll soon have lush canopies, dense flowers, and harvests that rival any dispensary — all from the comfort of your home.
You may also like:
- 🌿 Growing Weed Indoors for Beginners — Step-by-Step Guide
- 💡 Growing Weed with LED Lights — Complete Lighting Guide
- 🪴 Best Soil for Cannabis Plants — Organic vs Synthetic Mixes
- 💧 Hydroponic Weed Setup — How to Grow Without Soil
- 🌡️ Controlling Humidity in a Grow Tent — Tips for Every Stage
References and Sources:
- Hildenbrand, Z., Mendoza-Dickey, H., & Manes, R. (2024). Lighting penetration in indoor cannabis cultivation. Cannabis Science & Technology, 7(4), 14–18. https://www.cannabissciencetech.com/view/lighting-penetration-in-indoor-cannabis-cultivation
- Ahsan, S. M. (2024). Illuminating Cannabis sativa L.: The power of light in growth, physiology and metabolism. Plants, 13(19), 2774. https://www.mdpi.com/2223-7747/13/19/2774
- Llewellyn, D., et al. (2022). Indoor-grown cannabis yield increased proportionally with irradiance to a maximum. Frontiers in Plant Science, 13, 9551646. https://pmc.ncbi.nlm.nih.gov/articles/PMC9551646/
- Condair Group. (n.d.). Humidity for cannabis – Deep dive. Retrieved from https://www.condair.com/m/0/23-55-humidity-for-cannabis-deep-dive-2.pdf
- Cannabis Business Times. (2016). Moisture matters. Retrieved from https://www.cannabisbusinesstimes.com/home/article/15703674/moisture-matters
- Greenhouse Product News. (2021). Climate optimization for cannabis. Retrieved from https://gpnmag.com/article/climate-optimization-for-cannabis/
- Dantherm Group. (2024). The impact of uncontrolled humidity on cannabis growing. Retrieved from https://www.danthermgroup.com/uk/insights/the-impact-of-uncontrolled-humidity-on-cannabis-growing
- DryGair. (n.d.). Cannabis case study – Cannabis greenhouses with the DryGair solution. Retrieved from https://drygair.com/blog/cannabis-greenhouses-drygair-case-study/