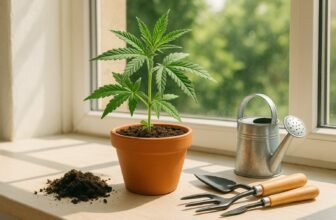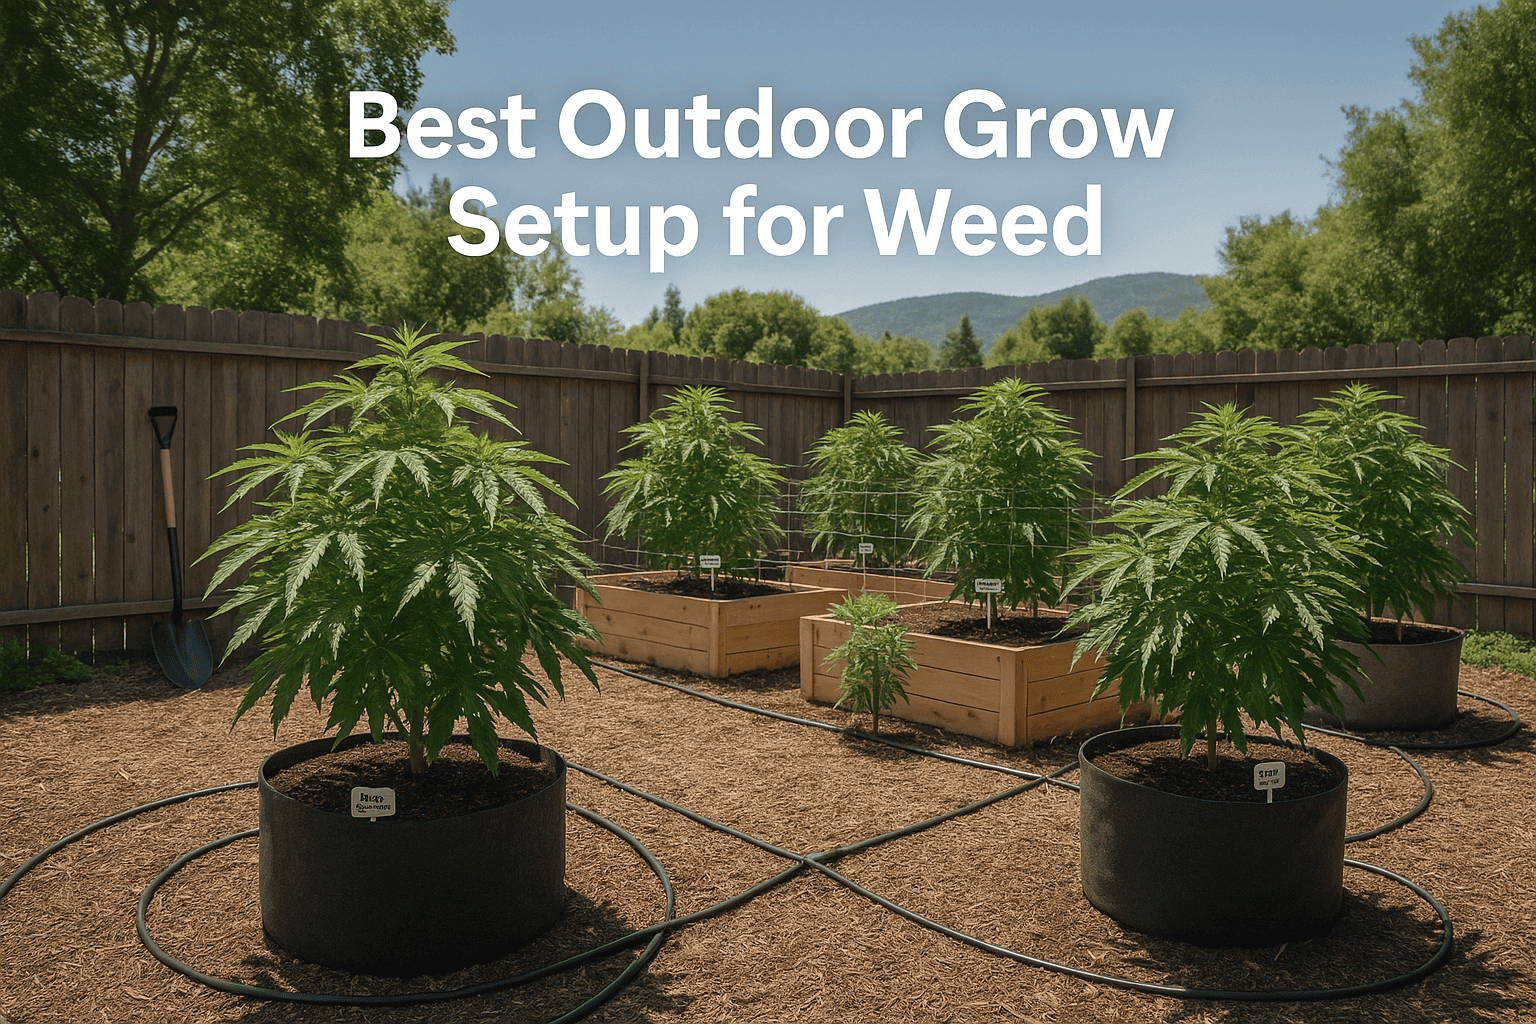
The best outdoor grow setup includes a sunny, private location with well-draining organic soil or raised beds, breathable fabric pots, and a reliable watering system like drip irrigation. Add pest protection, use quality feminized seeds, and ensure good airflow and sunlight exposure to maximize cannabis growth and yields outdoors.
Thinking about growing weed outdoors but unsure how to set things up for success? Whether you’re planting a few cannabis seeds in your backyard or planning a full outdoor grow op, the right setup can make or break your harvest. Outdoor cultivation is budget-friendly, eco-conscious, and ideal for harnessing the power of the sun. But to get the best yields, you need more than just good weather — you need a smart outdoor grow setup. In this guide, we’ll walk you through everything from picking the perfect spot and choosing containers to managing pests and water systems, all while staying stealthy and sustainable.
🧭 Why Choose an Outdoor Grow Setup?
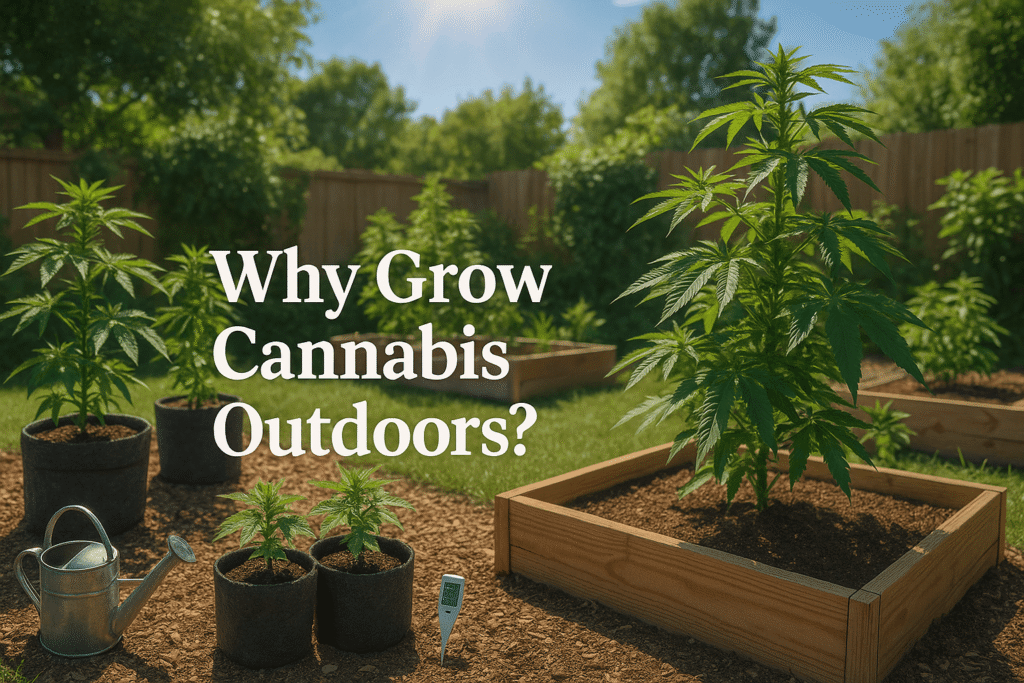
Growing cannabis outdoors is one of the most cost-effective and natural ways to cultivate high-yield plants. Unlike indoor setups that demand artificial lights, ventilation systems, and electricity bills, outdoor growing relies on sunlight, fresh air, and the natural ecosystem—making it an eco-friendly option for both beginners and experienced growers.
One of the biggest benefits of growing weed outside is that the sun provides full-spectrum light, which is essential for healthy cannabis development from seedling to harvest. Plants grown under natural sunlight often grow larger, stronger, and more resinous than those grown indoors.
Additionally, outdoor cannabis cultivation is budget-friendly, requiring fewer resources. With the right location and setup, you can grow weed with minimal gear—just some quality soil, good seeds, and patience. This makes it an ideal option for those seeking a low-cost cannabis growing method.
Another advantage is the increased sustainability. An outdoor grow has a significantly lower carbon footprint than energy-intensive indoor setups. If you’re looking to align your grow practices with eco-conscious cannabis cultivation, going outdoors is the way to go.
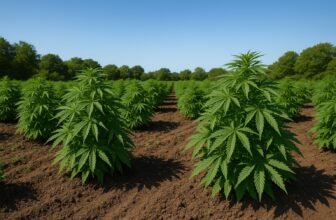
And finally, outdoor grows offer more space, which allows for bigger plants and higher yields. Unlike confined indoor tents, your cannabis can reach its full potential in open air, especially when grown in the ground or large breathable containers.
🌿 Key Takeaways:
- Natural sunlight enhances potency and yield.
- Low-cost cannabis growing with minimal equipment.
- Supports eco-friendly weed cultivation practices.
- Ideal for large-scale, high-yield plants.
- Beginner-friendly, especially for seasonal growing.
🏡 Choosing the Right Outdoor Grow Location
Picking the right location for your outdoor cannabis grow is one of the most important steps to ensure healthy plants and a high-yield harvest. Even with the best seeds and soil, a poor grow site can lead to stunted growth, mold, or even crop loss.
To start, sunlight is king. Choose a south-facing location that receives at least 6–8 hours of direct sunlight per day. Cannabis is a sun-hungry plant, and full-spectrum light is critical for photosynthesis and flower production. If your area has intense midday heat, partial shade in the afternoon can help prevent stress.
Next, look at wind protection. While airflow is important to prevent mold and strengthen stems, excessive wind can damage branches and dry out soil too quickly. Natural windbreaks like shrubs, fences, or walls offer the perfect balance between airflow and shelter.
Privacy and security are also key considerations. Even in legal regions, keeping your grow discreet is wise. Look for a spot hidden from public view, such as behind a fence, in a backyard corner, or near tall companion plants like tomatoes or sunflowers for stealth growing outdoors.
Elevation and drainage matter, too. Avoid low-lying areas that retain water and may cause root rot. A slightly elevated site with good soil drainage ensures that rainwater doesn’t pool and damage your plants.
And don’t forget about accessibility. You’ll be watering, feeding, and inspecting your cannabis plants regularly, so choose a location that’s easy to reach and maintain.
✅ Ideal Outdoor Grow Site Checklist:
- South-facing exposure with 6–8+ hours of sunlight
- Natural windbreaks without blocking airflow
- Private, secure area for stealth and safety
- Well-draining soil, slightly elevated if possible
- Accessible for daily maintenance and observation
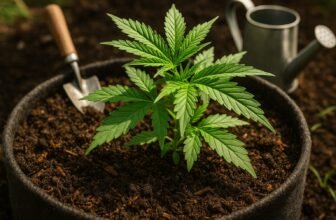
🌱 Best Containers and Beds for Outdoor Growing
When it comes to outdoor cannabis cultivation, the type of container or bed you use plays a huge role in plant health, root development, and overall yield. Choosing between fabric pots, raised beds, or planting directly in the ground depends on your grow goals, space, and climate.
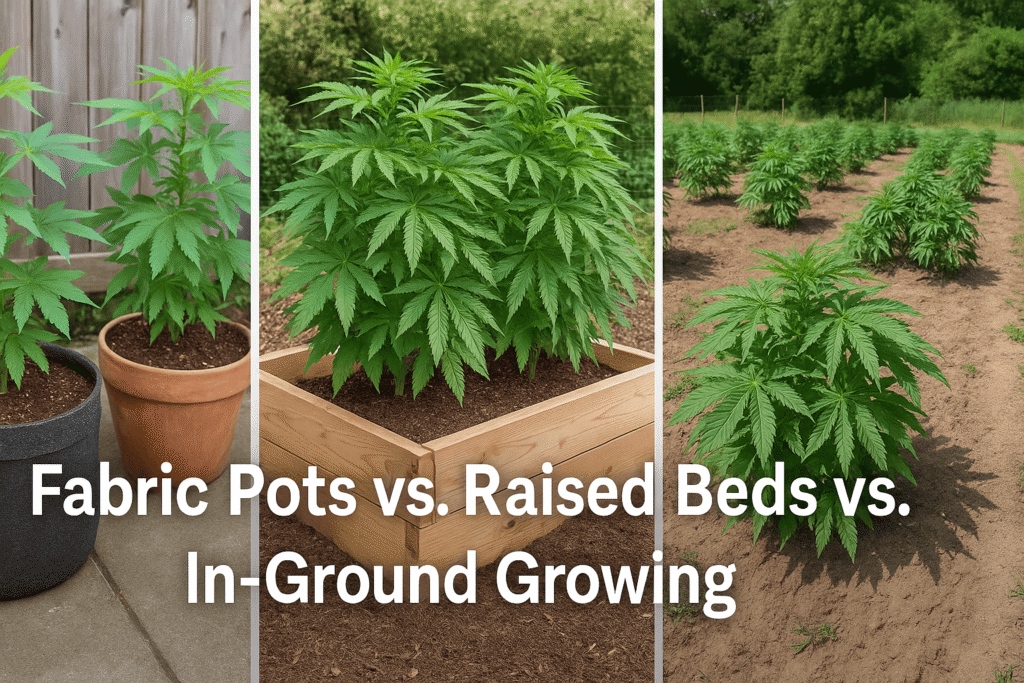
🪴 Fabric Pots: Breathable and Efficient
Fabric pots (like Smart Pots or GeoPots) are a favorite among outdoor growers because they promote air pruning of roots, which prevents plants from becoming root-bound and helps develop a dense, fibrous root system. These breathable containers also allow better airflow and drainage, reducing the risk of overwatering and root rot. They’re ideal for growers who want portability and control over soil composition.
🛏️ Raised Beds: Bigger Roots, Bigger Buds
Raised beds offer more room for root expansion, making them great for larger plants and higher yields. They retain moisture better than pots and provide excellent insulation against temperature fluctuations. With organic living soil and compost, a raised bed becomes a thriving ecosystem, especially if you practice no-till gardening. Just be sure to line the base with mesh or wire if burrowing pests are a concern.
🌱 In-Ground Planting: Low-Cost and Natural
Planting directly in the earth is the most budget-friendly option, especially if you already have fertile soil. However, it gives you the least control over drainage and pests. To boost success, amend your native soil with compost, perlite, and other soil conditioning materials. This method is perfect for large-scale outdoor grows with access to land and good weather.
📊 Quick Comparison:
| Container Type | Pros | Best For |
|---|---|---|
| Fabric Pots | Portable, breathable, prevents root binding | Small–medium grows, mobile setups |
| Raised Beds | Big root zones, steady temps, ideal for organics | High-yield outdoor gardens |
| In-Ground | Natural drainage, zero-cost | Guerrilla or large-area grows |
🌿 Soil and Nutrients for Outdoor Cannabis Success
If you want your cannabis plants to thrive outdoors, starting with the right soil and nutrient plan is essential. Healthy soil is more than just dirt—it’s a living ecosystem that feeds your plants and supports root development, water retention, and microbial life.

🌱 Go Organic: Living Soil is Key
For the best results, many growers opt for organic living soil, which mimics natural environments by encouraging beneficial microbes, fungi, and bacteria. These microscopic allies help your cannabis plants absorb nutrients more efficiently and build stronger immunity against pests and diseases. A quality living soil blend includes compost, worm castings, peat moss, perlite, and kelp meal, forming a rich, nutrient-dense base.
🌿 DIY Super Soil vs. Store-Bought Mixes
You can make your own DIY super soil using a custom blend of organic inputs or purchase a pre-made cannabis-specific soil mix like FoxFarm Ocean Forest or Roots Organics. The benefit of a homemade mix is full control over ingredients, especially for growers practicing no-till gardening or regenerative cultivation.
🧪 Nutrient Supplements: When and Why
While living soil often contains slow-release nutrients, supplementing during veg and flower stages ensures maximum growth. Use organic nutrient solutions (like fish emulsion, bat guano, or molasses) to boost nitrogen in the vegetative phase and phosphorus + potassium during bloom. Monitoring soil pH is also crucial—cannabis prefers a pH of 6.0–6.8 for optimal nutrient uptake.
🚫 What to Avoid:
- Avoid soil mixes labeled “moisture control” as they may retain too much water.
- Skip synthetic fertilizers if you’re aiming for a clean, organic grow.
- Never reuse old soil without recharging it with compost and amendments.
✅ Key Takeaways:
- Use organic living soil to build microbial life and long-term plant health.
- Boost growth with slow-release compost and natural amendments.
- Maintain proper pH balance and supplement nutrients as needed.
- Choose between DIY super soil or trusted commercial soil blends.
💧 Watering Systems and Drainage Setup
An efficient watering system and proper drainage setup are critical for outdoor cannabis success. Whether you’re growing in fabric pots, raised beds, or directly in the ground, maintaining the right moisture balance helps prevent root rot, nutrient lockout, and stunted growth.
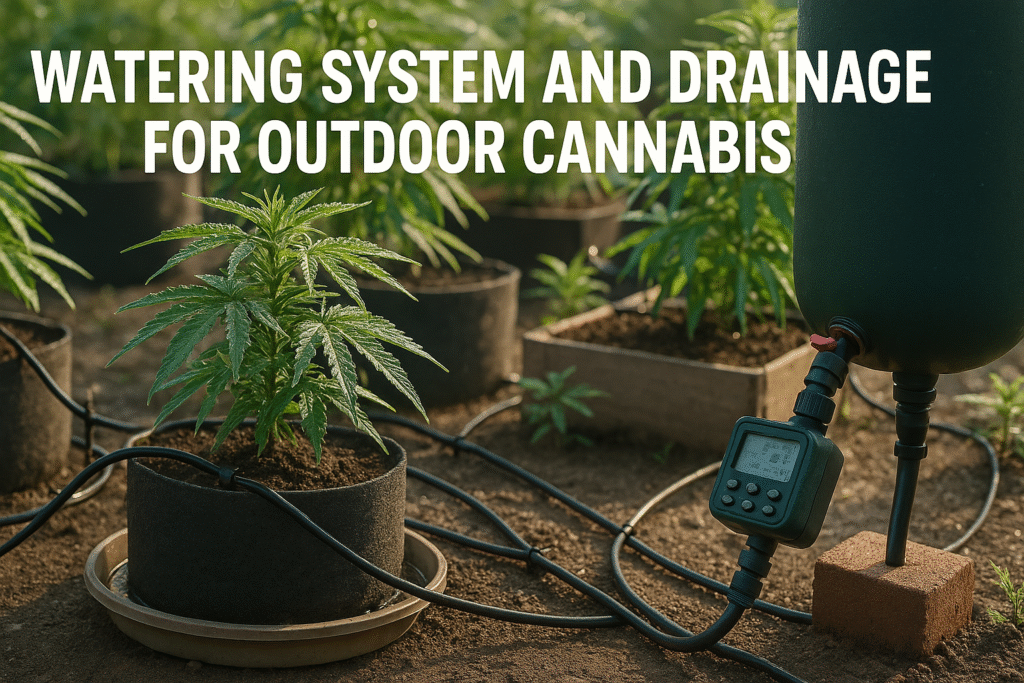
🚿 Drip Irrigation: Consistent and Water-Efficient
One of the best outdoor watering methods is a drip irrigation system. It delivers water slowly and directly to the base of each plant, conserving water and keeping foliage dry—minimizing the risk of mold or mildew. A simple gravity-fed watering system with a timer can automate this process, making it perfect for growers with busy schedules.
💦 Manual Watering: Great for Small Grows
For smaller gardens or beginner setups, manual watering with a hose or watering can is totally effective—just be consistent. Water early in the morning or late afternoon to reduce evaporation. Use moisture meters or the finger test to avoid overwatering, especially in fabric pots which tend to dry out faster due to better airflow.
🕳️ Drainage: The Foundation of Root Health
Regardless of how you water, drainage is essential. Cannabis roots hate being waterlogged. Use containers with drainage holes and elevate them slightly off the ground. In raised beds or ground grows, mix in perlite or pumice to increase soil aeration and prevent compacted, soggy zones.
📈 Pro Tip: Watering Frequency
Outdoor cannabis typically needs watering every 1–3 days, depending on weather, plant size, and soil type. In hot, dry climates, you may need to water daily, while cool or humid regions require less frequent irrigation.
✅ Key Takeaways:
- Use drip irrigation systems for consistent, water-saving delivery.
- Monitor soil with moisture meters or manual checks.
- Ensure proper drainage holes and soil aeration to avoid root rot.
- Adjust watering frequency based on climate and plant size.
🌞 Light, Temperature, and Climate Considerations
Outdoor cannabis cultivation is all about working with nature, and understanding your environment can be the difference between a weak yield and a thriving harvest. From sunlight exposure to temperature swings and microclimate management, every grower must adapt their setup to local conditions.
☀️ Sunlight: The Natural Grow Light
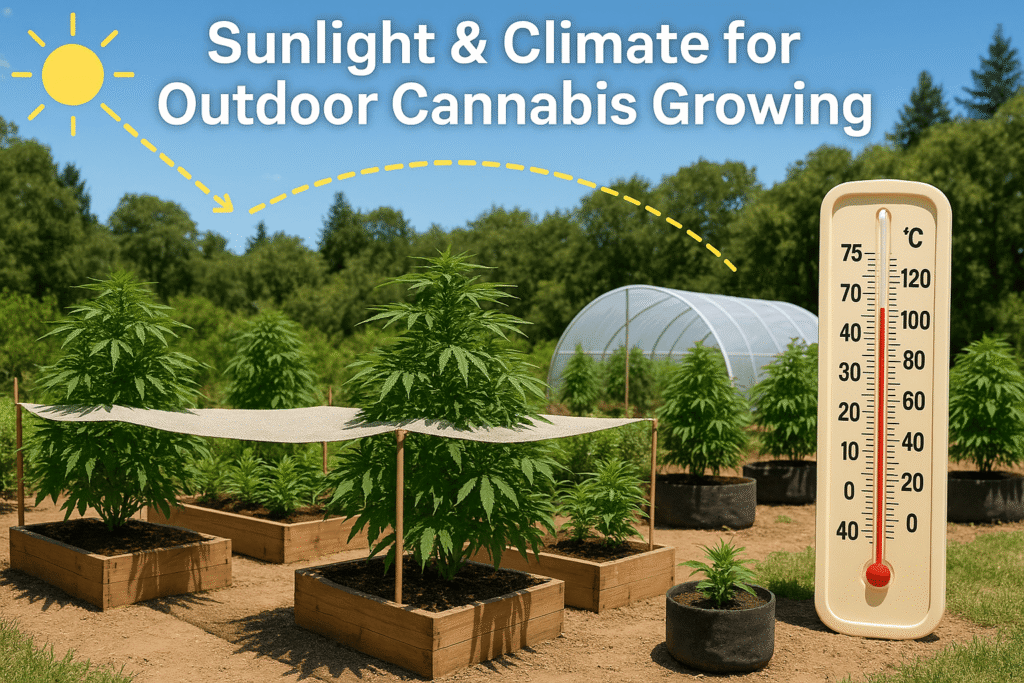
Cannabis is a photoperiod-sensitive plant that thrives under full sun exposure. Your grow site should receive at least 6–8 hours of direct sunlight per day, ideally from the south-facing direction. Plants grown in strong, consistent sunlight develop thicker stems, larger leaves, and denser buds.
If your region experiences intense midday heat, you can use shade cloth to prevent light stress and heat damage during peak hours—this is especially useful in arid climates or high-altitude locations.
🌡️ Temperature: Stay Within the Sweet Spot
Cannabis prefers a daytime range of 70–85°F (21–29°C) and nighttime temps no lower than 50°F (10°C). Extreme cold can stunt growth, while excessive heat can cause wilting, slowed photosynthesis, and nutrient lockout.
For areas with large temperature swings, consider hoop houses or temporary greenhouses to help stabilize your microclimate. These structures trap warmth during cool nights and protect plants from harsh winds or cold snaps.
🌎 Climate Zones: Adapt to Your Region
Know your USDA plant hardiness zone or regional climate patterns to select strains and growing schedules that fit your environment. For example:
- In coastal climates, watch for high humidity and mold risks.
- In desert regions, prioritize heat-tolerant strains and soil that holds moisture.
- In northern zones, autoflowers or fast-finishing feminized strains work best.
Your local microclimate—even within your backyard—can affect outcomes. For instance, a spot next to a brick wall may retain more heat, while shaded corners stay cooler and damper.
✅ Key Takeaways:
- Provide 6–8+ hours of full sun; south-facing sites are ideal.
- Use shade cloth or greenhouses for climate control.
- Maintain optimal temperature ranges for strong growth.
- Match your strain selection and setup to local climate zones.
🐛 Pest Control and Plant Protection Outdoors
Growing cannabis outdoors invites the benefits of natural light and airflow—but it also exposes your plants to pests, animals, and environmental stressors. Effective outdoor pest control and plant protection strategies are crucial for keeping your crop healthy without relying on harsh chemicals.
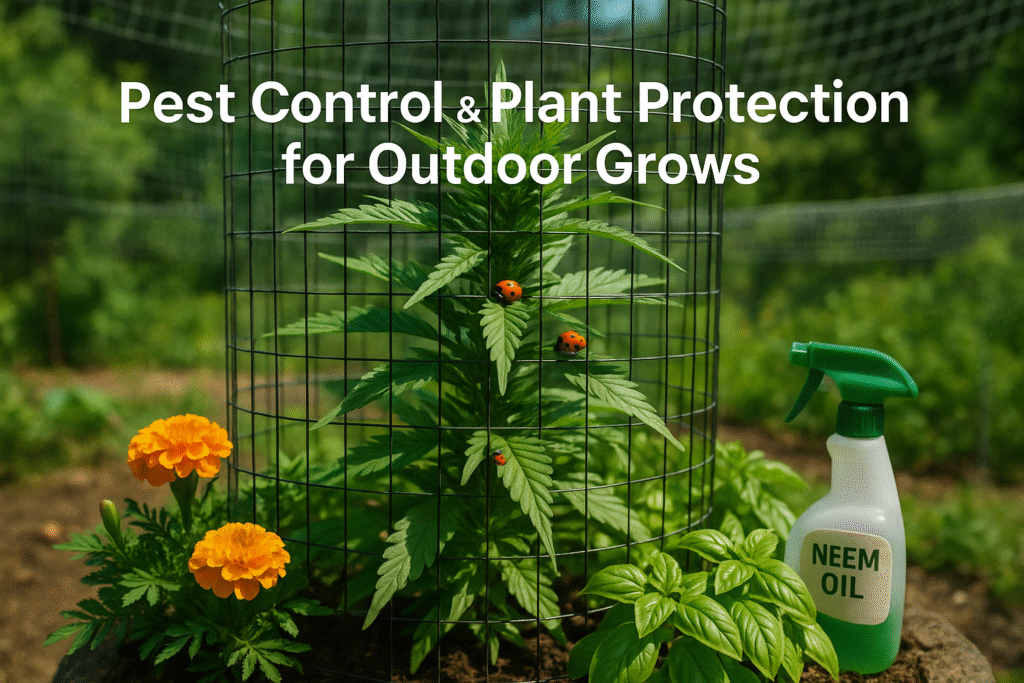
🐞 Natural and Organic Pest Control Methods
The best approach is a preventative, organic pest control strategy. Use beneficial insects like ladybugs, lacewings, and predatory mites to naturally manage aphids, spider mites, and thrips. These good bugs eat harmful ones and maintain a balanced garden ecosystem.
For direct intervention, neem oil, insecticidal soap, and companion planting (like basil, marigold, or dill) are effective and safe for cannabis. Apply neem oil as a foliar spray early in the morning or late evening to avoid sunburn on leaves.
🛡️ Physical Barriers for Plant Protection
To keep larger threats like deer, rabbits, and pets away, install chicken wire fencing or mesh cages around your plants. Use netting or row covers to shield plants from caterpillars and grasshoppers, especially during vegetative growth.
If you’re growing stealthily or in a guerrilla setup, consider camouflaging your plants with taller vegetation or hiding them behind structures. This also helps protect from prying eyes and strong winds.
🌧️ Weather-Related Protection
Heavy rain and hail can damage cannabis plants. You can reduce harm by installing temporary canopies, hoop tunnels, or using bamboo stakes and trellis netting to support heavy branches and prevent snapping.
✅ Key Takeaways:
- Use organic pest control like neem oil and beneficial insects.
- Add physical barriers (fencing, netting) to deter animals.
- Install plant supports and covers for storm and wind protection.
- Practice companion planting to naturally repel pests and attract pollinators.
💸 Budget-Friendly Outdoor Grow Setup Ideas
Growing cannabis outdoors doesn’t have to break the bank. In fact, one of the biggest advantages of outdoor cultivation is that you can start small and scale affordably. With a little creativity and strategic planning, you can set up a cheap outdoor grow setup that still produces healthy, high-yielding plants.

🧺 Reuse and Repurpose What You Have
Before buying anything new, look around your home or garden for items you can repurpose. Old buckets, storage totes, or recycled nursery pots can become excellent grow containers—just make sure to drill drainage holes to avoid waterlogging. Use leftover compost, grass clippings, or food scraps to enrich your DIY soil mix.
🏗️ Build Your Own Raised Beds and Shade
Instead of buying expensive grow beds, use recycled wood, cinder blocks, or even old pallets to construct raised beds. For sunlight control, a DIY shade structure made from PVC pipes and greenhouse plastic or cloth netting works well to protect plants during peak summer heat.
💧 Go Manual with Watering
Skip the expensive timers and irrigation kits—manual watering with a hose or watering can is cost-effective and gives you more control during the early learning stages. Mulch around your plants to retain moisture and reduce how often you need to water.
🌱 Start with Budget Seeds or Clones
If you’re just learning, there’s no need to spend a fortune on premium genetics. Look for budget feminized seeds, local clones from growers, or reputable seed banks offering starter packs. Many affordable strains are bred for resilience, making them perfect for beginner outdoor grow setups.
🥷 Stealth and Guerrilla Grow Tips
If you’re growing discreetly, guerrilla grow setups in remote outdoor locations can be done with minimal equipment. Use camo netting, dig-in pots to blend with surroundings, and avoid attracting attention with flashy grow gear.
✅ Key Takeaways:
- Build a low-cost cannabis grow setup using recycled containers and local materials.
- Use manual watering, mulch, and DIY shade setups to cut expenses.
- Start with affordable feminized seeds or clones bred for outdoor growing.
- Try guerrilla growing methods for stealthy, budget-friendly cultivation.
🧪 Monitoring and Maintenance for Outdoor Grow Success
Once your outdoor cannabis plants are established, ongoing monitoring and maintenance are key to keeping them healthy, productive, and pest-free. While nature does a lot of the work in outdoor grows, staying hands-on with regular checks helps catch small problems before they become big ones.
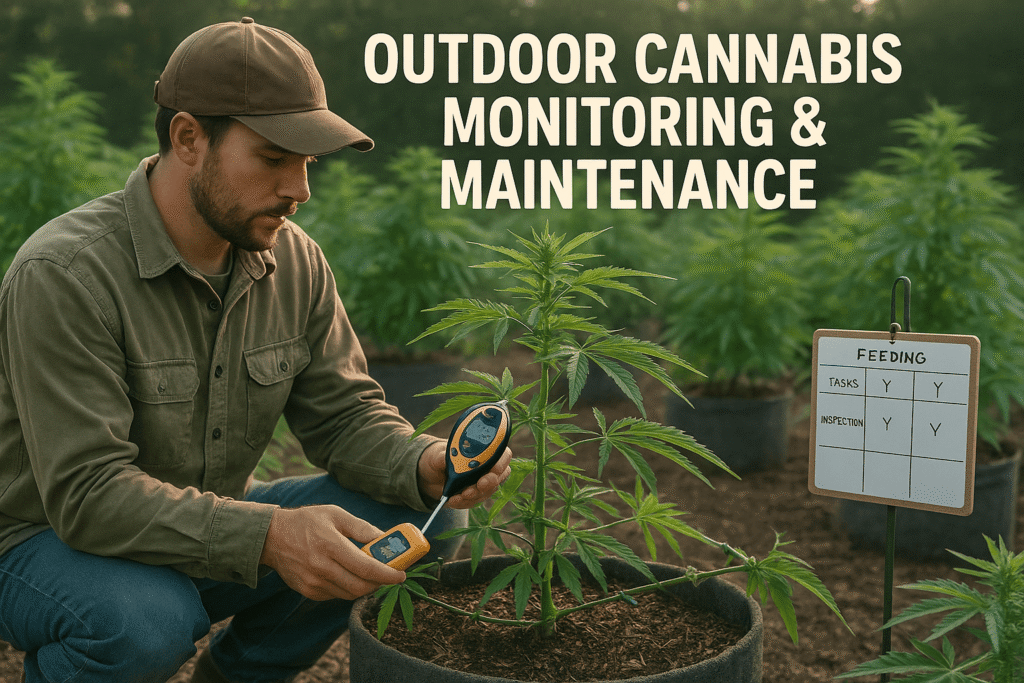
🌡️ Use Tools to Track Grow Conditions
Invest in basic tools like a soil pH meter, moisture meter, and thermometer/hygrometer combo. These help you monitor critical environmental factors like pH, humidity, and temperature, all of which affect nutrient uptake and plant health. Cannabis prefers slightly acidic soil (pH 6.0–6.8), and too much or too little moisture can lead to root issues.
✂️ Pruning, Topping, and Training
To manage plant size, encourage airflow, and boost bud development, use training techniques like:
- Pruning lower growth for better airflow
- Topping or FIMing to create bushier plants
- Low-Stress Training (LST) or SCROG to increase light penetration
These techniques are especially important in outdoor grows, where space is less limited and plants can grow very large if not maintained.
📆 Feeding and Inspection Schedule
Create a regular inspection routine—ideally every 1–2 days during peak growth. Look under leaves for pests, check for signs of nutrient deficiency (yellowing, curling, spots), and examine soil moisture. Follow a feeding schedule based on the plant’s lifecycle (vegetative vs flowering), using organic nutrients when needed.
🧩 Adapt and Adjust
Be flexible. Outdoor conditions change fast. Storms, heat waves, or pest invasions can disrupt growth. Successful growers adjust feeding, watering, and protection strategies in real time to stay ahead of these challenges.
✅ Key Takeaways:
- Monitor with tools like pH meters, moisture meters, and thermometers
- Practice pruning, topping, and LST for airflow and structure
- Maintain a consistent inspection and feeding schedule
- Be ready to adapt to changing weather or pest conditions
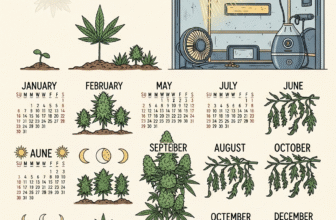
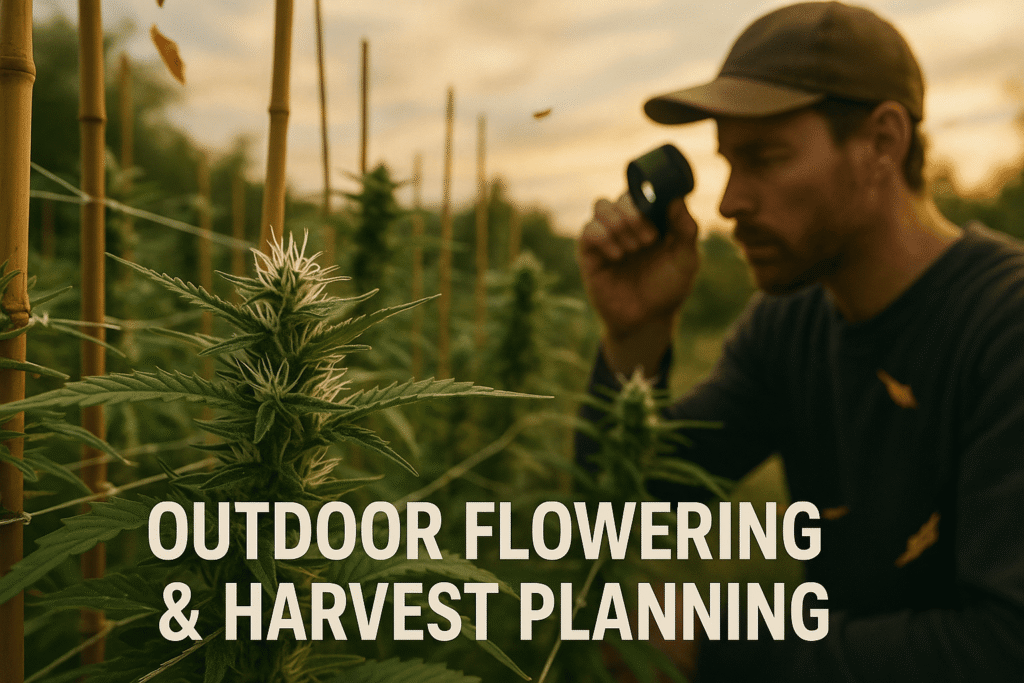
🔁 Transitioning to Flowering and Harvest Planning
As your outdoor cannabis plants mature, they’ll naturally shift from vegetative growth to flowering stage, triggered by shortening daylight hours—typically in late summer. Understanding this transition and planning your harvest correctly is essential for maximizing yields and potency.
🌼 Recognizing the Pre-Flower Stage
The first signs of the flowering phase appear as tiny white pistils or hairs at the nodes (where leaves meet the stem). This pre-flower stage usually begins 1–2 weeks after daylight hours drop below 14. It’s also when your plant’s energy shifts toward bud development, so adjust your care routine accordingly.
Key signals include:
- Slower upward growth
- Appearance of pistils (female plants)
- Tighter node spacing
💧 Shift Nutrients for Flowering
During this stage, switch from nitrogen-rich fertilizers to phosphorus and potassium-heavy bloom nutrients. This supports resin production, bud size, and flower density. Many growers use organic bloom boosters like bat guano, seaweed extract, or molasses.
✂️ Final Pruning and Support
Before full flowering begins, do a final round of light pruning to remove unnecessary lower leaves and small branches. Install trellis netting, bamboo stakes, or tomato cages to support heavy colas as they develop.
🗓️ Planning the Harvest
Outdoor cannabis is typically ready to harvest between late September and mid-October, depending on strain and local climate. Watch for:
- 70–90% of pistils turning amber
- Trichomes turning cloudy or milky
- Aroma intensifying
Use a magnifying loupe or microscope to check trichome maturity, which is the most accurate way to time your harvest.
🌦️ Weather Awareness
Watch weather forecasts closely as harvest nears—cold nights and rain can trigger mold or bud rot. If a storm is coming, consider harvesting a bit early or providing cover.
✅ Key Takeaways:
- Watch for pre-flower signs like pistils and slowed vertical growth
- Switch to flowering nutrients high in phosphorus and potassium
- Provide plant support as buds gain weight
- Monitor trichome maturity and pistil color to plan harvest
- Protect plants from harvest-time rain and cold snaps
❓ FAQs
The most affordable outdoor grow setup involves recycled containers, DIY soil mixes, and manual watering. Use old buckets or fabric grow bags with drilled drainage holes, and amend native soil with compost and perlite. Skip the expensive gear and stick with budget feminized seeds or clones.
Cannabis thrives with 6–8 hours of direct sunlight per day, ideally from a south-facing location. The more sunlight, the better the bud development—especially during the flowering stage.
Both options work, but it depends on your goals:
1. Fabric pots offer great drainage and root oxygenation.
2. In-ground planting is cost-effective and ideal for guerrilla grows.
3. Raised beds combine the best of both—deep root zones and soil control.
Use organic living soil rich in compost, worm castings, and perlite. Whether store-bought or homemade, it should support microbial life, retain moisture, and maintain a pH of 6.0–6.8.
Yes, excessive rain can lead to bud rot, mildew, and root damage. Prevent this by using breathable pots with good drainage, installing temporary covers, or moving plants under shelter during storms.
Outdoor flowering is triggered by shortening daylight hours, typically starting in late summer (August in the Northern Hemisphere). You’ll notice pistils forming and growth slowing as the plant shifts focus to bud production.
The sweet spot is 70–85°F (21–29°C) during the day and no lower than 50°F (10°C) at night. Too much heat or cold can stress your plants, reduce yield, or delay flowering.
Most outdoor grows are ready between late September and mid-October. Harvest when trichomes turn cloudy or amber, and 70–90% of pistils darken. A magnifying loupe helps with accurate timing.
Conclusion
Creating the best outdoor grow setup doesn’t have to be expensive or complicated. With the right balance of sunlight, soil, watering, and protection, your cannabis plants can thrive in a natural environment—and reward you with potent, high-yield buds. Whether you’re using raised beds, fabric pots, or in-ground setups, tailoring your grow to your specific climate and budget is the key to success.
Remember, the most successful outdoor cannabis gardens are built on observation, adaptation, and consistency. Start small, keep learning, and upgrade as you grow.
👉 New to this? Don’t forget to read our complete beginner’s guide to growing weed outdoors for a full walkthrough from seed to harvest. “If you’re new to outdoor cultivation, check out our complete guide on growing weed outdoors for a step-by-step overview from seed to harvest.”
“For the best start, choose the right seedling soil. Learn more in our guide on best soil for cannabis seedlings.”
“Using containers? Discover how to optimize yields by growing weed in 5-gallon pots outside.”
“Strain selection matters. Here are our top picks for the best feminized seeds for outdoor growing.”
“Don’t let your plants dry out. Learn how to spot and fix underwatered weed plants.”