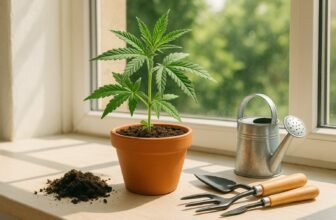
If you’re looking to grow cannabis the natural way, growing organic pot outdoors is one of the most rewarding methods. Not only does it eliminate the need for synthetic fertilizers and pesticides, but it also allows your plants to thrive in harmony with nature. The result? Cleaner buds, richer flavors, and a more environmentally friendly harvest.
In this complete beginner’s guide, you’ll learn how to cultivate chemical-free marijuana from seed to harvest using organic techniques. From preparing living soil to choosing the best outdoor strains and using natural pest control methods, we’ll walk you through each stage of the organic grow cycle.
Whether you’re new to cannabis cultivation or transitioning from synthetic methods, this guide will equip you with the knowledge and confidence to grow high-quality organic cannabis in your own backyard. You’ll also discover why many growers believe that organically grown weed offers superior aroma, potency, and overall smoking experience.
Let’s dive into the world of organic weed cultivation—where clean soil, fresh air, and sunlight come together to produce some of the purest cannabis on earth.
What Is Organic Pot?
Organic pot, also known as organic cannabis, refers to marijuana that is grown without synthetic fertilizers, pesticides, herbicides, or genetically modified organisms (GMOs). Instead, it’s cultivated using natural processes that promote biodiversity, soil health, and long-term sustainability.
In an organic setup, everything—from the soil to the nutrients—is derived from natural sources. This means using living soil, compost, and microbial life to feed the plant rather than bottled chemicals. As a result, the plant develops in a balanced, nutrient-rich environment, leading to more flavorful, terpene-rich, and chemical-free weed.
One of the most frequently asked questions is: what makes weed organic? The answer lies not only in the absence of synthetic inputs but also in how the growing process supports ecological balance. Organic growing methods focus on building a healthy soil ecosystem, reducing environmental impact, and producing a cleaner end product.
It’s also a common myth that natural marijuana growing results in lower yields. While synthetic systems may deliver faster results, organic grows often produce cannabis with higher quality in terms of taste, aroma, and smoking experience. Plus, you get peace of mind knowing your weed is free from harmful chemical residues.
In short, organic pot isn’t just about what you exclude—it’s about nurturing your plants through regenerative, soil-focused practices that benefit both the grower and the planet.
Choosing the Right Organic Cannabis Strain
Selecting the right strain is one of the most important decisions in organic cannabis cultivation, especially for outdoor growing. Not every strain is built to thrive in a chemical-free environment, so it’s essential to choose genetics that naturally perform well under organic conditions.
Look for Resilient Outdoor Cannabis Genetics
When growing organically, you won’t be using synthetic boosters or chemical pesticides, so you need strains that are:
- Mold and pest resistant
- Able to thrive in natural soil ecosystems
- Adaptable to your local climate and daylight cycle
Many experienced growers recommend landrace strains or heirloom cannabis genetics, which evolved in the wild and are naturally hardy—making them ideal for organic weed gardens.
Autoflowering vs. Photoperiod: Which Is Better for Organic Growing?
Autoflowering strains are beginner-friendly, with short grow cycles and no need to adjust light schedules. They’re perfect for low-maintenance outdoor organic grows, especially in regions with shorter summers.
Photoperiod strains, while requiring more care and time, often yield larger harvests and can develop a more complex terpene profile—especially when grown in nutrient-rich, living soil.
Where to Get Organic Weed Seeds
Look for seed banks that specialize in organic cannabis seeds, especially those labeled as non-GMO or suited for outdoor cultivation. Some breeders also test their strains under organic growing conditions, which can give you a head start. If your goal is to grow high-quality buds without synthetic input, prioritize genetics with a reputation for thriving in organic, outdoor environments. Strains like Northern Lights, Blue Dream, and Sour Diesel are often recommended for natural setups because of their resilience and adaptability.
By starting with the right organic cannabis strain, you’re setting your grow up for success—ensuring healthy plants, flavorful buds, and a harvest that’s as natural as it is potent.
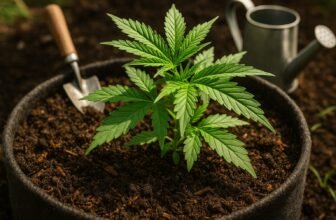
Building Healthy Organic Soil
At the heart of organic cannabis cultivation is one critical element: the soil. In organic growing, your soil isn’t just a growing medium—it’s a living ecosystem. Known as living soil, this rich, biologically active environment provides everything your cannabis plant needs, naturally and sustainably.
What Is Living Soil?
Living soil for cannabis is full of beneficial microorganisms like fungi, bacteria, nematodes, and earthworms that work symbiotically with your plants. Instead of relying on synthetic nutrients, your cannabis absorbs its food through the biological interactions in the soil food web. These microbes break down organic matter into plant-available nutrients, creating a self-sustaining system—key to regenerative cannabis farming.
Basic Living Soil Recipe (Organic Weed Grower’s Blend)
To create your own organic soil mix, start with the following base:
- Base soil: 1 part organic compost, 1 part coco coir or peat moss, 1 part aeration material (perlite or pumice)
- Nutrient amendments:
- Worm castings (rich in nitrogen and microbes)
- Bat guano or fish meal (for phosphorus and micronutrients)
- Kelp meal (potassium and trace minerals)
- Alfalfa meal (growth stimulant)
- Crustacean meal (calcium, chitin to boost plant immunity)
- Optional enhancers:
- Mycorrhizal fungi inoculants
- Biochar for water and nutrient retention
This living soil recipe for cannabis provides a complete, balanced foundation that feeds your plants throughout their entire lifecycle—especially when supported with occasional top-dressing and compost teas.
Tips for Maintaining Healthy Organic Soil
Over time, your soil becomes richer, stronger, and more resilient—allowing you to grow more potent and aromatic buds naturally, season after season. Healthy, balanced organic soil for weed is your greatest asset in achieving a vibrant, pesticide-free, and sustainable grow. Invest in it early, and your plants will thank you with every trichome-coated bud.
- Avoid tilling – this disrupts microbial networks and fungal hyphae.
- Apply mulch – use straw, shredded leaves, or wood chips to retain moisture and feed the topsoil.
- Let soil rest between grows – or plant cover crops like clover to replenish nitrogen.
- Reamend and reuse – instead of tossing old soil, rejuvenate it with more compost and organic amendments.
Nutrient Management Without Chemicals
Feeding your plants during the flowering and vegetative stages is crucial, but in organic cannabis cultivation, this means avoiding synthetic bottled nutrients and instead relying on natural, slow-release fertilizers. When managed properly, organic feeding can produce more flavorful buds and stronger terpene profiles, while keeping your grow chemical-free.
Use Organic Nutrients and Natural Amendments
Here are common organic nutrients for weed that support plant health and development:
- Compost teas: Brewed from compost, worm castings, and molasses, these teas are full of beneficial microbes and soluble nutrients. Use as a foliar spray or soil drench to boost microbial life and nutrient availability.
- Fish emulsion: A powerful nitrogen source for the vegetative stage, promoting lush green growth.
- Kelp meal or seaweed extract: Contains trace minerals and natural hormones that help plants resist stress and stimulate root growth.
- Bone meal and bat guano: Rich in phosphorus and calcium, ideal for the flowering stage of organic cannabis.
- Alfalfa meal: Contains natural growth hormones and micronutrients to promote vigorous development.
These inputs are slow-releasing and support long-term plant health through improved soil biology, making them perfect for natural marijuana feeding schedules.
Creating a Simple Organic Feeding Schedule
A consistent, observation-based feeding schedule for organic cannabis helps maintain plant vitality without risking overfeeding or nutrient burn. Here’s a basic guideline:
| Growth Stage | Feeding Strategy |
|---|---|
| Seedling Stage | Plain water or diluted compost tea (optional) |
| Vegetative Stage | Add nitrogen-rich amendments (e.g., worm castings, fish emulsion) every 2–3 weeks |
| Flowering Stage | Top-dress with phosphorus-rich materials (bone meal, guano) + kelp meal |
| Late Flowering | Reduce all feedings and prepare for flushing with plain water |
Always observe your plants—yellowing leaves, curling, or stunted growth can signal deficiencies. But unlike synthetic grows, your organic garden will usually recover well with small, gradual adjustments.
Avoid Common Mistakes
- Don’t over-apply even organic nutrients—excessive feeding can disrupt soil biology.
- Never use synthetic boosters—these kill beneficial microbes and defeat the purpose of growing organic.
- Use pH-balanced water (6.0–7.0) to support microbial activity and nutrient uptake.
Proper nutrient management without chemicals not only promotes healthier plants and higher cannabinoid levels, but also ensures your final product is clean, safe, and flavorful. With time and experience, you’ll learn to “read your plants” and feed them exactly what they need—naturally.
Pest & Disease Control the Organic Way
When growing organic cannabis outdoors, managing pests and diseases naturally is essential. Without chemical pesticides or fungicides, you need a proactive strategy to protect your plants while preserving the health of your living soil and beneficial microbes. This is where Integrated Pest Management (IPM) becomes your best friend—a sustainable approach that uses observation, prevention, and natural treatments to control harmful insects and diseases in your garden.
3 Preventive Strategies for Organic Pest Control
The key to chemical-free cannabis pest control is prevention. These natural techniques can greatly reduce pest infestations before they even begin:
- Companion Planting for Cannabis: Grow plants like basil, marigold, dill, or lavender around your cannabis. These act as pest repellents or attract beneficial insects like ladybugs, which feed on aphids and mites.
- Proper Spacing and Airflow: Crowded plants are more prone to mold and mildew. Give each plant room to breathe, especially in humid climates.
- Mulching and Soil Health: Healthy soil promotes vigorous plant growth, helping your cannabis resist stress and disease naturally. Mulch also prevents soil-borne pathogens from splashing onto leaves.
Natural Remedies for Weed Pests
If pests appear, don’t panic—there are many safe, effective organic pest control methods for cannabis growers:
- Neem Oil Spray: A go-to for many organic growers, neem oil is antifungal and insecticidal. Mix with water and apply at dusk to avoid leaf burn. It works against aphids, whiteflies, spider mites, and more.
- Insecticidal Soap: Made from fatty acids, this spray suffocates soft-bodied insects without harming beneficial predators or the plant.
- Essential Oil Blends: Peppermint, rosemary, and clove oil sprays can deter many cannabis pests. Always test a small area first before full application.
Biological Controls:
- Release beneficial insects like:
- Ladybugs (eat aphids, thrips)
- Lacewings (consume whiteflies and caterpillars)
- Predatory mites (target spider mites)
Managing Common Cannabis Diseases Organically
- Powdery Mildew: Improve airflow, avoid overhead watering, and use diluted milk sprays or potassium bicarbonate solutions.
- Bud Rot (Botrytis): Prevent by pruning lower branches, keeping humidity low during flowering, and harvesting at the right time.
- Fungal Root Rot: Avoid overwatering, and improve drainage. Use compost teas to boost root-zone microbes.
By using organic disease control practices and a strong preventive approach, you can maintain healthy plants without resorting to toxic chemicals. A balanced, living garden not only produces potent, terpene-rich buds—it also becomes more self-sustaining over time. With the right strategy, natural pest control for cannabis becomes a manageable, even empowering part of your organic grow journey.
Watering Practices in Organic Growing
Proper watering is one of the most overlooked yet vital aspects of organic cannabis cultivation. In the absence of synthetic fertilizers and chemical root stimulants, water becomes a key player in maintaining soil health, supporting microbial life, and delivering nutrients effectively. When done right, a consistent organic watering schedule helps your plants thrive from seedling to harvest.
Use Clean, Microbe-Friendly Water
For organic gardens, it’s important to avoid water sources that harm beneficial soil organisms. Chlorine and chloramine in tap water can disrupt the delicate balance in your living soil.
Best water for cannabis:
- Rainwater (ideal for organic grows)
- Dechlorinated tap water (let it sit 24–48 hrs to off-gas chlorine)
- Filtered water (especially if using municipal supplies with heavy treatment)
How Often to Water Cannabis Outdoors
A general rule of thumb in watering cannabis outdoors is: Water deeply and less frequently. This encourages deeper root growth and healthier plants. Let the top inch or two of soil dry out before watering again.
Here’s a simple way to test: Stick your finger into the soil up to your second knuckle. If it’s dry, it’s time to water.
| Stage | Watering Frequency | Notes |
|---|---|---|
| Seedling | Light watering every 1–2 days | Use a spray bottle or gentle trickle |
| Vegetative | Deep watering every 2–3 days | Increase as plants grow larger |
| Flowering | Deep watering every 3–4 days | Monitor humidity to prevent bud rot |
| Late Flowering | Water less to avoid mold, prepare for flushing | Let soil dry more deeply between waterings |
Use Mulch for Moisture Control
Applying mulch (like straw, dried leaves, or shredded bark) around the base of your cannabis plants helps:
- Retain soil moisture (reduces watering frequency)
- Prevent weed growth (less competition for nutrients)
- Protect microbial life from sun and wind exposure
Mulching is a must-have technique in organic marijuana gardening, especially in hot, dry climates.
Signs You’re Overwatering
Even organic growers can overdo it. Watch out for:
- Drooping leaves (especially when soil is wet)
- Slow growth or yellowing lower leaves
- Fungus gnats or sour-smelling soil
Letting the soil breathe between waterings keeps oxygen flowing to the roots—essential for healthy cannabis growth without chemicals. In short, watering techniques for marijuana in organic systems go hand-in-hand with soil care. Use clean water, water deeply and infrequently, and mulch smartly. When your plants receive just the right amount of hydration, your organic garden will reward you with lush growth and resin-rich buds.
Monitoring Plant Health Organically
In organic cultivation, your eyes are your best tool. Since you’re not relying on chemical quick fixes or digital nutrient meters, it’s essential to understand how to monitor weed plant health naturally by reading physical and environmental cues. By observing daily changes, you can prevent small issues from becoming major problems—and keep your plants thriving.
Read the Plant: Natural Signs of Cannabis Stress
Healthy organic cannabis plants have upright leaves, vibrant green color, and steady vertical growth. When something’s off, your plant will signal distress through visible changes. Some of the most common organic cannabis plant problems include:
| Symptom | Possible Cause | Organic Fix |
|---|---|---|
| Pale or yellowing lower leaves | Nitrogen deficiency | Top-dress with worm castings or compost |
| Brown spots or rust on leaves | Calcium or magnesium deficiency | Add dolomite lime or crushed eggshells |
| Drooping or curling leaves | Overwatering or underwatering | Adjust watering schedule; check soil moisture |
| Purple stems or slow growth | Phosphorus deficiency or cold stress | Use bone meal or fish bone meal |
| White powder on leaves | Powdery mildew | Apply neem oil or potassium bicarbonate spray |
These natural signs of cannabis stress are easy to correct if caught early—and you won’t need synthetic inputs to solve them.
Environmental Monitoring for Organic Grows
Keeping tabs on your outdoor grow environment is equally important:
- Temperature: Cannabis thrives in 65–80°F (18–27°C). Excessive heat or cold can cause stress, leaf curl, or nutrient lockout.
- Humidity: Aim for 40–60% relative humidity during flowering. Higher levels may cause mold or mildew.
- Airflow: Promote air circulation by spacing plants properly and pruning lower branches—this prevents fungal outbreaks.
Using basic tools like a thermometer, hygrometer, and your own observation, you can create a stable organic growing environment without the need for synthetic climate control systems.
Trust the Organic Process
Organic cannabis cultivation teaches patience and attentiveness. Don’t panic if a few leaves yellow or your plant hits a temporary growth plateau. Often, small stress events will pass as your plant self-adjusts with the help of living soil biology. If you must intervene, choose natural cannabis troubleshooting methods like compost teas, foliar sprays with kelp or aloe, or rebalancing soil with organic amendments.
By consistently observing your plants and reacting with natural, soil-friendly solutions, you’ll develop a deep understanding of how to keep your organic weed garden healthy. It’s not just farming—it’s building a relationship with your plant and its environment.
Harvesting and Curing Organic Buds
After months of nurturing your plants with living soil, organic nutrients, and natural care, it’s finally time for the most rewarding part of the process: harvesting and curing your organic weed. Doing this correctly ensures your buds retain their potency, flavor, and terpene profile, all without introducing chemicals during the final steps.
When to Harvest Organic Cannabis
The best time to harvest isn’t based on the calendar—it’s based on plant signals. To ensure maximum cannabinoid content and smooth smoke, monitor both trichome color and pistil development:
- Trichomes: Use a jeweler’s loupe or handheld microscope.
- Clear = too early
- Cloudy = peak THC potency
- Amber = more sedative, calming effects
- Pistils: Wait until 70–90% of the white hairs have darkened and curled inward.
These two signs together indicate the perfect window to harvest organic cannabis with peak flavor and strength.
How to Dry Cannabis Buds Organically
Once harvested, drying is your first post-harvest step. Organic drying methods preserve terpenes and reduce harshness:
- Hang buds upside down in a dark, well-ventilated room at 60–70°F (15–21°C) with 50–60% humidity.
- Ensure good airflow but no direct fans on the buds.
- Drying typically takes 7–10 days. Buds are ready when small stems snap instead of bending.
Avoid rushing this step. Slow drying weed organically retains aroma and minimizes nutrient breakdown.
Curing Organic Weed for Flavor and Smoothness
Curing is where the magic happens. It enhances aroma, smooths out the smoke, and locks in the terpene profile of organic buds.
- Place dried buds in airtight glass jars, filling them about 70–80% full.
- Store in a cool, dark place (60–65°F).
- For the first 2 weeks, burp the jars daily for 10–15 minutes to release moisture and refresh air.
- Continue curing for 3–6 weeks for best results. Some connoisseurs cure for up to 3 months.
Well-cured organic cannabis buds should be sticky, aromatic, and burn evenly without crackling—signs that your product is free from excess nutrients and chemicals.
Properly harvesting and curing organic weed takes time and patience, but the reward is cannabis that’s smooth, flavorful, and rich in cannabinoids—exactly what you’d expect from a pure, chemical-free grow.
FAQs
The flowering stage of cannabis typically lasts 8 to 10 weeks, depending on the strain. Indica-dominant plants usually flower in 7–9 weeks, while sativa-dominant strains can take 10–12 weeks. Outdoor conditions like sunlight hours and temperature also affect flowering duration.
Flushing involves giving your plants only clean water to help remove built-up nutrients before harvest. In organic cannabis cultivation, flushing isn’t always necessary—especially if you’ve been using balanced, natural inputs. However, some growers still perform a light flush 1–2 weeks before harvest to enhance flavor and smoothness, particularly if they’ve added heavy organic amendments late in flowering.
Use a magnifying tool to inspect the trichomes on your buds. These tiny, mushroom-shaped resin glands should change from clear to milky/cloudy for peak THC potency. If you’re looking for a more relaxing, sedative effect, wait until some trichomes turn amber. Monitoring trichome maturity is one of the most accurate ways to time your cannabis harvest.
Besides checking trichomes, look at the pistils (hairs). When 70–90% of pistils have darkened and curled in, it’s a strong visual cue that the buds are mature. Buds should also feel dense, sticky, and emit a strong aroma. These are all key signs of harvest readiness in marijuana.
Yes! You don’t need anything fancy to cure weed organically. Just use clean glass jars with airtight lids. Keep them in a cool, dark place and “burp” the jars daily for the first two weeks to release moisture. This natural curing method improves flavor, aroma, and smoothness without the need for synthetic chemicals or tools.
Conclusion
Learning how to grow organic pot outdoors is not just about cultivating cannabis—it’s about embracing a sustainable, regenerative, and chemical-free approach to the plant. From preparing living soil to using natural pest control, and from observing trichomes to harvesting organic buds, every step is rooted in respect for the plant, the environment, and your health.
One of the greatest advantages of growing weed outdoors is that nature does much of the heavy lifting for you. With access to natural sunlight, fresh air, and the rhythms of the seasons, your cannabis plants can thrive without synthetic inputs—yielding buds that are more flavorful, aromatic, and free of harmful residues. Plus, outdoor growing reduces energy consumption and supports sustainable cannabis cultivation practices.
By choosing organic cannabis gardening, you’re producing clean medicine for yourself or your community while improving soil health, preserving beneficial insects, and reducing your ecological footprint.
🌱 Key Takeaways:
- Organic weed is grown without synthetic fertilizers or pesticides.
- Outdoor growing offers a low-cost, high-reward path to natural cultivation.
- Living soil and compost-based nutrients support healthier, more resilient plants.
- Proper observation and natural cannabis care can prevent most issues without chemicals.
- Flushing, harvesting, and curing organically ensures purity from seed to stash.
✅ Ready to Put This Into Practice?
Kickstart your organic outdoor cannabis grow with our easy-to-follow checklist!
📋 Download the Free Organic Grower’s Checklist to:
- Track each phase of your grow—from seed to harvest
- Stay on top of feeding, watering, and pest prevention—naturally
- Make sure your plants get everything they need without synthetic chemicals
- Avoid common beginner mistakes using organic-friendly practices
- Grow clean, terpene-rich buds with confidence