How to Grow Hydro Weed Plants Indoors: Complete Hydroponic Cannabis Setup Guide
Growing hydro weed indoors has become one of the most rewarding and efficient ways to cultivate cannabis. Instead of relying on soil, hydroponic systems use nutrient-rich water to feed your plants directly — resulting in faster growth, bigger yields, and cleaner buds. Whether you’re an experienced grower looking to level up your setup or a beginner curious about the hydroponic method, this guide will walk you through everything you need to know.
Unlike traditional soil growing, hydroponics gives you complete control over nutrients, pH levels, and water delivery. This means you can fine-tune your environment to produce top-quality cannabis with stronger aromas, more resin, and healthier roots. And because hydro systems are cleaner and more water-efficient, they’re ideal for indoor growing setups where space, airflow, and precision matter.
To grow hydro weed plants indoors, start by setting up a hydroponic system like Deep Water Culture (DWC) or Ebb and Flow in a reflective grow tent with LED grow lights. Germinate cannabis seeds in rockwool cubes, then transplant them into net pots filled with clay pebbles above an oxygenated nutrient reservoir. Maintain water pH between 5.5–6.2 and EC between 1.0–2.0, adjusting nutrients as plants move from vegetative to flowering stages. Keep temperatures near 75°F (24°C), humidity between 40–60%, and ensure constant airflow. Regularly flush and replace the nutrient solution to prevent salt buildup. With the right lighting, feeding, and environment, hydro weed grows faster and yields more potent buds than soil-grown cannabis.
In this complete guide, we’ll explore the best hydroponic systems for weed, how to set up your grow space, maintain ideal lighting, pH, and nutrients, and avoid common mistakes like root rot or nutrient burn. By the end, you’ll know exactly how to build a thriving indoor hydro weed garden — from germination to harvest.
🌱 What You Need to Grow Hydro Weed Indoors
Before diving into your first hydro grow, you’ll need to gather the right equipment and supplies. A solid setup makes all the difference between struggling plants and a thriving cannabis garden with explosive growth and thick, resinous buds.
Hydroponic weed growing is all about control and consistency — your plants depend on you for water, nutrients, oxygen, and light. So let’s break down what every indoor hydro grower needs to get started.
🧰 Essential Hydroponic Setup Equipment
- Hydroponic System: The heart of your grow. Most beginners start with a Deep Water Culture (DWC) or Ebb & Flow system, as they’re simple, reliable, and efficient for small to mid-sized indoor spaces.
- Water Reservoir & Air Pump: Your plants’ roots will live here, so clean water and oxygenation are key. Use an air stone and air pump to keep the nutrient solution bubbling and rich with oxygen.
- Net Pots & Grow Medium: Instead of soil, hydro growers use mediums like clay pebbles (Hydroton), rockwool cubes, or coco coir. These support the plant and hold moisture while allowing roots to breathe.
- Grow Tent or Grow Room: A reflective grow tent helps contain light, humidity, and odor — while keeping pests out. Choose one with Mylar walls for better light reflection.
💡 Lighting Setup
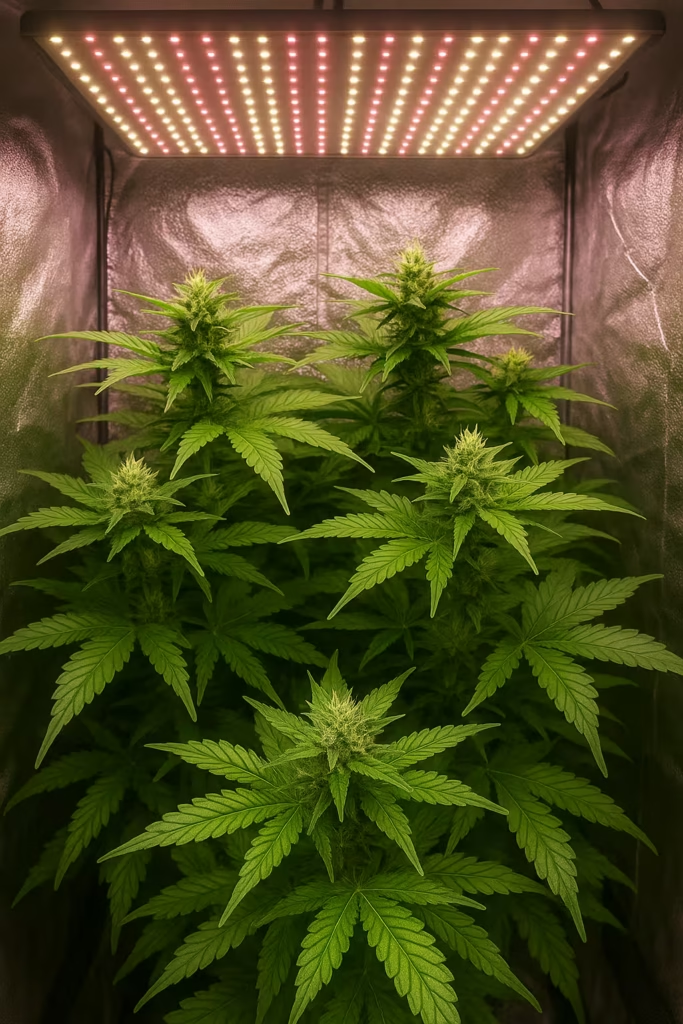
Lighting is one of the most critical parts of an indoor hydro setup. Cannabis thrives under full-spectrum LED grow lights, which mimic natural sunlight. LEDs are energy-efficient, run cool, and produce dense, resin-heavy buds.
For best results:
- Use 18 hours of light and 6 hours of darkness during the vegetative stage.
- Switch to 12/12 for the flowering stage to trigger bud production.
- Keep lights about 12–18 inches above the canopy to avoid light burn.
🌡️ Environmental Controls
Maintaining the right environment is just as important as nutrients.
- Temperature: Keep between 70–85°F (21–29°C) during the day and slightly cooler at night.
- Humidity: 60–70% for seedlings, 40–50% for flowering.
- Air Circulation: Use inline fans and oscillating fans to prevent mold and strengthen stems.
- Carbon Filter: Keeps that classic cannabis smell under control.
🧪 Nutrients and Monitoring Tools
In hydroponics, nutrients are your “soil.” You’ll need a two- or three-part nutrient solution formulated for cannabis — containing Nitrogen (N), Phosphorus (P), and Potassium (K), plus trace elements like calcium, magnesium, and iron.
To stay dialed in:
- Use a digital pH meter to keep your water between 5.5–6.2.
- Use an EC/TDS pen to measure nutrient strength (EC 0.8–2.0 depending on growth stage).
- Change your nutrient solution every 7–10 days to avoid salt buildup.
With this equipment, you’re ready to start your hydro journey. Every part — from the air pump to the LED lights — plays a role in creating a perfectly balanced environment where your weed plants can grow faster, stronger, and more potent than ever.
💧 Choosing the Right Hydroponic System for Your Weed Plants
When it comes to growing hydro weed indoors, the type of hydroponic system you choose can make or break your grow. Each setup delivers nutrients and oxygen differently, and your choice will depend on how hands-on you want to be, how much space you have, and your budget.

As a cannabis gardener, you’ll quickly learn that there’s no one-size-fits-all solution — but some systems are far easier for beginners than others. Let’s explore the most popular hydroponic systems for indoor cannabis cultivation and what makes each one unique.
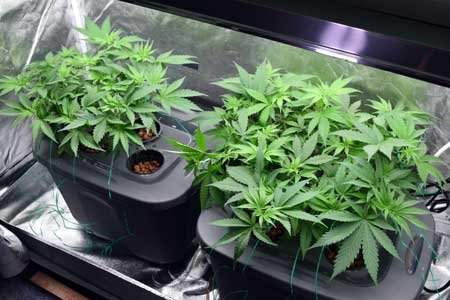
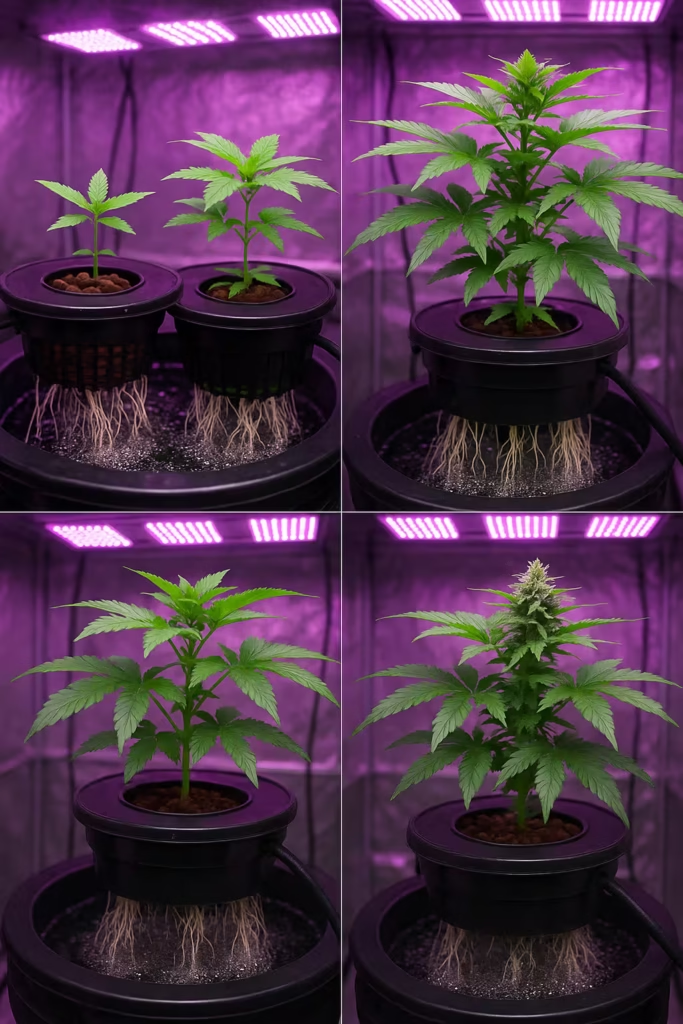
🪣 1. Deep Water Culture (DWC) — The Best for Beginners
If you’re new to hydroponics, DWC is hands-down the easiest way to grow healthy, fast-growing cannabis plants. In this system, your weed plants sit in net pots above a nutrient-rich water reservoir. An air stone and pump keep the solution oxygenated, preventing root rot and encouraging explosive root growth.
Why growers love it:
- Super simple setup — just buckets, water, and bubbles.
- Roots stay constantly fed and hydrated.
- Low maintenance once pH and EC are balanced.
Best for: Small home grows, first-time hydro growers, or anyone who loves a straightforward system.
🌊 2. Ebb and Flow (Flood and Drain) — Great for Medium Setups
The Ebb and Flow system (also called Flood and Drain) uses a tray that floods the roots with nutrient solution on a timer, then drains it back into a reservoir. This cycle repeats several times a day, keeping the roots moist, oxygenated, and happy.
Why growers love it:
- Excellent for medium-sized grows or multiple plants.
- Allows strong root oxygenation during the drain phase.
- Highly customizable and scalable.
Best for: Growers who want to manage multiple plants while maintaining tight environmental control.
🌿 3. Nutrient Film Technique (NFT) — For Experienced Growers
NFT systems use a constant thin film of nutrient solution flowing through channels that hold your plants. The roots get steady access to nutrients and oxygen, resulting in rapid growth and massive yields when dialed in correctly.
Why growers love it:
- Efficient nutrient use — no standing water.
- Constant feeding equals rapid vegetative growth.
- Great for advanced growers with time to monitor flow and pH.
Best for: Experienced hydro growers looking for precision and high yields.
🌬️ 4. Aeroponics — The Most Advanced System
In an aeroponic system, the roots hang in air and are misted with a nutrient-rich solution. This gives them maximum oxygen and nutrients, creating incredibly fast growth and dense buds. However, aeroponics requires constant maintenance and precision.
Why growers love it:
- The fastest-growing and most high-tech hydro method.
- Outstanding oxygen-to-nutrient ratio.
- Produces top-tier, potent buds.
Best for: Experienced growers ready to invest in automation and monitoring.
⚙️ 5. Wick System — The Simplest Passive Setup
The wick system is simple: nutrients move from the reservoir to the roots using wicks. No pumps, no electricity. It’s low-cost and beginner-friendly, but it’s not ideal for large cannabis plants since it provides slower nutrient delivery.
Why growers love it:
- No moving parts — totally silent and low-maintenance.
- Great for seedlings, clones, or micro-grows.
Best for: Small grows or growers experimenting with hydro for the first time.
🌱 Choosing What Works for You
If you’re new to hydro growing, DWC or Ebb & Flow systems offer the best balance of simplicity and performance. As you gain experience, you can explore NFT or aeroponic systems for higher yields and efficiency.
Remember: the best hydroponic system is the one that matches your growing goals, budget, and commitment level. With the right system in place, your cannabis plants will grow faster, stronger, and more flavorful — all from the comfort of your indoor garden.
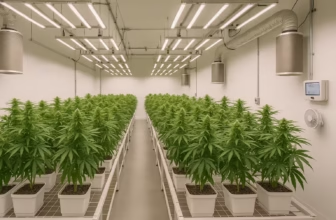
🌿 Setting Up the Indoor Grow Space for Hydro Weed
Now that you’ve picked your hydroponic system, it’s time to build the perfect indoor grow space — the heart of your hydroponic cannabis garden. Think of this as your weed’s home: the better the environment, the better your buds will be. A proper setup keeps your plants healthy, your room efficient, and your yields impressive.
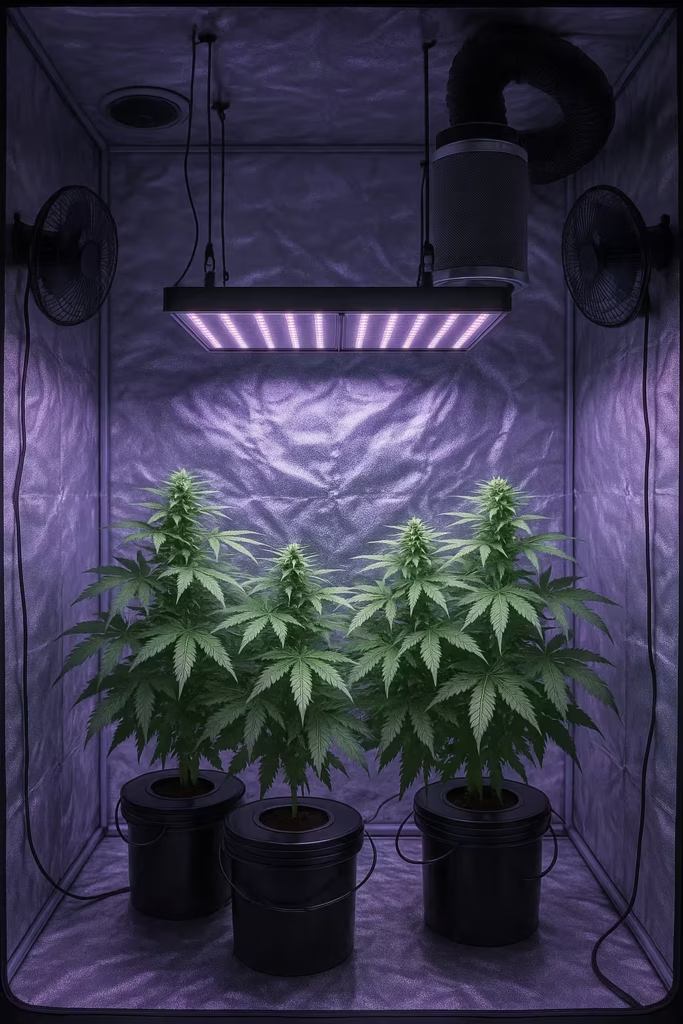
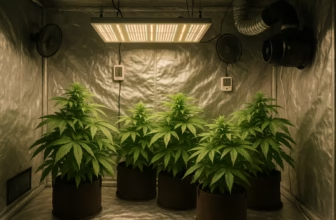
🏠 Designing the Perfect Grow Room or Tent
A grow tent or dedicated grow room helps you control light, temperature, and humidity — the three pillars of indoor growing. Most hydro growers prefer Mylar-lined tents since they reflect up to 90% of the light back onto your plants, helping every bud site get some shine.
When picking your grow tent:
- Start small (2×2 or 3×3 ft) if it’s your first run.
- Choose tents with heavy-duty zippers, built-in vents, and lightproof seams.
- Use plastic trays or floor mats under your hydro buckets to catch spills.
If you’re using a full grow room, line the walls with reflective Mylar or flat white paint to maximize light coverage.
💨 Airflow and Ventilation Setup
Good airflow keeps your plants strong and prevents mold and mildew — the enemy of any hydro grower. Use inline fans for exhaust and oscillating fans for internal circulation. This constant breeze not only strengthens stems but also keeps your humidity stable.
Pro Grower Tips:
- Install an inline fan connected to a carbon filter to remove cannabis odor.
- Place oscillating fans at canopy level for even air movement.
- Keep a thermo-hygrometer inside the tent to track temperature and humidity at a glance.
Target climate:
- Temperature: 70–85°F (21–29°C) during the day, 5–10°F cooler at night.
- Humidity: 65–70% for seedlings, 50–60% for veg, 40–50% for flowering.
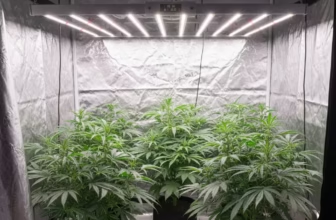
💡 Lighting Placement and Power
Lighting is the engine of your hydro grow. Your plants don’t just need light — they crave the right kind of light. Go for full-spectrum LED grow lights, which give cannabis the ideal balance of blue and red wavelengths.
Lighting tips:
- Hang lights 12–18 inches above the canopy for LEDs.
- Use adjustable ratchet hangers to raise or lower lights as your plants grow.
- During veg, keep lights on for 18 hours a day; switch to 12/12 for flowering.
- Cover dark hours completely — even small light leaks can confuse your plants and cause hermies.
💧 Managing Temperature, Humidity & Air Exchange
Hydroponic cannabis loves stable conditions. Extreme heat or humidity swings can cause nutrient uptake issues or root stress. Use:
- A humidifier/dehumidifier to adjust moisture levels.
- A heater or AC unit if your grow area is too cold or hot.
- Timers and thermostats to automate fan and light cycles for consistency.
Consistency is key — hydro plants grow fast, and environmental changes affect them immediately.
⚡ Power & Safety Considerations
Hydroponic setups use pumps, fans, and lights — all running on electricity near water. Safety comes first!
- Use GFCI outlets to prevent electrical hazards.
- Keep all cords and timers off the ground and away from water.
- Use surge protectors and label every plug (lights, fans, air pumps, etc.).
By now, your indoor hydro grow space should be taking shape — a sealed, reflective, well-ventilated mini-ecosystem that gives your cannabis the perfect environment to flourish. Once your space is dialed in, you’ll be ready to move on to the next stage: germinating your seeds and transplanting them into your hydro setup.
🌱 Germinating and Transplanting into Hydro
Now that your hydro setup is ready, it’s time to bring your cannabis seeds to life. Germination is where your grow truly begins — and getting this stage right sets the tone for your entire harvest. Hydroponic weed growing gives seedlings a clean, oxygen-rich start, but it requires gentle handling and the right medium to avoid transplant shock.
Let’s walk through how to germinate cannabis seeds for hydroponics and safely transplant them into your system.
🌾 Step 1: Germinate Your Cannabis Seeds
You can germinate your seeds using a few proven methods — but for hydro growers, the paper towel method or direct germination in rockwool cubes works best.
Paper towel method:
- Moisten two paper towels (not dripping wet).
- Place seeds between them and set inside a ziplock bag.
- Keep it warm (75–80°F / 24–27°C) and dark for 24–48 hours.
- Once the taproot appears (~½ inch long), it’s ready to transplant into a cube.
Rockwool cube method:
- Soak cubes in pH-adjusted water (around 5.5) for 30 minutes.
- Place one seed in each cube, about ¼ inch deep.
- Keep cubes warm and slightly moist — not soaked.
- Sprouts should appear in 2–5 days.
Pro tip: Avoid touching the taproot; it’s delicate. Use clean tweezers or gloves when handling sprouted seeds.
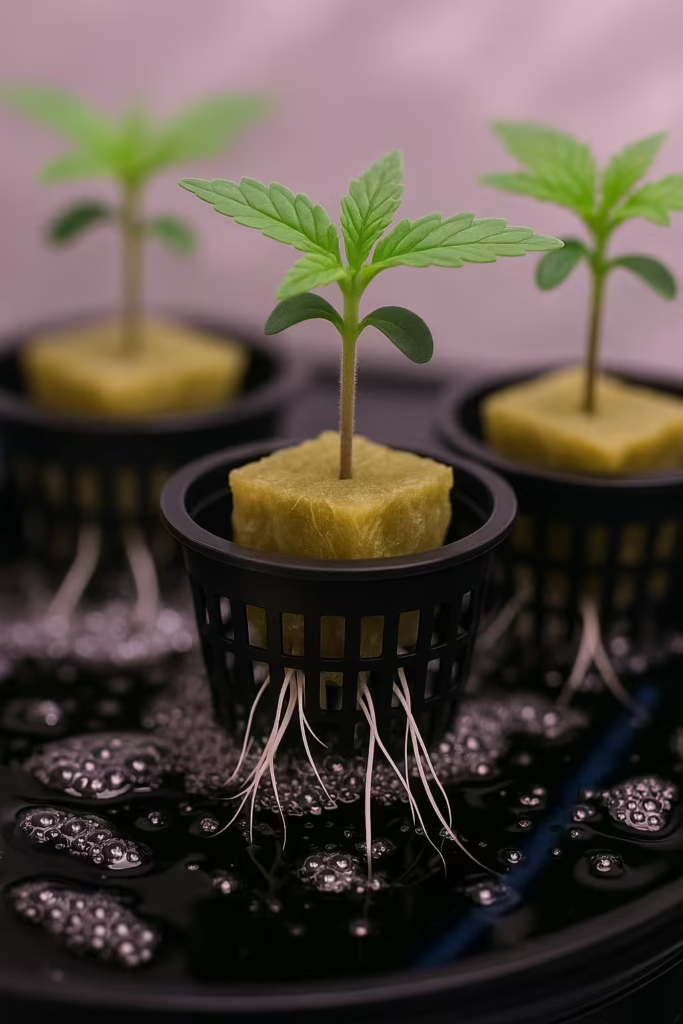
🧱 Step 2: Preparing the Grow Medium and Net Pots
Before transplanting, prepare your net pots and hydro medium. For most hydroponic systems, expanded clay pebbles (Hydroton) are ideal — they hold moisture but allow air to circulate freely around the roots.
How to prepare:
- Rinse your clay pebbles thoroughly to remove dust and residue.
- Fill the bottom half of the net pot with clean pebbles.
- Place your sprouted seedling (in its rockwool cube) in the center.
- Fill around the sides with more pebbles for stability.
Make sure the bottom of the rockwool cube touches the top of your nutrient solution — but not submerged. The bubbles from your air stone should gently mist the cube’s bottom to keep roots moist.
💧 Step 3: Transplanting Seedlings into the Hydro System
Now comes the exciting part — moving your baby cannabis plants into the hydro system!
Steps:
- Ensure your reservoir has a mild nutrient solution (¼ strength) and is pH-balanced (5.8–6.0).
- Turn on your air pump — you should see constant bubbling under the net pots.
- Gently place the net pots into the lid openings.
- Keep the grow lights about 18–24 inches above seedlings to avoid heat stress.
For the first few days, roots will start stretching down toward the oxygenated water. Once they hit the nutrient solution, growth accelerates dramatically — you’ll literally see new leaves daily.
🌿 Step 4: Early Seedling Care and Troubleshooting
During the first week:
- Keep humidity high (65–70%) for fast root development.
- Watch for nutrient burn — if leaf tips turn yellow, dilute your solution.
- Keep lights gentle — full-spectrum LEDs on low power work great for this stage.
- Avoid overhandling; let the roots establish.
Within 10–14 days, you’ll notice white roots poking through the net pots — a sign your plants are ready for stronger nutrients and faster vegetative growth.
💧 Nutrients, pH, and EC Management in Hydro Weed Growing
When growing hydro weed indoors, your plants rely entirely on the nutrient solution you provide — it’s their soil, food, and water all in one. Managing your nutrients, pH, and EC (electrical conductivity) is what separates thriving, resin-packed buds from struggling plants. Hydroponics is all about precision, and once you learn how to balance your feed, you’ll see your cannabis explode with healthy growth.
🌿 Understanding Hydroponic Nutrients for Cannabis
In hydroponics, cannabis needs a complete nutrient solution since there’s no soil to provide minerals. You’ll be using liquid nutrients — usually in a two- or three-part formula like Grow, Micro, and Bloom.
The basics:
- Nitrogen (N): For lush green growth during veg.
- Phosphorus (P): Helps roots and buds develop.
- Potassium (K): Boosts overall plant strength and flower production.
- Micronutrients: Magnesium, calcium, iron, and sulfur support vital plant functions.
Pro grower tip: Stick with reputable hydro brands like Advanced Nutrients, General Hydroponics, or Fox Farm — all designed for cannabis feeding schedules.
⚗️ Mixing the Perfect Nutrient Solution
Mixing your nutrients properly is key to preventing lockouts and deficiencies. Always add nutrients to water, not the other way around.
Step-by-step mixing guide:
- Fill your reservoir with clean, filtered water (ideally RO or distilled).
- Add nutrients one part at a time, stirring between each addition.
- Measure your EC/TDS after mixing — start with 0.6–0.8 EC for seedlings, 1.2–1.6 EC for veg, and up to 2.0 EC in flower.
- Finally, adjust pH to 5.5–6.2 using pH Up or pH Down solutions.
Your goal is to keep your nutrient mix balanced — too strong, and you’ll see burnt leaf tips; too weak, and your plants will show pale leaves or slow growth.
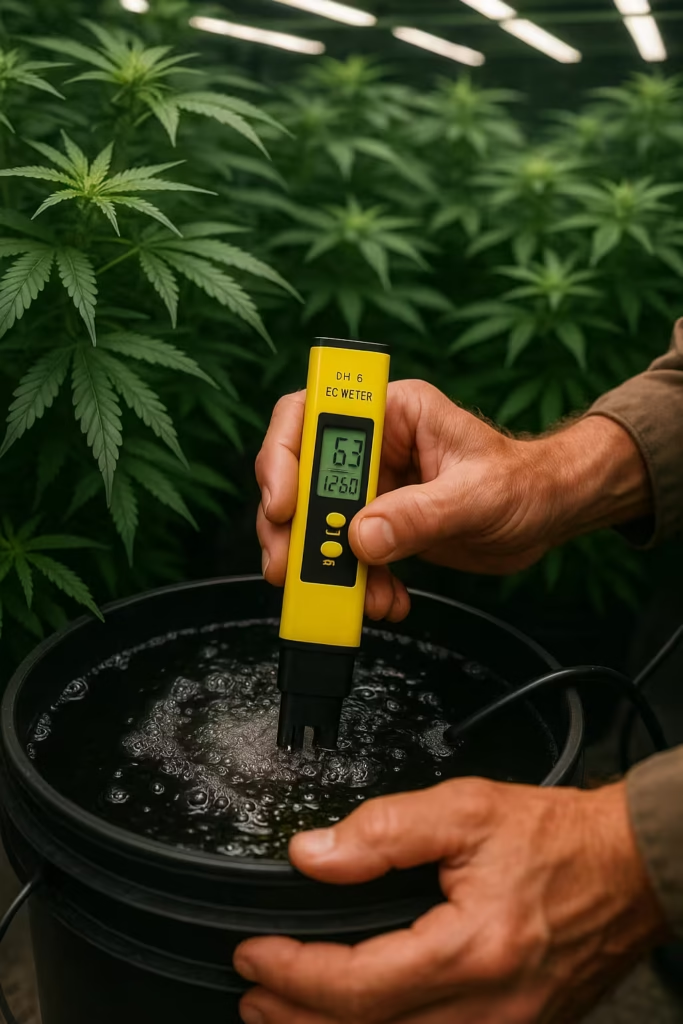
📊 Monitoring pH Levels for Hydro Weed
pH is crucial in hydroponics because it controls how well your plants can absorb nutrients. Cannabis prefers a slightly acidic environment — between 5.5 and 6.2 — where most nutrients are available.
Tips to maintain stable pH:
- Check pH daily with a digital pH meter.
- If it drifts too low or high, adjust in small increments.
- Replace your nutrient solution every 7–10 days to reset balance.
A small daily “pH drift” (about 0.1–0.3) is actually good — it allows different nutrients to become available at different times.
⚡ Managing EC and TDS for Nutrient Strength
EC (Electrical Conductivity) or TDS (Total Dissolved Solids) measures how strong your nutrient mix is. Too high and you’ll burn your roots; too low and your plants will starve.
Recommended EC by stage:
- Seedlings: 0.4–0.8 EC
- Vegetative: 1.0–1.4 EC
- Flowering: 1.6–2.0 EC
- Final Flush: 0.2–0.4 EC (clean water only)
Grower tip: Always observe your plants — they’ll tell you if your mix is too strong. Burnt tips mean too much feed, while light green leaves mean they’re hungry.
🔄 Flushing and Nutrient Change Routine
Over time, salts build up in the reservoir and can cause nutrient lockout. To avoid this:
- Change your reservoir every week to 10 days.
- Rinse equipment and air stones to remove residue.
- Once every few weeks, run plain pH’d water for 24 hours to flush your system.
This reset keeps roots fresh, oxygen flowing, and nutrient uptake efficient.
Keeping your nutrients, pH, and EC balanced is like tuning your grow to perfection. Once you master this, your hydro weed plants will reward you with lush growth, thick stems, and top-shelf buds that burst with aroma and potency.
💡 Lighting for Hydro Weed: Powering Growth and Bud Production
When growing hydro weed indoors, your lighting setup is the engine that drives growth. Since your plants don’t get sunlight, artificial lights must deliver the perfect spectrum, intensity, and timing for every stage of cannabis development. In hydroponics, where growth is faster and more vigorous, light quality and consistency directly determine your yield and bud density.
🌞 Choosing the Right Grow Lights for Hydroponic Cannabis
There are several types of grow lights, but LEDs have become the gold standard for indoor hydro grows. They run cool, save power, and produce a full-spectrum light that mimics the sun — perfect for both veg and bloom.
Popular options:
- Full-Spectrum LEDs: Best balance of efficiency and bud quality. Look for brands like Spider Farmer, Mars Hydro, or Viparspectra.
- HPS (High Pressure Sodium): Great for flowering; produces warm red/orange light but runs hot.
- MH (Metal Halide): Excellent for vegetative stage due to its blue light output.
If you’re a home grower, go with a full-spectrum LED panel — you can grow from seed to harvest without switching lights.
📅 Light Schedule for Each Growth Stage
Your light cycle tells your cannabis when to grow and when to flower. Mimicking natural sunlight patterns ensures your plants stay on track.
Recommended light cycles:
- Seedling Stage: 18–24 hours of light per day (low intensity).
- Vegetative Stage: 18 hours light / 6 hours darkness — encourages fast growth and strong stems.
- Flowering Stage: 12 hours light / 12 hours darkness — triggers bud development.
Always use a digital timer to keep light cycles consistent. Even a few minutes of light during dark hours can stress your plants or cause hermaphrodites.
🔦 Light Distance and Intensity
Finding the sweet spot between your lights and the canopy ensures maximum growth without burning leaves.
General rule for LED grow lights:
- Seedlings: 24–30 inches above canopy.
- Vegetative: 18–24 inches.
- Flowering: 12–18 inches (depending on wattage).
Most modern LED panels list their ideal PPFD (Photosynthetic Photon Flux Density) range — aim for:
- Veg: 400–600 µmol/m²/s
- Flower: 700–1000 µmol/m²/s
Watch your plants closely: if leaves curl upwards or bleach, raise your lights slightly.
⚙️ Reflectivity and Light Distribution
Even light coverage ensures every cola gets its fair share of photons. Reflective surfaces like Mylar, white poly film, or even flat white paint bounce light back onto lower branches and shaded areas.
Grower tip: Rotate plants every few days or use light movers to keep your canopy evenly exposed.
🌙 Light Spectrum Explained
Each color of light affects cannabis differently:
- Blue light (400–500 nm): Encourages leafy, compact growth — great for seedlings and veg.
- Red light (620–700 nm): Promotes flowering and bud density.
- UV light: Boosts trichome production and resin content.
- Infrared (IR): Enhances stretching and flower development.
Full-spectrum LEDs provide all of these wavelengths, giving your plants everything they’d get from the sun — and more.
Proper lighting is the secret weapon behind thick stalks, lush foliage, and sticky buds. When your hydroponic plants get the right spectrum and intensity, they’ll reward you with vibrant growth and potent, aromatic harvests that rival any professional grow.
🌿 Growth Stages and Maintenance Tips for Hydro Weed
Once your plants are thriving in your hydro system and soaking up those LED rays, it’s time to guide them through their growth stages. Each phase — from seedling to harvest — demands specific care, nutrients, and lighting adjustments. In hydroponics, these transitions happen faster and more dramatically, so staying on top of your maintenance makes all the difference between average buds and top-shelf flower.
🌱 1. Seedling Stage (Weeks 1–2)
Your cannabis seedlings are fragile during this stage. Keep your humidity high (65–70%), use mild light, and start with ¼-strength nutrients to avoid root burn.
Key tips:
- Maintain a gentle bubbling in your nutrient reservoir to keep roots oxygenated.
- Keep pH between 5.8–6.0.
- Ensure temperatures stay around 75°F (24°C) with lights on.
- Avoid strong fans directly on seedlings — gentle airflow is enough.
You’ll know your plants are ready for veg when they have 3–5 sets of true leaves and roots are reaching deep into the nutrient solution.
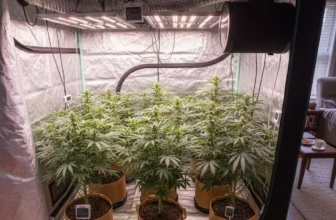
🌿 2. Vegetative Stage (Weeks 3–6)
This is where your hydro plants start showing their power. Roots explode in size, leaves get broad, and stems strengthen quickly.
Key actions during veg:
- Increase nutrient strength to 1.2–1.6 EC.
- Keep lights 18–24 inches above the canopy for steady growth.
- Maintain humidity around 50–60%.
- Trim or top your plants to create more bud sites and an even canopy.
- Train branches outward using Low Stress Training (LST) or SCROG (Screen of Green) methods to maximize light exposure.
Hydroponic cannabis in veg can grow 1–2 inches per day — it’s a good time to monitor reservoir levels daily, as roots drink and feed fast.
🌺 3. Flowering Stage (Weeks 7–12)
Once you switch to a 12/12 light cycle, your plants focus all their energy on producing flowers. You’ll start seeing white pistils forming within a week — this is where the magic happens.
Flowering care tips:
- Lower humidity to 40–50% to prevent bud rot.
- Raise EC to 1.8–2.0 using bloom nutrients high in phosphorus and potassium.
- Keep pH between 5.8–6.2 for maximum nutrient absorption.
- Use a carbon filter — flowering cannabis smells strong!
- Watch for nutrient burn or deficiencies and flush with pH’d water if needed.
As buds swell, increase airflow and remove lower leaves to boost light penetration and reduce humidity pockets.
🌾 4. Ripening and Pre-Harvest Stage (Final 1–2 Weeks)
In the final stretch, your focus shifts from feeding to flavor. Begin flushing your plants with clean, pH-balanced water (no nutrients) about 7–10 days before harvest. This helps remove nutrient salts and improves taste and smoothness.
Check trichomes with a magnifier:
- Clear: Not ready.
- Milky: Peak potency.
- Amber: More body-high and sedative effects.
Once most trichomes are milky with a few amber, it’s harvest time.
🧹 Maintenance Tips for a Healthy Hydro Grow
To keep your system and plants happy:
- Change reservoir water every 7–10 days.
- Rinse air stones and tubing regularly to prevent algae.
- Keep your grow area clean and dry — moisture attracts mold.
- Use beneficial root additives like Hydroguard to prevent root rot.
- Check pH and EC daily; minor fluctuations are normal but correct big swings.
🌾 Harvesting and Flushing Hydro Weed
You’ve nurtured your hydroponic cannabis from seed to full bloom — now comes the most rewarding part: harvest time. But before you snip those beautiful buds, there’s one crucial step that separates harsh-tasting weed from smooth, flavorful smoke: flushing. In hydroponics, flushing and proper harvesting are what give your buds that clean burn and pure aroma every grower dreams of.
💧 Flushing Your Hydro System Before Harvest
Flushing is the process of running plain, pH-balanced water through your hydro system to remove leftover nutrient salts from the roots and medium. This helps the plant use up any stored nutrients, leading to smoother, cleaner buds.
When to start flushing:
- Begin 7–10 days before harvest when most trichomes turn cloudy.
- Drain your reservoir completely and refill it with clean, pH’d water (5.8–6.0).
- Do not add nutrients — you can use optional flush solutions like FloraKleen or Sensi Flush to speed up the process.
During the flush:
- Maintain normal lighting and temperature.
- Monitor pH daily; it can drift faster without nutrients.
- Look for yellowing leaves — that’s a good sign your plant is using up stored nutrients.
Flushing in hydroponics is fast and efficient since water moves directly through the root zone — expect clean, crisp smoke when cured properly.
✂️ When to Harvest Hydro Weed
Timing your harvest perfectly is crucial. Harvest too early, and your buds won’t reach full potency; too late, and THC starts to degrade.
Use a jeweler’s loupe or digital microscope to examine the trichomes (the tiny crystals on your buds):
- Clear trichomes: Not ready — low potency.
- Milky/cloudy trichomes: Peak THC levels and balanced high.
- Amber trichomes: More relaxing, couch-lock effect.
Most growers aim for 80–90% cloudy and 10–20% amber for optimal potency and flavor.
You can also check pistils — when 70–90% have turned from white to orange or brown, your buds are mature.
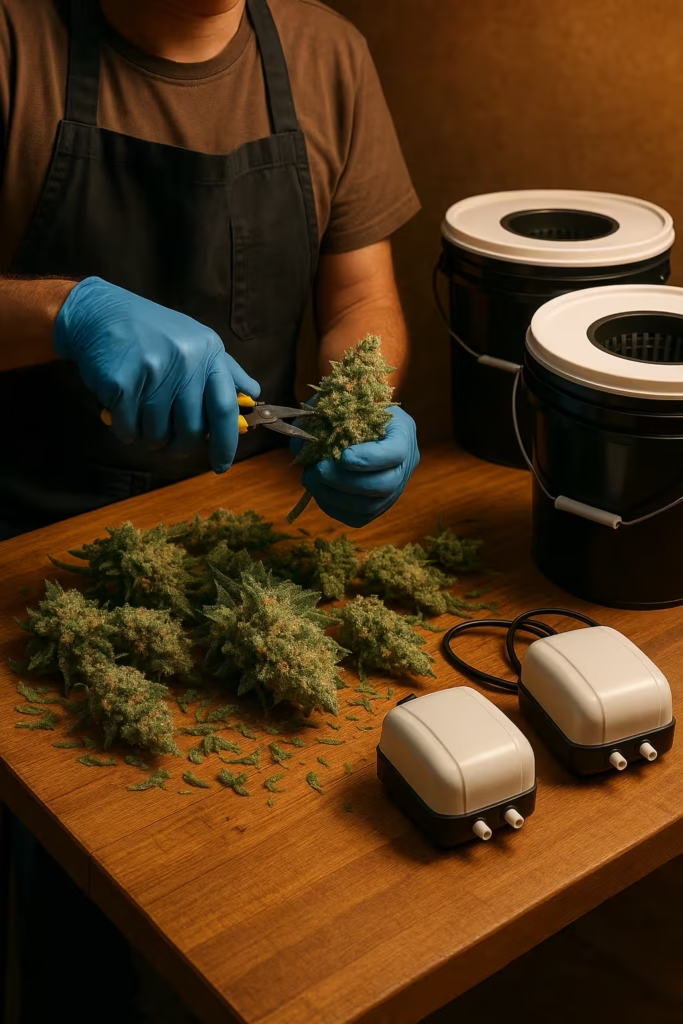
🌿 Harvesting Techniques for Hydroponic Plants
When it’s time, power off your lights and pumps, then:
- Cut plants at the base with sharp pruning shears.
- Remove large fan leaves first.
- Hang whole plants or branches upside down in a dark room with good airflow.
- Keep the drying area at 60–70°F (15–21°C) and 50–60% humidity.
Drying takes 7–10 days — you’ll know it’s ready when small stems snap instead of bending. After drying, trim your buds and transfer them to airtight jars for curing.
🫙 Curing for Perfect Flavor and Potency
Curing refines your buds, enhancing aroma and smoothness.
- Place trimmed buds in glass jars, filling them about 75% full.
- Store jars in a cool, dark place (60–65°F / 16–18°C).
- Open (“burp”) jars for 10–15 minutes daily for the first week to release moisture.
After 2–4 weeks of curing, your hydro weed will reach its peak — dense, aromatic, and bursting with terpenes.
🔁 Post-Harvest System Cleanup
Once harvest is done, it’s time to clean your hydro system before the next run:
- Drain all remaining water.
- Scrub the reservoir, tubing, and air stones with a mild bleach or hydrogen peroxide solution.
- Rinse thoroughly with clean water.
- Let the system dry completely before reusing.
This prevents algae, bacteria, and mineral buildup from affecting your next grow.
⚠️ Common Hydro Weed Growing Mistakes (and How to Avoid Them)
Even the most dedicated growers make mistakes — especially when diving into hydroponic cannabis for the first time. The good news? Most issues in a hydro grow are easy to spot and fix once you know what to look for. Hydro systems are ultra-responsive, so a small problem (like a pH swing or pump failure) can quickly affect your plants. Learning from common hydro weed growing mistakes keeps your garden healthy and your yields high.
💧 1. Ignoring pH and EC Levels
Your plants can’t absorb nutrients if the pH or EC is off. A pH above 6.5 or below 5.5 locks out essential elements like calcium and magnesium, while overly high EC leads to nutrient burn.
How to fix it:
- Test pH daily and keep it between 5.5–6.2.
- Check EC levels every time you top up or mix nutrients.
- If EC climbs too high, dilute your solution with clean, pH’d water.
- Change your reservoir every 7–10 days to reset nutrient balance.
Grower’s note: Hydro weed plants respond fast to corrections, so if leaves start recovering color after 24 hours — you nailed it.
🌿 2. Overfeeding or Underfeeding Nutrients
More nutrients do not mean more bud. Overfeeding causes leaf burn, clawing, and salt buildup, while underfeeding slows growth and weakens plants.
How to fix it:
- Follow the manufacturer’s feeding schedule, but always start light (½ strength).
- Observe your leaves — dark green with curled tips means too much nitrogen.
- Flush your system with plain water for 24 hours if you suspect nutrient overload.
🌫️ 3. Poor Oxygenation and Root Rot
Roots need oxygen to thrive — and in hydroponics, stagnant water is your worst enemy. Poor aeration leads to root rot (Pythium), which causes brown, slimy roots and drooping leaves.
How to fix it:
- Use powerful air pumps and multiple air stones for proper bubbling.
- Keep water temperatures between 65–70°F (18–21°C) — warmer water holds less oxygen.
- Add beneficial bacteria or products like Hydroguard to protect roots naturally.
Pro tip: Healthy hydro roots are bright white and smell clean — check them weekly!
💡 4. Incorrect Lighting Distance or Schedule
Light issues are common for new growers. Placing LEDs too close can bleach leaves, while poor timing can stress your plants.
How to fix it:
- Keep lights 12–18 inches above the canopy during flowering.
- Ensure complete darkness during the 12-hour off cycle — even a tiny light leak can cause hermies.
- Gradually increase light intensity between stages to prevent shock.
🌡️ 5. Poor Environmental Control
Hydroponic cannabis loves consistency. Rapid changes in temperature or humidity create stress and invite mold, mildew, or pests.
How to fix it:
- Use a thermo-hygrometer to monitor your climate constantly.
- Keep humidity around 50–60% during veg and 40–50% during flower.
- Use fans, exhaust systems, and carbon filters for airflow and odor control.
🧹 6. Skipping System Cleaning and Maintenance
Skipping cleanups is one of the biggest rookie mistakes. Nutrient salts, algae, and biofilm can clog pumps and affect your pH stability.
How to fix it:
- Clean your reservoir and tubing every nutrient change.
- Flush your system with hydrogen peroxide or mild bleach between grows.
- Keep the grow area tidy — no standing water or wet cables.
A clean setup is a healthy setup — and healthy roots mean huge, frosty buds.
🌿 Conclusion: Is Hydroponics Worth It for Indoor Weed?
If you’ve made it this far, you already know — growing hydro weed indoors isn’t just worth it, it’s one of the most rewarding ways to cultivate cannabis. Hydroponics gives you total control over your plants’ environment, nutrients, and water supply. That precision pays off in faster growth, bigger yields, and more potent buds than traditional soil grows.
For many growers, the first time they see their hydro plants explode with vibrant green leaves and crystal-covered flowers, there’s no going back. The results speak for themselves — clean, high-quality cannabis with the kind of consistency that makes you feel like a pro.
🌱 Why Hydroponics Is Worth It
- Faster Growth: Hydroponic roots absorb nutrients directly, leading to shorter veg times and earlier harvests.
- Higher Yields: Efficient feeding and lighting mean fatter, denser buds per square foot.
- Cleaner and Healthier Plants: No pests, no soil-borne diseases — just oxygen, water, and nutrients.
- More Control: Adjust pH, EC, and nutrient ratios to match every growth phase perfectly.
For indoor growers who love tweaking and perfecting their setups, hydroponics offers unmatched flexibility and precision.
⚖️ What to Keep in Mind
Hydroponics isn’t plug-and-play — it takes attention and consistency. You’ll be monitoring pH, EC, and water levels daily, and equipment maintenance is part of the game. But once you dial it in, the process becomes second nature, and your results will be worth every bit of effort.
💚 Final Thoughts
Whether you’re a beginner setting up your first DWC bucket system or an advanced grower running a multi-bucket recirculating setup, hydroponics opens a world of possibilities for your cannabis garden. The satisfaction of watching your plants thrive in a perfectly balanced ecosystem is something every grower should experience at least once.
Hydroponic growing isn’t just about bigger buds — it’s about mastering your craft. So yes, it’s absolutely worth it. Once you taste your first home-grown hydro harvest, you’ll understand why hydro growers never look back.
References and sources:
- The optimum pH for coco and hydroponics is 5.5-6.5
- Plants in hydroponic setups generally grow faster … and less likely to get bugs.
- “Understanding the pH level and electric conductivity of your water and nutrient solution can allow a grower to properly feed their plants…”
- “With a good nutrient solution and a pH between 5.2 and 6.2 there should be no nutrient problems.”
- “Cannabis prefers a pH of around 6.0 to 7.0, or mildly acidic to neutral pH. Stable EC allows plants to readily absorb the necessary nutrients.”