Harvesting marijuana grown outdoors is one of the most rewarding moments for any cannabis cultivator. After months of nurturing your plants through sun, soil, and careful observation, it all comes down to timing and technique. Whether you’re growing marijuana naturally in your backyard or managing a larger outdoor grow, knowing when and how to harvest is critical to preserving potency, flavor, and yield.
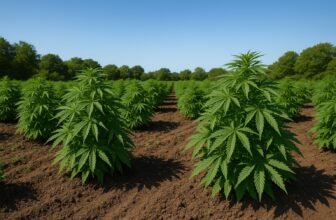
For growers cultivating in the open air, the outdoor cannabis harvest marks the grand finale of months of dedication, patience, and environmental awareness. Unlike controlled indoor setups, outdoor marijuana relies on the rhythm of nature, making each harvest a unique experience. From germination to full bloom, understanding the marijuana plant life cycle is essential to determining exactly when your crop is ready to cut and cure.
Unlike indoor cultivation, outdoor cannabis harvests rely heavily on the changing seasons, environmental factors, and your plant’s natural growth cycle. If you harvest too early, you risk underdeveloped buds with lower THC levels. Too late, and the trichomes degrade, affecting the overall quality.
In this guide, we’ll walk you through every step — from recognizing the signs that your cannabis plant is ready for harvest, to cutting, drying, and curing your outdoor buds properly. By following these best practices, you can minimize transplant shock, protect your healthy root system, and make the most of your outdoor growing efforts.
🌼 Understanding the Marijuana Harvest Window
Knowing exactly when to harvest outdoor marijuana can be the difference between potent, flavorful buds and a disappointing yield. This decision relies heavily on understanding the cannabis flowering stage, monitoring trichome color, and observing pistil maturity—key indicators in the plant’s natural life cycle.
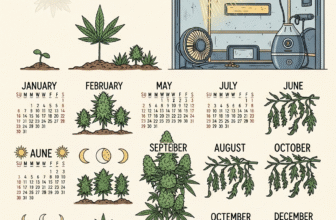
In a natural growing environment, cannabis plants follow the rhythm of the seasons. After transitioning from the vegetative phase, the flowering stage begins when daylight hours shorten—typically in late summer. This stage can last anywhere from 6 to 12 weeks, depending on whether you’re growing indica, sativa, or a hybrid strain.
The ideal outdoor harvest season usually lands between late September and mid-October in the Northern Hemisphere. However, timing can shift based on factors like latitude, local climate, and strain genetics. For example, fast-flowering indicas may be ready in early fall, while late-finishing sativas might stretch into late October.
Two primary cues help you determine the best time to harvest:
🔍 Trichome Color
Trichomes are the sticky, crystal-like structures on buds and leaves that produce cannabinoids and terpenes. Under magnification (with a jeweler’s loupe or microscope), observe the following stages:
- Clear trichomes = too early (low THC)
- Milky/cloudy trichomes = peak THC levels
- Amber trichomes = more sedative, body-heavy effects
A balanced mix of cloudy and amber trichomes is often the sweet spot for most growers.
🔍 Pistil Maturity
Pistils are the hair-like structures on cannabis buds. In early bloom, they are white and upright. As flowering progresses, they darken (orange, red, or brown) and curl inward. When 70% to 90% of pistils have darkened, it’s generally a sign your plant is ready for harvest.
These natural indicators—paired with aroma, bud density, and environmental conditions—guide you in choosing the perfect window for your outdoor cannabis harvest. Patience during this phase will pay off in both cannabinoid content and smoking experience.
🔍 Signs Your Outdoor Plants Are Ready to Harvest
Before you reach for the scissors, it’s crucial to identify the clearest marijuana harvest indicators that your plant is at its peak. Outdoor cannabis matures more gradually than indoor grows, and recognizing cannabis bud ripeness ensures that you don’t harvest too early (sacrificing potency) or too late (risking degradation of THC and terpenes).
✅ 1. Trichomes Tell the Truth
The most accurate method to check for resin gland maturity is by examining the trichomes—tiny, mushroom-shaped crystals on the buds and sugar leaves. These resin glands hold most of the cannabinoids and terpenes.
Use a jeweler’s loupe or digital microscope to observe the trichome heads:
- Clear trichomes = immature buds with low THC
- Cloudy/milky trichomes = peak THC levels and maximum potency
- Amber trichomes = more CBN (sedative effects), reduced THC
An ideal harvest time is when 60–70% of trichomes are cloudy, with 10–30% turning amber, depending on your desired effect.
✅ 2. Pistil Color and Curling
As the cannabis plant matures, the pistils (hair-like structures) begin to darken and curl. In the early flowering stage, they’re white and upright. But when buds approach full maturity:
- 70%–90% of pistils turn brown/orange
- The hairs begin to curl inward. These visual changes are key cannabis bud ripeness cues.
✅ 3. Bud Density and Aroma
Mature buds will feel tight, sticky, and aromatic. If your flowers still feel light and airy or lack strong scent, they may need more time in the sun.
✅ 4. Fan Leaves Start to Yellow and Die
Late in the flowering stage, the large fan leaves naturally yellow and fall off. This is part of the plant redirecting its energy to flower production—another marijuana harvest indicator.
🌿 Pro Tip: Don’t rely on just one sign. The best approach is to combine resin gland maturity, pistil development, and the overall look and feel of the buds to ensure you’re harvesting at the perfect time.
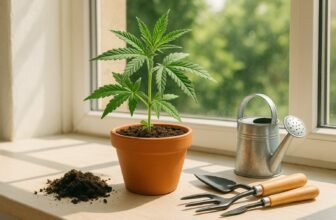
🧤 Preparing for Harvest
Before you begin cutting your cannabis plants, it’s essential to focus on cannabis harvest preparation. A successful harvest starts days—even weeks—before the first snip. Careful planning ensures that your buds retain maximum potency, flavor, and cleanliness through the final stages of the grow.
✅ Develop a Pre-Harvest Checklist
Having a well-organized pre-harvest checklist keeps you efficient and prevents costly mistakes. Key items to include:
- Flush plants 7–14 days before harvest (if using nutrients)
- Inspect buds for mold, pests, or powdery mildew
- Stop watering 1–2 days prior to harvest to reduce moisture
- Clean and sharpen pruning scissors
- Prepare drying area (temperature: 60–70°F, humidity: 50–60%)
- Gather gloves, trays, drying lines, and storage containers
This step-by-step preparation helps protect your trichomes, avoid contamination, and streamline post-harvest drying and curing.
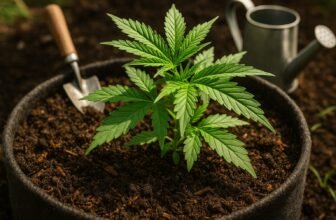
✅ Give Your Plants Some Outdoor Marijuana Care
During the final weeks of the flowering stage, your plants need extra attention. Keep an eye on:
- Humidity: Sudden rain or moisture can cause bud rot
- Sunlight: Make sure plants receive adequate light until the final cut
- Wind exposure: Too much wind can damage dense, resinous buds
Consistent outdoor marijuana care ensures that your cannabis finishes strong. Avoid handling the buds too much during this time, as mature trichomes can be knocked off easily.
✅ Choose the Right Day to Harvest
Harvesting should be done on a dry day, preferably early in the morning when resin content is highest. Avoid harvesting in rain or high humidity, as wet buds are more susceptible to mold during drying.
Taking time for proper cannabis harvest preparation not only improves your final product but also makes the entire process smoother and more rewarding. Think of it as the final stretch in your outdoor grow journey—one that determines the aroma, potency, and quality of your stash.
✂️ Step-by-Step Guide to Harvesting Marijuana Outdoors
After months of tending to your plants under the sun, it’s finally time to begin the marijuana harvesting process. Outdoor harvesting is more than just chopping buds—each step impacts your final yield’s potency, flavor, and smokability. Here’s a complete walkthrough of how to go from plant to drying rack the right way.
✅ Step 1: Outdoor Weed Cutting
Choose a dry morning to begin your harvest. Resin production is typically highest at this time, and lower humidity reduces the risk of mold. Using clean, sharp shears, cut your plants one of two ways:
- Whole plant method: Cut at the base of the stem and hang the entire plant upside down.
- Branch-by-branch method: Snip individual branches to manage large plants more easily or optimize space in your drying area.
If mold is a concern or you’re harvesting in stages, the branch method provides better control and air circulation.
✅ Step 2: Trimming Cannabis (Wet Trim vs. Dry Trim)
Trimming is essential to remove excess leaf matter and prepare the buds for drying and curing. There are two popular approaches:
- Wet trimming: Remove fan and sugar leaves immediately after harvest. This method is faster and prevents moisture buildup.
- Dry trimming: Hang plants or branches for several days first, then trim once the leaves are crisp.
Regardless of your method, wear gloves and use trays or parchment to collect trichome-rich trimmings, which can be used for making hash or edibles.
✅ Step 3: Transporting Buds to Drying Space
Carefully move the harvested material to your drying area. Be gentle—fully mature buds are sticky and delicate, and rough handling can knock off trichomes. Ideal drying conditions are:
- Temperature: 60–70°F (15–21°C)
- Humidity: 50–60%
- Darkness: Prevents cannabinoid degradation
- Air circulation: Helps prevent mold
Use drying racks, hangers, or lines depending on your space and harvest size.
📝 Quick Tips:
- Use a trimming tray to catch fallen trichomes
- Sanitize tools between plants to prevent contamination
- Keep pets and dust away from the drying area
By carefully executing each part of the outdoor weed cutting and trimming cannabis stages, you’ll set the stage for a smooth drying and curing process. Mastering this phase of the marijuana harvesting process ensures you preserve the full aroma, potency, and effects of your outdoor-grown buds.
🌬️ Drying and Curing Outdoor-Grown Marijuana
Once your buds are harvested, your job as a grower isn’t done yet. In fact, the post-harvest process is one of the most critical stages for producing smooth, potent, and flavorful cannabis. Properly drying cannabis buds and curing weed not only preserves THC but also locks in terpenes—the aromatic compounds responsible for the strain’s unique flavor and effects.
✅ Step 1: Drying Cannabis Buds
Immediately after trimming, you’ll need to hang your buds or branches in a controlled environment. The goal is to slowly remove moisture without damaging potency or risking mold.
Ideal Drying Conditions:
- Temperature: 60–70°F (15–21°C)
- Humidity: 50–60%
- Lighting: Complete darkness (light degrades THC)
- Airflow: Gentle circulation with a small fan (not directly on buds)
Buds should feel dry on the outside and small stems should “snap” rather than bend. This typically takes 7–14 days, depending on bud size, density, and climate. The drying phase is essential for terpene preservation. If dried too quickly, you risk losing aromatic oils; too slowly, and you increase the risk of mold.
✅ Step 2: Curing Weed
Once your buds are dry, it’s time to cure—a slow-aging process that enhances smoothness, flavor, and cannabinoid profile.
Curing Steps:
- Place trimmed buds in airtight glass jars (¾ full to allow some air).
- Store jars in a cool, dark place (60–70°F).
- Burp the jars daily for the first 1–2 weeks. This means opening them for 5–10 minutes to release moisture and bring in fresh air.
- After 2–4 weeks, reduce burping frequency.
Curing can last anywhere from 2 to 8 weeks. The longer you cure, the more refined the flavor and aroma will be—especially for terpene-rich strains.
🌿 Why the Post-Harvest Process Matters
Neglecting the post-harvest process can ruin months of outdoor growing. Drying too fast, skipping the cure, or improper storage can lead to harsh smoke, lost terpenes, or moldy buds. On the flip side, getting it right means:
- Smooth smoke
- Enhanced flavor and aroma
- Longer shelf life
- Maximum THC/CBD expression
- Full terpene preservation
⚠️ Common Outdoor Harvesting Mistakes to Avoid
Harvesting marijuana grown outdoors is a satisfying milestone—but it’s also where many new growers slip up. Even if your grow season went smoothly, a few missteps during harvest can drastically reduce your bud quality, potency, or shelf life. Here are some of the most frequent cannabis harvest mistakes and how to avoid them with practical outdoor grower tips.
❌ Harvesting Too Early or Too Late
One of the biggest mistakes outdoor growers make is rushing the process. Harvesting too early means your buds haven’t developed peak cannabinoid or terpene levels, leading to a weak high and lackluster flavor. Waiting too long can cause trichomes to degrade, resulting in reduced THC and overly sedative effects.
Tip: Use trichome color and pistil maturity—not just a calendar—to determine the right time to cut.
❌ Harvesting in Bad Weather
Outdoor cannabis is vulnerable to late-season rains or unexpected humidity spikes. Harvesting wet plants or during a rainstorm increases the risk of mold in your buds.
Tip: Monitor weather forecasts and aim to harvest on a dry morning. If rain is imminent, consider partial harvests or extra drying precautions.
❌ Poor Trimming Practices
Improper or rushed trimming can damage trichomes, leave too much leaf matter (which adds harshness when smoked), or cause mold in dense buds.
Tip: Whether you’re wet trimming or dry trimming, always use clean scissors, trim in a dust-free space, and handle buds gently to preserve resin.
❌ Skipping the Drying Room Setup
Drying is one of the most overlooked yet critical stages of the harvest. Common drying weed issues include high humidity (leading to mold), overly fast drying (which ruins terpenes), or improper airflow.
Tip: Set up a dedicated drying space with stable temperature (60–70°F), humidity (50–60%), and no direct light. Hang buds or use drying racks with airflow below but not directly on them.
❌ Not Curing Properly
Even if drying goes well, neglecting the cure means losing out on smoothness, flavor, and potency. Sealing buds before they’re fully dry can also lead to mold.
Tip: Cure your buds in airtight jars for at least 2–4 weeks. Burp jars daily to release moisture and monitor for unwanted smells or condensation.
✅ Final Outdoor Grower Tips:
- Avoid touching buds with bare hands—use gloves
- Label and separate strains during harvest
- Be patient—quality harvests come from careful observation and timing
- Don’t rush drying just to smoke faster—rushed weed tastes green and harsh
Avoiding these common cannabis harvest mistakes will help ensure your outdoor marijuana crop reaches its full potential, from terpene-rich aroma to a smooth, satisfying burn.
🧤 5. Do I need special tools to harvest outdoor marijuana?
Not necessarily. All you need is:
- Clean, sharp trimming scissors
- Nitrile gloves to avoid sticky resin
- A drying space with controlled temperature and humidity
- A magnifier (jeweler’s loupe or digital microscope) for checking trichomes.
Optional tools like drying racks, humidity packs, and trimming trays can improve efficiency but aren’t required.
❓FAQs About Harvesting Marijuana Outdoors
The best time to harvest varies by strain and climate, but most outdoor grows are ready between late September and mid-October in the Northern Hemisphere. Rather than relying solely on a calendar, observe trichome color, pistil maturity, and bud density. If you’re wondering about trichome timing questions, the ideal moment is when trichomes are mostly cloudy with a touch of amber.
It’s not ideal. Wet conditions increase the risk of bud rot and mold during drying. If rain is unavoidable, you can still harvest—but act quickly to dry your buds in a controlled environment with good airflow and low humidity. If possible, wait for a dry window, especially early in the morning when resin levels are naturally higher.
With proper care, THC potency outdoors can rival or even surpass indoor grows—especially when grown in rich soil, with ample sunlight, and under ideal environmental conditions. While indoor grows offer more control, outdoor plants benefit from natural UV exposure, which can enhance cannabinoid and terpene production.
This is a common trichome timing question. Clear trichomes mean the cannabinoids haven’t fully developed. Even if the pistils are turning color, it’s best to wait until at least 50–60% of trichomes appear cloudy. Cloudy trichomes signal peak THC; amber ones suggest a more sedative profile. Always prioritize resin gland maturity over pistil color alone.
🌾 Growing Weed Outdoors: What Comes After the Harvest
After harvesting your outdoor marijuana crop, many growers simply focus on curing and enjoying the final product. But the real cycle of sustainable cannabis growing continues well beyond the last cut. How you treat your grow space and remaining plant materials sets the stage for healthier, more efficient grows in future seasons.
✅ Reuse and Recycle Plant Material
Instead of discarding your leftover stems, stalks, and root balls, consider ways to reuse marijuana plant material. While buds are the main goal, other parts of the plant can serve a purpose:
- Fan leaves can be composted or used to make teas and tinctures
- Trim and sugar leaves can be used for edibles, extracts, or hash
- Root balls can be composted to enrich future soil beds
This approach supports marijuana plant reuse and reduces grow waste, especially important for eco-conscious cultivators.
✅ Post-Harvest Garden Care
Once the plants are gone, your soil and garden beds need attention. Good post-harvest garden care involves:
- Removing any remaining root systems carefully
- Turning over or amending the soil with compost, worm castings, or organic matter
- Cover cropping or mulching to protect your soil during the off-season
- Sterilizing reusable containers and tools to prevent disease buildup
These practices restore nutrient balance, support microbial life, and prepare the land for your next grow.
✅ Sustainable Cannabis Growing for the Long Term
Outdoor cannabis cultivation is deeply tied to the environment, so minimizing your impact is key. Some easy steps toward sustainable cannabis growing include:
- Water conservation (collecting rainwater or using drip irrigation)
- Organic pest control (companion planting, neem oil, beneficial insects)
- Soil regeneration instead of chemical fertilizers
- Local seed sourcing to reduce transport emissions and increase regional adaptability
By building a closed-loop system, you’re not just growing cannabis—you’re cultivating a regenerative ecosystem.
🌱 Final Thoughts
The outdoor harvest may signal the end of the growing season, but it’s also the beginning of soil healing, sustainability efforts, and future planning. Embracing post-harvest garden care and principles of sustainable cannabis growing ensures that your next crop is even more successful, efficient, and environmentally responsible.
✅ Conclusion
Harvesting marijuana grown outdoors is more than a seasonal task—it’s the culmination of months of dedication, observation, and care. From recognizing the right trichome timing to executing a clean trim and proper cure, each step in the marijuana harvesting process plays a vital role in preserving potency, flavor, and yield.
We’ve walked you through how to identify key marijuana harvest indicators, avoid common mistakes, prepare your drying space, and implement post-harvest sustainability. With this knowledge, you’re well-equipped to get the most from your outdoor cannabis grow.
There’s something uniquely rewarding about growing weed outdoors. Unlike indoor setups, outdoor cultivation connects you with the natural rhythms of the sun, soil, and seasons. While it comes with its own set of challenges—like weather unpredictability and pest control—the payoff is unmatched in scale, sustainability, and quality when done right.