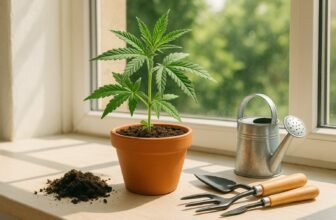
Transplanting your cannabis seedlings at the right time is a critical step in ensuring a successful grow, whether you’re cultivating indoors or planning for outdoor growing. During the delicate cannabis seedling stage, your young plants are developing the foundation of what will become a strong and productive root network. Understanding when your seedlings have formed a healthy root system can make all the difference between a thriving plant and one that struggles to survive.
Move too early, and your seedlings risk transplant shock, a condition that can stunt growth, weaken stems, or even kill the plant. But wait too long, and your roots may become bound, limiting the plant’s ability to absorb nutrients efficiently. In this guide, we’ll walk you through the signs that your seedlings are ready for transplant, how to avoid shock, and what to expect whether you’re moving them to a larger pot or into the soil for outdoor cultivation.
🌿 Understanding the Cannabis Seedling Stage
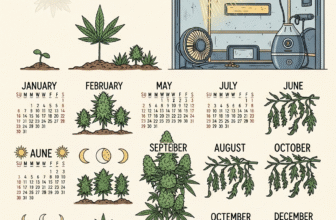
The cannabis seedling stage typically lasts between 2 to 3 weeks after germination, depending on your growing conditions and strain. During this period, the plant develops its first sets of true leaves and begins establishing its root base. It’s a sensitive phase where light, moisture, and temperature must be carefully balanced to promote steady, healthy growth.
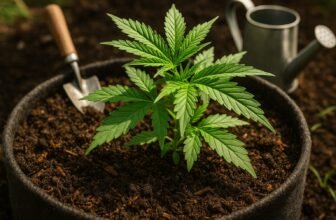
A common mistake among new growers is rushing the transplant process before the roots are well-developed. However, a healthy root system is the key indicator that your seedlings are ready to move. Look for roots gently poking out of the bottom of the container or signs of slowed growth from being root-bound. This indicates that your plant is outgrowing its current space and needs a more supportive environment.
When timed right, transplanting at the end of the seedling stage helps your plant transition smoothly into the vegetative phase, setting it up for success whether you’re growing in containers or preparing for outdoor growing. Monitoring this early stage closely also reduces the risk of transplant shock, which can occur if the roots are disturbed too soon or exposed to drastic changes in environment.
⏱️ When Is the Best Time to Transplant Weed Seedlings?
Knowing the best time to transplant weed seedlings can make the difference between strong, fast-growing plants and those that suffer delays due to stress. The ideal moment usually arrives when your seedlings have developed 3 to 4 sets of true leaves and stand around 4 to 6 inches tall. At this stage, their stems are sturdy enough to handle movement, and the cannabis seedling stage is nearing its end.
Another clear sign it’s time to transplant is when you notice roots beginning to circle the inside of the pot or poking out from the drainage holes—evidence of a well-established, healthy root system. These are strong indicators that your plant needs more space to grow and access nutrients.
If you’re preparing for outdoor growing, timing becomes even more crucial. Wait until outdoor temperatures are consistently warm—typically above 60°F (16°C) at night—and your seedlings are robust enough to handle the environmental shift. Transplanting too early into the elements can lead to transplant shock, especially if the root system isn’t fully developed or if the plants aren’t properly hardened off beforehand.
In short, the best time to transplant is not just about age or height—it’s about recognizing signs of readiness. When the roots are strong, the leaves are healthy, and the conditions are right, your cannabis seedlings are primed for their next stage of life.
🌦️ 5 Factors That Influence Transplant Timing
While the number of leaf sets and visible root growth are key signs, several other factors can influence the ideal time to transplant your cannabis seedlings. Timing isn’t just about the plant’s size—it’s also about creating the most favorable conditions for a smooth transition and preventing transplant shock.
1. Growing Environment (Indoor vs. Outdoor Growing)
If you’re growing indoors, you have more control over variables like light, humidity, and temperature, which makes transplant timing more flexible. However, for outdoor growing, your transplant window is limited by weather. Ensure frost is no longer a risk and nighttime temperatures are warm enough for seedlings to thrive.
2. Root Development
A strong, healthy root system is essential. Roots that fill up the seedling container or begin circling the bottom signal that your plant needs more space. Transplanting too early—before the roots can anchor into the new medium—can stress the plant and slow growth.
3. Soil Conditions
Whether you’re transplanting into a larger pot or garden bed, the medium must be loose, nutrient-rich, and well-draining. Poor soil or compacted earth can harm the roots and increase the risk of transplant shock.
4. Weather and Light Exposure
For outdoor transplants, cloudy days or late afternoons are ideal, as they reduce the intensity of light and give seedlings time to adjust. Direct sun immediately after transplanting can shock plants that were previously under lower light intensity.
5. Hardening Off Process
If you’re moving plants from an indoor grow to the outdoors, a gradual hardening-off process is crucial. This transition helps your seedlings acclimate to outdoor conditions like wind, sunlight, and temperature fluctuations—greatly reducing the chance of shock and improving their resilience.
Read more about: Best soil for transplanting cannabis inside.
🧰 How to Prepare for a Smooth Transplant
Before transplanting your cannabis seedlings, proper preparation can significantly reduce the risk of transplant shock and help your plants establish quickly in their new environment. Whether you’re moving to larger pots or preparing for outdoor growing, setting the stage right is key to supporting a healthy root system and overall plant health.
✅ 1. Choose the Right Container or Location
For potting up indoors, select a container that’s at least twice the size of the current one and offers good drainage. If transplanting outdoors, pick a well-drained, fertile plot with full sun exposure and no risk of frost. A loose, airy soil medium will allow the cannabis seedling’s roots to spread without resistance.
✅ 2. Pre-Moisten the Soil
Moist—but not soggy—soil helps roots adjust more easily. Water the soil in the new container or planting site before transplanting. This stabilizes the temperature and provides immediate hydration to minimize stress.
✅ 3. Water the Seedlings Before Transplanting
Well-hydrated seedlings are more resilient. Water your plants an hour or so before transplanting. This also helps the soil stick together around the root system, making it easier to transfer the seedling without breaking roots.
✅ 4. Handle with Care
Always hold seedlings by the leaves—not the stem—when removing them from their containers. Gently loosen the soil around the edges, and avoid disturbing the roots too much. A strong root system is delicate at this stage and can be easily damaged.
✅ 5. Harden Off for Outdoor Growing
If moving seedlings outdoors, start hardening them off about a week in advance. Gradually expose them to outdoor conditions for a few hours a day, increasing the time each day. This simple step greatly reduces transplant shock and helps your seedlings adapt to natural sunlight, wind, and temperature shifts.
🪴 Step-by-Step Guide: Transplanting Weed Seedlings Safely
Transplanting cannabis seedlings is a delicate but straightforward process when done correctly. The key is to protect the developing root system, minimize transplant shock, and set your plants up for healthy growth—whether indoors or for outdoor growing. Follow these steps for a smooth and stress-free transplant.
🔁 Step 1: Gather Your Tools
You’ll need:
- The new container or outdoor planting site
- Quality soil or growing medium
- A small trowel or spoon
- Watering can with pH-balanced water
- Optional: Mycorrhizal fungi or transplant-friendly nutrients
🏗️ Step 2: Prepare the New Medium
Fill the new container or hole with fresh soil, leaving space for the seedling. Lightly moisten the soil to help ease the transition and create a welcoming environment for the cannabis seedling’s roots.
🪟 Step 3: Gently Remove the Seedling
Water the current container lightly to keep the soil together. Then, turn the container upside down, gently supporting the seedling with your fingers. Tap the bottom and slide it out, being careful not to damage the fragile root system.
🌱 Step 4: Place the Seedling in Its New Home
Lower the seedling into the new pot or soil at the same depth it was previously growing. Avoid burying the stem too deep. Lightly press the soil around the base to anchor the plant while allowing air to reach the roots.
💧 Step 5: Water Immediately
Give your seedling a good watering right after transplanting. This helps settle the soil around the roots and begins the recovery process. Be cautious not to overwater, especially during the first few days.
☁️ Step 6: Provide Gentle Light and Shade
Avoid placing freshly transplanted seedlings under intense direct sunlight or strong grow lights for the first 24–48 hours. If outdoor growing, choose a shaded or overcast time of day. This helps the plant adjust without added stress and reduces the risk of transplant shock.
🚨 Signs of Transplant Shock and How to Avoid It
Even with the best care, cannabis seedlings can experience transplant shock—a stress response caused by disruption to their root system or sudden changes in environment. Recognizing the signs early and knowing how to prevent them is essential for maintaining healthy growth.
⚠️ Common Signs of Transplant Shock
- Drooping or wilting leaves – even when soil is moist
- Yellowing or browning of lower leaves
- Stunted growth or no new leaf development for several days
- Leaf curling or twisting, especially in young plants
These symptoms typically appear within 1–3 days after transplanting and indicate the plant is struggling to adjust.
🛡️ How to Prevent Transplant Shock
- Transplant at the right time
Only move your plants once they’ve developed a healthy root system. Transplanting too early—during the fragile cannabis seedling stage—can lead to poor root anchoring and shock. - Minimize root disturbance
Be gentle. Avoid shaking off soil or handling the roots directly. Keeping the root ball intact allows the plant to transition more smoothly. - Water carefully
Use lukewarm, pH-balanced water immediately after transplanting. Avoid soaking the soil—too much water can drown sensitive roots while too little won’t relieve stress. - Control environmental conditions
After transplanting, maintain a stable temperature and humidity. If outdoor growing, avoid windy or extremely hot days. If indoors, adjust grow lights to a lower intensity for a day or two. - Use root boosters or beneficial microbes
Products like mycorrhizae or kelp extracts can help reduce shock and encourage faster root establishment.
🌱 Aftercare Tips: Helping Your Weed Seedlings Thrive
Once your cannabis seedlings have been transplanted, proper aftercare is critical to support recovery and promote vigorous growth. This stage bridges the gap between the cannabis seedling stage and the vegetative phase—so your goal is to help your plant adjust, rebuild momentum, and strengthen its root system.
🌤️ 1. Gradual Light Adjustment
For the first 24–48 hours post-transplant, limit light intensity to avoid stressing the plant. If you’re outdoor growing, place seedlings in a partially shaded area before exposing them to full sun. Indoors, raise grow lights slightly or dim them if possible. This reduces the chance of transplant shock during the initial adjustment period.
💧 2. Water Smartly
Water thoroughly right after transplanting, then wait until the top inch of soil dries out before watering again. Overwatering is a common mistake that can suffocate roots or promote fungal issues. Focus on maintaining evenly moist—not soggy—soil to allow the healthy root system to breathe and expand.
🌡️ 3. Maintain Stable Conditions
Keep temperatures between 70–80°F (21–27°C) and humidity around 60–70% during the first week. Fluctuations in heat, cold, or humidity can slow recovery and increase stress. Whether indoors or in outdoor growing, stability encourages faster root adaptation and leaf development.
🧪 4. Delay Nutrients Temporarily
Hold off on feeding nutrients for 4–7 days after transplanting. The new soil or medium likely has enough initial nutrients, and feeding too soon can overwhelm your recovering plants. Once new growth appears, you can start light feeding with a diluted veg-stage formula.
🛡️ 5. Monitor Daily for Progress
Watch for signs of new leaf growth, color improvement, and upward stretching. These are positive indicators that your plant has successfully adapted and is moving out of shock. Continue to check for pests, fungal issues, or any leaf abnormalities as your plant transitions fully into the vegetative stage.
❌ Common Mistakes to Avoid During Transplant
Even experienced growers can make small errors that lead to transplant shock or stunt seedling growth. Being aware of these pitfalls can help you preserve the health of your cannabis seedling’s root system and ensure a successful transition—especially when outdoor growing conditions add extra variables.
⚠️ 1. Transplanting Too Early
One of the most frequent mistakes is moving seedlings before they’ve fully developed. If your plant is still in the early cannabis seedling stage with underdeveloped roots and only one or two sets of true leaves, it’s not ready. This premature move can damage fragile roots and lead to shock.
⚠️ 2. Damaging the Root Ball
Excessively disturbing or tearing the roots during transplant is a major cause of transplant shock. Always handle seedlings gently and keep the root ball as intact as possible to reduce stress and promote faster adaptation.
⚠️ 3. Using the Wrong Soil
Transplanting into dense, poor-quality, or overly dry soil can suffocate roots or create water-logging issues. For optimal results, use light, aerated, well-draining soil that encourages oxygen flow and root penetration—especially critical in outdoor growing beds where soil composition can vary.
⚠️ 4. Overwatering After Transplant
While it’s important to water after transplanting, many growers go overboard. Soaked soil can drown new roots, promote rot, or prevent oxygen from reaching the root system. Water just enough to moisten the medium, then let the top layer dry slightly before the next watering.
⚠️ 5. Skipping the Hardening-Off Process
If you’re transplanting outdoors, a sudden change from a controlled indoor environment to wind, sunlight, and cooler nights can shock seedlings. Skipping the hardening-off period is a common mistake that often leads to wilting or slow recovery.
❓ FAQs About Transplanting Cannabis Seedlings
Ideally, cannabis should only be transplanted once or twice during its lifecycle. The fewer times you disturb the root system, the better. Common stages include moving from a seedling tray to a mid-size pot, then from that pot to a final container or garden bed.
Not immediately. Even if you’re planning outdoor growing, seedlings should be hardened off first. Gradually increase their exposure to sunlight over 5–7 days to prevent transplant shock caused by sudden environmental change.
Both. Water before transplanting to ease seedling removal and reduce root disturbance. Water again immediately after transplanting to help the healthy root system settle into its new medium and prevent air pockets.
No. Most potting soils or mixes provide enough nutrients initially. Wait 4–7 days or until you see new growth before feeding your seedlings to avoid nutrient burn or added stress.
This depends on your grow setup. For indoor grows, size up to a pot about twice the volume of the current one. For outdoor growing, you can transplant directly into a large container or into the ground if conditions are right.
✅ Conclusion
Transplanting cannabis seedlings at the right time is essential to set your plants up for a strong and healthy growing season. Whether you’re growing in pots or preparing for outdoor growing, wait until the cannabis seedling stage is complete—look for 3–4 sets of true leaves and visible root development. A well-timed transplant ensures your plant has a healthy root system ready to expand without experiencing transplant shock.
Growing weed outdoor offers a cost-effective and eco-friendly way to cultivate cannabis, taking full advantage of natural sunlight and fresh air. Once your seedlings are hardened off and weather conditions are favorable, transplanting them outdoors can lead to vigorous, large-scale growth. Just be sure to monitor temperature swings, pests, and rainfall to give your plants the best chance of reaching their full potential.